This whole wheat sourdough bread recipe gives you everything you love about a classic artisan loaf—crackly crust, open crumb, that signature tang—plus the earthy, nutty depth that only whole wheat can bring. This is real bread and it is really good!


New to sourdough? Start Here! How To Feed Sourdough Starter Beginners Guide Easy Sourdough Bread Recipe for Beginners (Artisan Loaf)
Why You Will Love This Whole Wheat Sourdough Bread Recipe
- Big Flavor: The whole wheat flour adds a rich, nutty flavor that plain white sourdough just can’t match. It tastes like real bread.
- Approachable for Intermediate Bakers: If you’ve made my easy sourdough bread recipe before, you are completely ready for this. It’s the same process with a small tweak to the flour blend. (In this case I’ve labeled it for Intermediate JUST because I want you to have made a few loaves before you try whole wheat. It is not a hard recipe.)
- Flexible Fridge Time: Park it in the refrigerator anywhere from 8 hours to 48 hours. This fits into a real life schedule beautifully.
- A Loaf Worth Bragging About: The color, the crust, the crumb—whole wheat sourdough is stunning and your people will absolutely notice.
What Makes Whole Wheat Sourdough Different?
Whole wheat flour is ground from the whole grain, which means it includes the bran and germ that white flours leave behind. That’s where most of the flavor and nutrition live—and honestly, it shows in every bite.
Here’s the honest reality though: whole wheat flour behaves differently than bread flour. The bran particles are sharp and will actually cut through gluten strands as the dough develops. This means a 100% whole wheat sourdough loaf tends to be denser and harder to work with, especially if you are still getting comfortable with the process.
This recipe threads the needle beautifully. We’re using 80% bread flour and 20% whole wheat flour. You get all that gorgeous whole wheat flavor and a slightly denser, more rustic crumb—without fighting a dough that doesn’t want to cooperate. It’s a genuinely great loaf that still has good structure and oven spring.
Can You Use Whole Wheat Flour for Sourdough Starter?
Great question! Whole wheat flour actually makes an excellent sourdough starter. The extra bran and germ provide more food for the wild yeast and bacteria, so it can be very active and healthy. Some bakers use a portion of whole wheat flour in every feeding.
If your starter is already established and healthy, you don’t need to change a thing for this recipe. Just make sure it’s fed, active, and doubled before you bake—same as always. If you want to dig into the details, my sourdough starter guide has everything you need.
How to Make Whole Wheat Sourdough Bread (Step by Step)
The process here is almost identical to my easy sourdough bread recipe—same steps, same rhythm, just with a different flour blend. If you’ve baked that loaf, this will feel very familiar. If this is your first sourdough bread, I’d suggest starting with the beginner recipe first and coming back here when you’re ready to level up!
Step 1: Mix the Dough (Autolyze)
Combine your active starter, water, bread flour, whole wheat flour and salt in a large bowl. Mix until no dry bits remain—the dough will look shaggy and a little rough, and that’s exactly right.
During this rest (called autolyze):
- The flour fully hydrates
- Gluten begins forming on its own
- The dough relaxes and becomes easier to work with
This one-hour rest does real work so you don’t have to. Love that.
Step 2: Stretch and Folds
Over the next two hours, do four sets of stretch and folds, one set every 30 minutes. Wet your hands to prevent sticking, grab one side of the dough, stretch it gently upward, then fold it back over the center. Rotate the bowl a quarter turn and repeat until you’ve gone all the way around—that’s one set.
The whole wheat flour means your dough may feel slightly stiffer than a white flour loaf. That’s normal. It’ll still smooth out beautifully as you work through the sets.
If you want to see exactly what stretch and folds look like, my complete stretch and fold video guide walks you through every detail.
Step 3: Bulk Fermentation
Cover the dough and let it rest at room temperature until it has doubled in size, looks pillowy and soft, and jiggles a little when you shake the bowl. You should see bubbles through the sides and along the bottom.
Because whole wheat flour ferments slightly faster than white flour, keep a closer eye on this dough—especially in a warm kitchen. A faster fermentation is great! Just don’t let it go so long that it starts to collapse.
Watch for these four signs before moving on:
- Dough has doubled in size
- Soft, marshmallow-like appearance on top
- Jiggles when you gently shake the bowl
- Bubbles visible through the sides of the bowl
Step 4: Shape the Dough
Once bulk fermentation is done, it’s shaping time. Lightly mist your counter with water (please skip the flour on your counter—use water!), ease the dough out of the bowl, and shape it into a round boule or oval batard.
The shaping goal is always the same: create surface tension while protecting the air bubbles built during fermentation. You don’t need to be perfect. You need to be gentle and intentional.
Full shaping instructions—including the pie-slice method for a round boule and the dough taco method for an oval batard—are in my easy sourdough bread recipe.
Dust your banneton liberally with rice flour, set the shaped dough in seam-side up, cover loosely, and head to the fridge.
Step 5: Cold Ferment (Overnight Proof)
Park the shaped dough in the refrigerator for anywhere from 8 hours to 48 hours. This cold rest:
- Develops deeper, more complex flavor
- Builds a skin on the dough that makes scoring much cleaner
- Gives you flexibility—bake it when it fits your schedule
I personally love a 8-12 hour cold ferment for a balanced flavor that isn’t too sharp. If you love a tangier loaf, let it go the full 48 hours.
Step 6: Preheat Your Oven (The Full Hour)
Put your Dutch oven with its lid inside the oven and preheat to 450°F. Set a timer for a full hour. Not until it “feels hot”—a full sixty minutes.
A fully preheated Dutch oven is what gives sourdough its dramatic oven spring and crackly crust. This step earns its time.
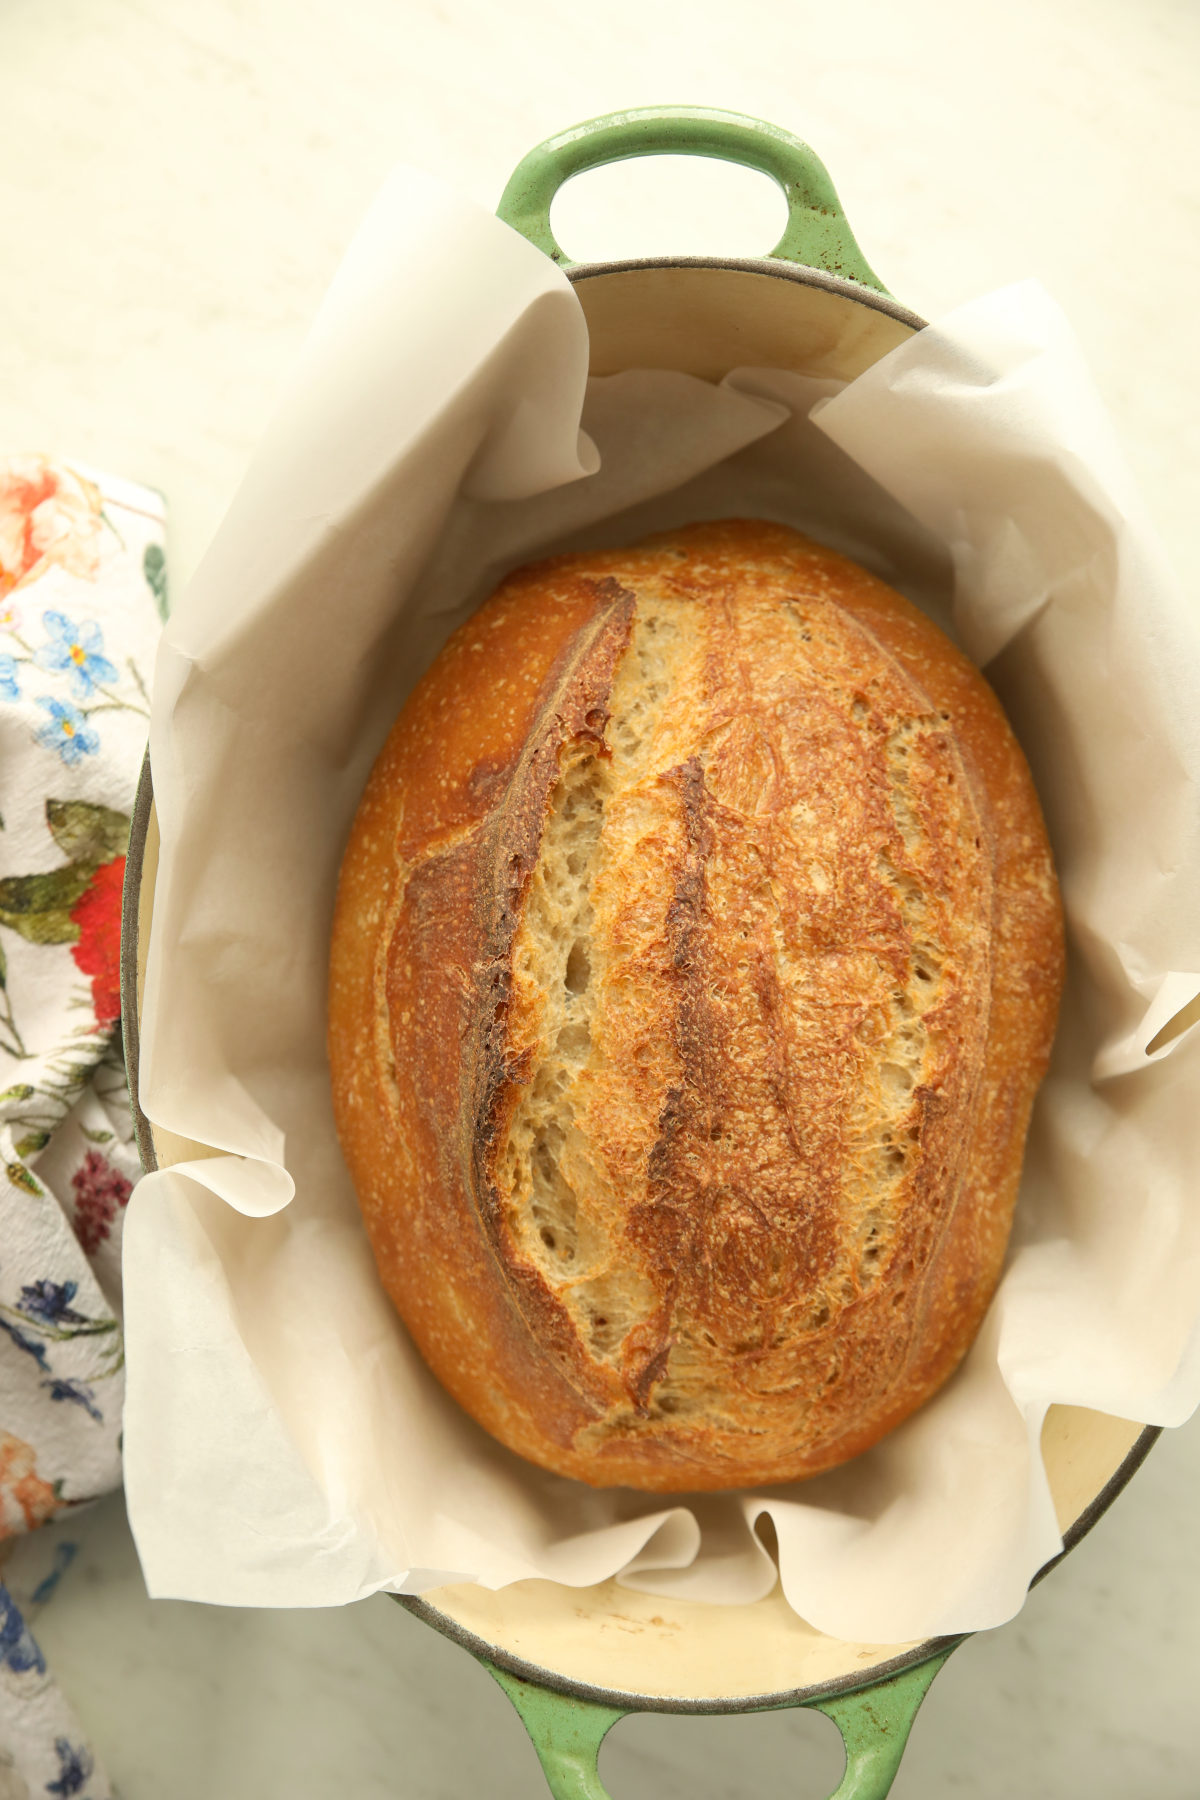
Step 7: Score the Dough
Take the dough straight from the refrigerator—cold dough holds its shape better and scores more cleanly.
Sprinkle rice flour on the bottom of your loaf and flip it out onto a sheet of parchment paper. Use a bread lame or sharp knife to score at least one long expansion slash from top to bottom. This gives the gases inside a designated escape route so your loaf rises beautifully instead of bursting at the seams.
My complete sourdough scoring guide has everything you need to know about scoring and ten simple designs if you want to get creative!
Step 8: Bake
Use the parchment paper as handles to lower the dough into your very hot Dutch oven. Spritz generously with water, put the lid on, and bake.
- 30 minutes at 450°F with the lid on — steam does its job, the bread rises
- Remove the lid, turn oven down to 410°F, and bake another 10–15 minutes until the crust reaches your preferred color
Whole wheat loaves brown a little faster than all-white loaves. Watch the color during that second phase and pull it when it looks right to you.
Step 9: Cool Before You Slice (Yes, Really)
I know. The bread smells incredible. But cutting a warm sourdough loaf releases steam from the crumb before it finishes cooking, and you’ll end up with a gummy texture that doesn’t do justice to all that work.
Wait at least 3 hours. The bread continues cooking internally after it leaves the oven. It’s worth the patience every single time.
Whole Wheat Sourdough Bread Ingredients
Bread Flour (400g): The workhorse of this recipe. Bread flour’s higher protein content gives the dough structure and that satisfying chew. Don’t substitute all-purpose flour without adjusting the recipe.
Whole Wheat Flour (100g): This is where the magic happens. Whole wheat flour brings nutty, earthy depth that white flour simply doesn’t have. We’re using 20% of the total flour as whole wheat—enough to make a real difference in flavor without making the dough difficult to handle.
Active Sourdough Starter (100g): Fed, happy, doubled, and bubbly. If your starter isn’t active, nothing else matters. Get my complete starter guide here.
Water (350g): Room temperature tap water works great. If your water is heavily chlorinated, filtered water is a kind thing to do for your bread.
Fine Grain Sea Salt (10g): Salt strengthens the dough, controls fermentation, and makes the flavor sing. Skip the pink Himalayan or Real Salt for this one—new sourdough bakers sometimes see a pink streak in the dough and panic about mold. Save yourself the stress.
Rice Flour (for dusting): Rice flour is the secret weapon for your banneton and for the bottom of your loaf. It doesn’t absorb moisture the way wheat flour does, which prevents sticking and gives you a gorgeous artisan finish. Use a baking-specific rice flour—Bob’s Red Mill is easy to find nationally.
Tools You’ll Need
You don’t need anything new for this recipe if you’ve already baked my easy sourdough bread. Same tools, same setup. If you’re just getting started, my complete sourdough tools guide has everything you need to know.
The essentials: a kitchen scale (non-negotiable), a large clear glass bowl, a banneton basket or towel-lined bowl, a Dutch oven, parchment paper, and a spray bottle. A pizza stone on the lower oven rack is a helpful bonus for preventing the bottom crust from over-browning.
Mirlandra’s Recipe Tips
Tip #1: Weigh everything. Whole wheat flour especially can vary wildly by volume. Please use a scale. I will not stop saying this.
Tip #2: Whole wheat ferments faster. Keep a closer eye on your bulk ferment than you might with an all-white flour loaf, especially in a warm kitchen. The extra bran and germ give the wild yeast more to eat, which speeds things up.
Tip #3: The cold ferment is your friend. Whole wheat dough scores beautifully after a cold rest because it develops a good skin. A minimum of 8 hours in the fridge is really the sweet spot. Don’t rush this if you can help it.
Tip #4: Watch your bake color. Whole wheat loaves take on color faster. Keep an eye on the crust during the final uncovered bake and pull it when it looks gorgeous to you—deep brown and crackly.
Final Thoughts
Whole wheat sourdough is one of those deeply satisfying bakes. The flavor is richer, the loaf looks a little wilder and more rustic, and there’s something that just feels right about a bread with this much character.
If you’ve already made the easy sourdough bread recipe, you are absolutely ready for this. And if you haven’t—go bake that one first, get your bearings, and then come back here. The whole wheat version will be waiting.
From here, sourdough sandwich bread and sourdough focaccia are both wonderful next steps. Keep going—you’re getting good at this.

Whole Wheat Sourdough Bread Recipe
Ingredients
- 350 g lukewarm water
- 100 g active sourdough starter fed and happy
- 400 g bread flour
- 100 g whole wheat flour
- 10 g fine grain sea salt
Instructions
Mix the Dough and Rest (Autolyze)
- In a large mixing bowl, combine the water, starter, bread flour, whole wheat flour, and salt. Mix with a dough whisk or wooden spoon until no dry bits remain and you have a shaggy dough.
- Cover and rest on the counter for 1 hour.
Stretch and Folds
- Wet your hands to prevent sticking. In the bowl, grab one side of the dough and pull gently upward until it starts to resist, then fold it back over the center. Rotate the bowl a quarter turn and repeat. Go all the way around the bowl—that's 1 set. (Complete Video Guide to Stretch and Folds Here.)
- Cover and rest 30 minutes. Repeat for a total of 4 sets over about 2 hours.
Bulk Fermentation
- Cover and let the dough rest at room temperature until it has doubled in size, looks pillowy and soft, jiggles when shaken, and shows bubbles through the sides and bottom of the bowl. This can take 4–10 hours depending on your kitchen temperature.
Shaping
- Mist your counter lightly with water. Use a silicone scraper to gently ease the dough out of the bowl, soft side down.
- Generously dust your banneton with rice flour.
- Shape the dough into a round boule or oval batard (see post for full shaping instructions if needed), then set it into the banneton seam-side up. Cover loosely.
Cold Ferment
- Place the covered banneton into the refrigerator for 8 to 48 hours.
Preheat
- Place your Dutch oven with its lid inside the oven. Preheat to 450°F for a full 1 hour. Leave the dough in the refrigerator until the last possible moment.
Score and Bake
- Cut parchment paper long enough to create handles. Sprinkle rice flour on the exposed top of your dough, then gently flip it out onto the parchment paper.
- Score the dough with at least one long slash using a lame, sharp knife, or razor blade. (Complete Guide to Bread Scoring Here.)
- Using oven gloves, carefully remove the hot Dutch oven. Use the parchment as handles to lower the dough in. Spritz well with water, put the lid on, and return to the oven.
- Bake 30 minutes at 450°F with the lid on.
- Remove the lid, spritz again, and turn the oven down to 410°F. Bake an additional 10–15 minutes until the crust is your desired color.
After the Bake
- Remove the loaf from the Dutch oven immediately and set on a rack to cool. Wait at least 3 hours before slicing.
Helpful Recipe Notes
Note #2 — Shaping with a bowl: If you don’t have a banneton, use a medium mixing bowl (7″–9″ diameter) lined with a tea towel rubbed generously with rice flour.
Note #3 — Pizza stone tip: A pizza stone on the lower oven rack helps prevent the bottom crust from overbrowning. If you don’t have one, a plain uncoated cookie sheet placed in the oven at the same time works as a backup.
Your Rating Matters
When you leave a comment or star rating, it means more than you might think. It helps me understand what you’re enjoying, builds trust for other readers, and supports real, tested cooking content. If you have a moment, I’d truly appreciate you sharing your experience. – Mirlandra
Nutrition Estimate
A Note on Nutrition
Nutritional info is an imperfect estimate. Please take it with a grain of salt.
New to sourdough? Start Here! How To Feed Sourdough Starter Beginners Guide Easy Sourdough Bread Recipe for Beginners (Artisan Loaf)
Leave a Reply