You don’t need an extravagant budget to get perfect, crackly sourdough loaves at home. We’re going to walk through the essential sourdough baking tools that actually earn their keep, from the “must-haves” for a consistent rise to the clever budget hacks that work just as well as the fancy stuff. I’ll be honest about what you can skip, what’s worth a splurge, and how to build a set of tools that grow with you.
This guide is all about finding that “sweet spot” equipment that fits your kitchen and your lifestyle.
New to sourdough? Start Here! How To Feed Sourdough Starter Beginners Guide Easy Sourdough Bread Recipe for Beginners (Artisan Loaf)
The Essential Sourdough Baking Tools: What’s Worth the Splurge?
The longer I’ve baked sourdough, the more opinions I’ve developed about tools. You don’t NEED a lot but there are things that bring great joy and simplify part of the process. You can save a lot of money and time by buying the things you really need and want the first go round. I hope this will save you some of the time I spent sifting through all the options!
The Minimalist: The Only Sourdough Tools You Actually Need
These are my most basic suggestions to get going on your first loaves. You can always add tools as you decide what works best for you.
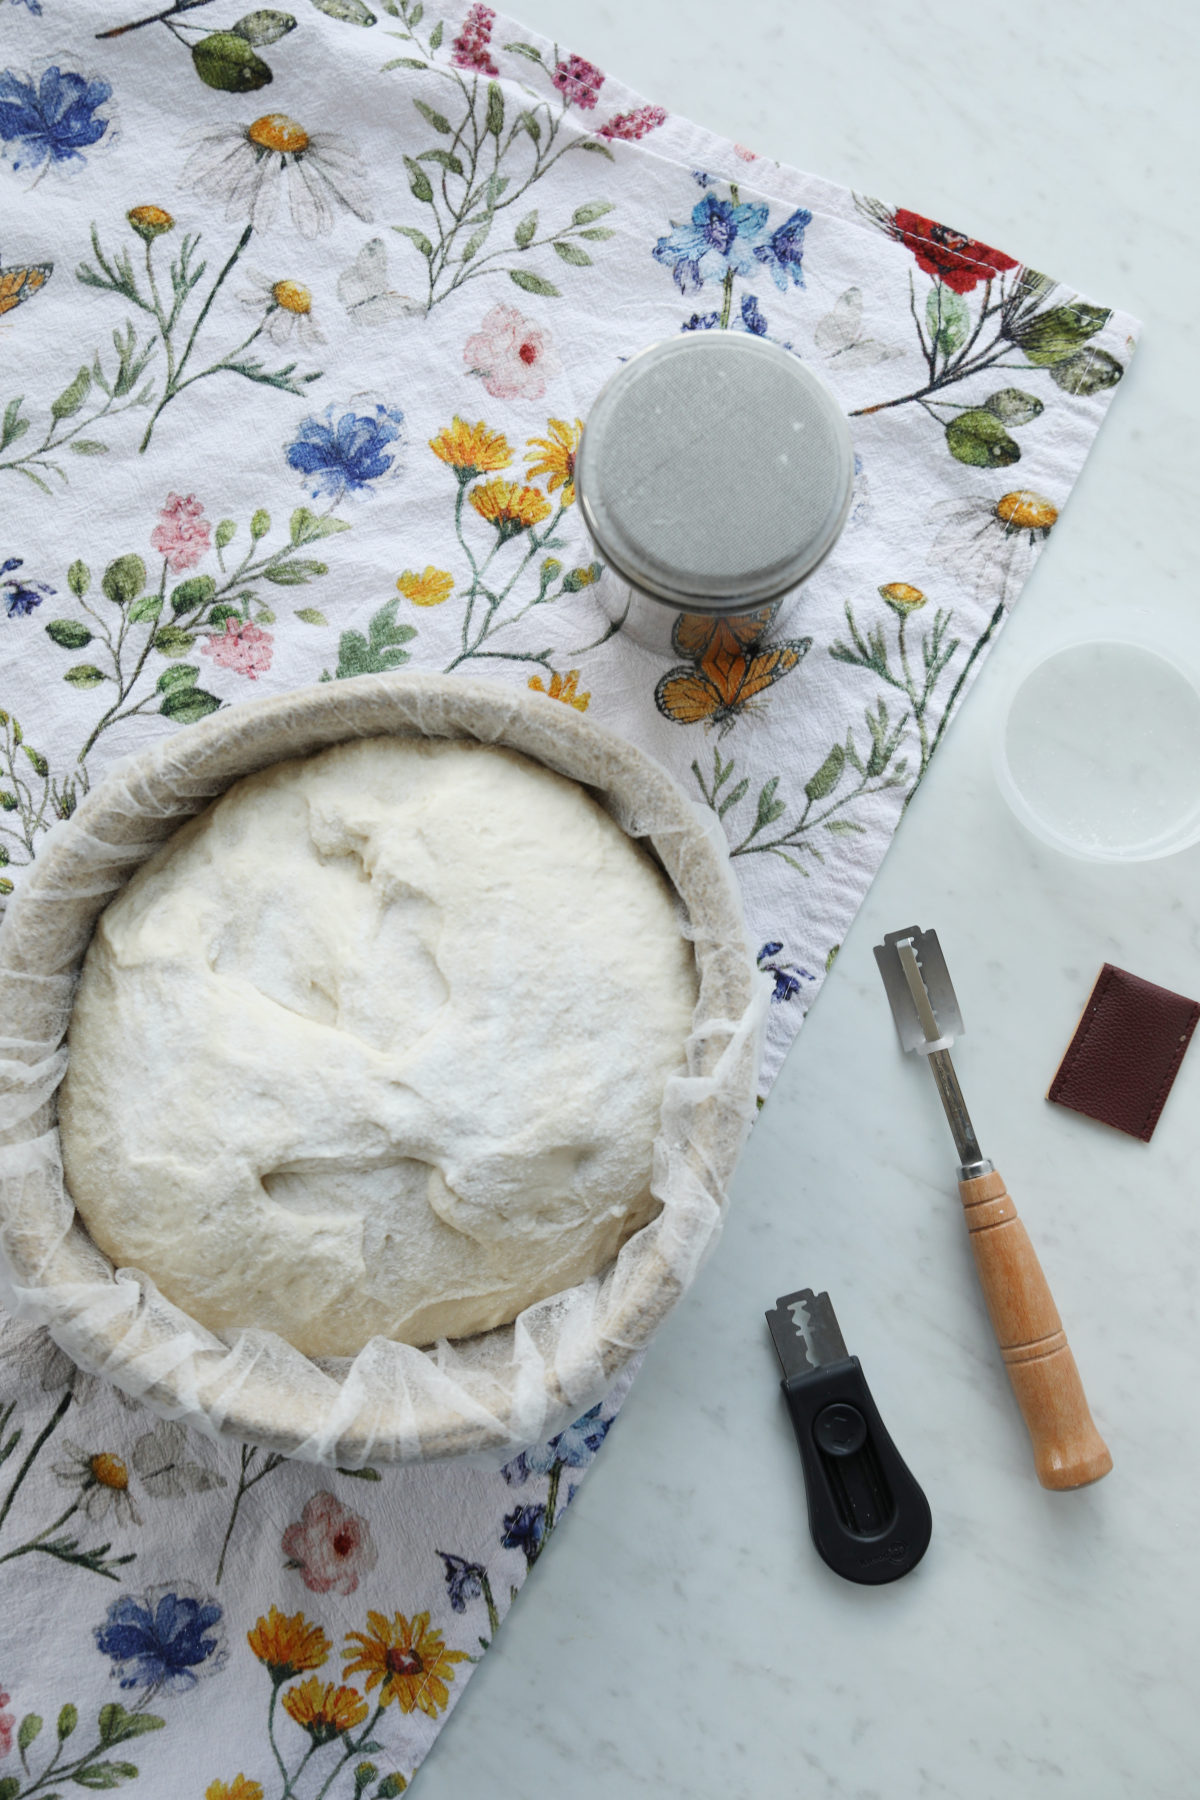
Glass Starter Jar and Lid: You don’t need anything fancy—a quart-sized wide mouth mason jar is perfect for giving your starter a happy home where you can track its growth. I love using the plastic screw on lids for my mason jar. I highly suggest avoiding jars with bails (flip-top) – they are hard to clean and wrangle and chip easily. (Learn everything you need to know about caring for your starter here.)
Rubber Bands or a Sharpie: You’ll want something to mark the “start” line after a feeding. I’ve used rubber bands, sharpie lines and even just grabbed a quick photo of Henrietta (my starter) on my phone so I can compare her progress later.
Kitchen Scale: This is the most important sourdough tool you can own because sourdough is all about precision. Having a scale is non-negotiable, but the price is negotiable. I’ve seen Amazon for under $10, and Costco has a good quality one for $20. My favorite OXO Scale is around $40. I switched to it a few years ago as an upgrade. It can handle big heavy batches of dough and enough potatoes for Thanksgiving dinner! It’s easy to use and clean. But the most important feature is the pull-out front so I can easily see the numbers under my biggest bowls. (It is also the top suggested scale from Serious Eats and they are right – it’s amazing.)
Clear Glass Bowl: Using a clear glass bowl is a game-changer when you’re learning because it lets you watch the bubbles develop and see exactly when your dough is ready to bake. A 4 quart bowl is enough for a double batch of bread but a 2-3 quart is big enough for one batch of dough at a time! Watch for Pyrex sets seasonally at Costco or local grocery stores sometimes.
Flexible Scraper: I didn’t bother with this and when my minimalist SIL said she had and loved hers I ordered this inexpensive three pack. They help you gently remove your dough from the bowl while preserving all the beautiful air bubbles you made during the bulk ferment. It’s a low budget wonder! (This is a different tool from the metal bench scraper.)
Danish Dough Whisk: AKA Bread Whisk or Dough Whisk. If you have a sturdy wooden spoon, you can wait on this, but I truly love mine for how easily it cuts through shaggy dough without getting all clumped up. I use it for all sorts of batters now. Wooden handles are pretty, but I like the all stainless option to toss it in the dishwasher! This one has been in my kitchen since 2020 and is still going strong!
Plastic Wrap or a Damp Tea Towel: You’ve got to keep that dough covered and hydrated while it rests. Plastic wrap is easy or you can use a damp tea towel to avoid buying extras in the beginning. I started with plastic wrap and quickly shifted to shower caps (I cover this below).
Dutch Oven: Do you really need a Dutch Oven? Yes AND no… Clear as mud, right? I think a Dutch Oven is the easiest way to start baking sourdough. It was one of the things that scared me off initially but I’ve come to value the way it makes great crust easy. You can start with a 5-6 quart round Dutch Oven. (I use a 15 quart oval for my batard shaped loaves. But a 5 – 7 quart oval will do you just fine!) My priciest Le Creuset Goose Pot Dutch Oven bakes the same as my 2 for $70 Costco Dutch Oven. Get what works for your budget. FB Marketplace can be a good place to pick up something to start with and the Costco one is a great starting point too.
Parchment Paper: Think of this as your “bread sling”—it’s the safest way to lower your dough into a screaming hot pot without burning your fingers. Parchment paper comes in different qualities. I like the Kirkland one – high quality and cost effective.
High-Heat Oven Gloves: Oven mitts don’t cover it for high heat baking. Get some high heat oven gloves like this ASAP.
Pro-Tip: My #1 Confidence Booster
For years I used classic oven mitts, but they were clumsy and didn’t shield me from the high heat. The 450°F+ oven was one of the things that had initially discouraged me from trying sourdough baking! Finding high-heat oven gloves was my ultimate game-changer. They give me total dexterity and keep me from burning myself! It also means I have the maneuverability to tuck my parchment into the hot pot so it doesn’t get in the way of my loaf. You are looking for a set that can handle 500F +!
Rice Flour: This is my secret to perfectly brown loaf bottoms. Rice flour handles high heat much better than regular flour. It keeps the loaf from sticking to the parchment paper AND from burning on the bottom! Get a coarse rice flour intended for baking (like Bob’s Red Mill Stone Ground White Rice Flour). Don’t buy Asian cooking flour – it is a different ingredient.
Mister Spray Bottle: A spray of water right before you close the lid adds that extra boost of steam for a truly spectacular “oven spring.” I keep one of these little mister bottles at hand for all my sourdough baking.
Cooling Racks: I own FOUR of these because they are true kitchen workhorses – durable and dishwasher safe! They keep your crust from getting soggy while the bread cools, but I use them for all my baking, for roasting meat and even as trivets for hot Dutch oven lids. These baking racks fit inside a standard half sheet pan.
Serrated Bread Knife: You need a sharp blade that won’t squish your loaf. You do not need to spent $200 on a bread knife! You do need to buy something serrated with a 9″-10″ blade that is intended to cut sourdough. This Dexter-Russell Basics is a great option for around $20. If you want a top of the line option expect to pay about $100 for Tojiro Japan hand made bread knife.
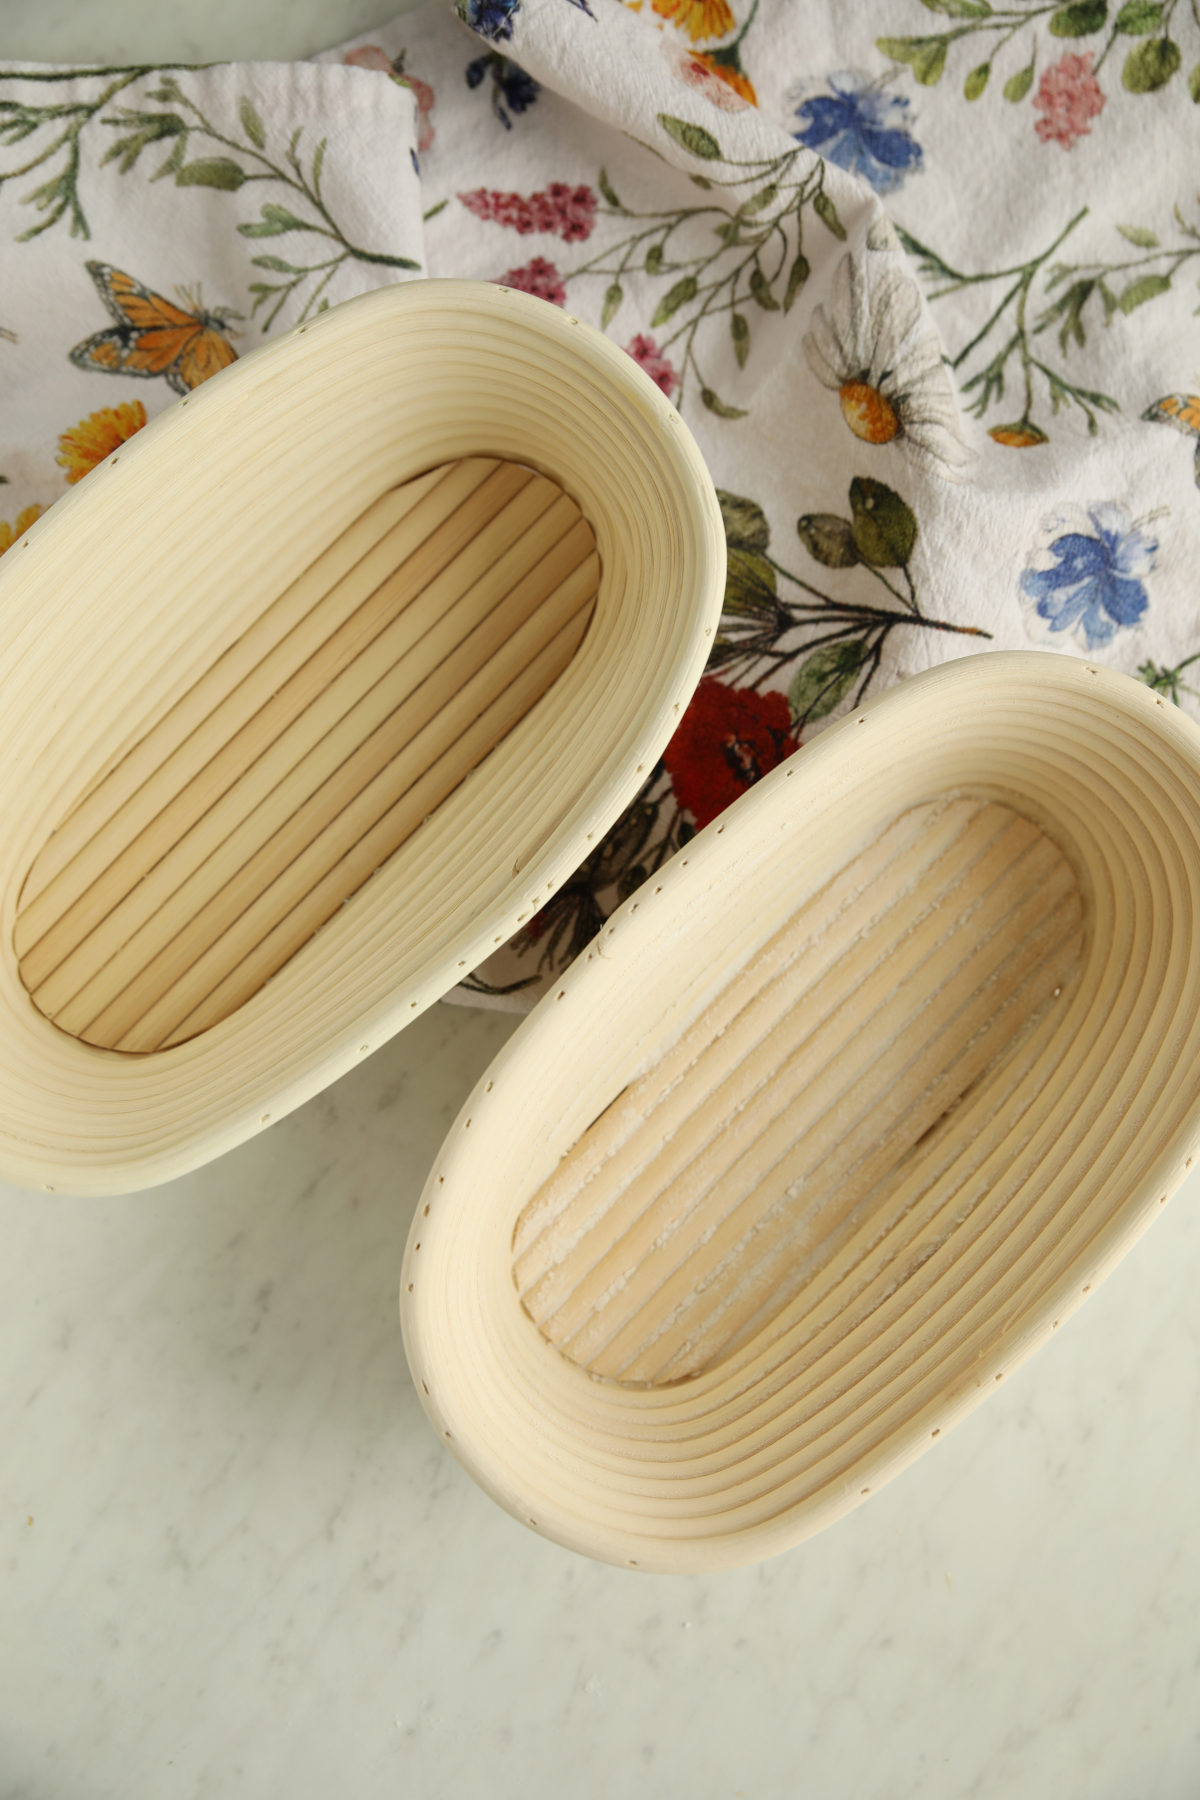
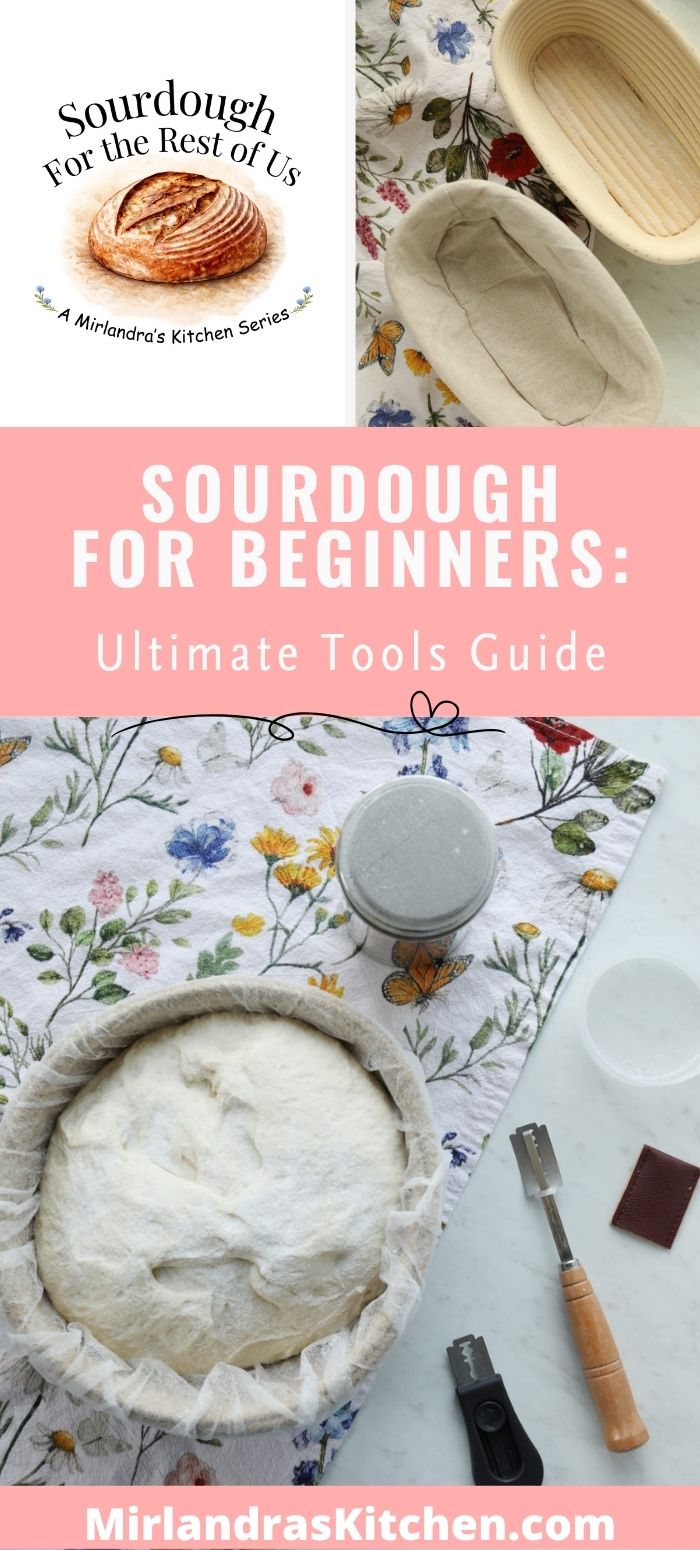
Ready for the Level Up? These rattan proofing baskets are a game-changer for consistent, professional-looking sourdough loaves.
The Level Up: Practical Upgrades for More Consistent Loaves
Once you’ve got the rhythm of sourdough down, these are the “joy-of-baking” tools. They aren’t strictly required to make bread, but they solve the little frustrations and simplify your process a lot.
Jar Spatula: A skinny, strong, silicone spatula (like the OXO) is a lifesaver for getting every bit of your starter out of the jar without the sticky mess.
Bench Knife: AKA Bench Scraper helps you divide and shape dough on the counter. It’s also useful for lifting dough into the proofing basket. I use mine all the time for many different cooking tasks. I own the OXO – any option that is strong and sharp will work for you.
Banneton Proofing Baskets: Moving from a bowl to a basket is how you get those beautiful, professional-looking flour rings on your crust. It also allows the best flow air flow for good crust skin formation. I like cane baskets more because they hold their shape better than rope baskets. I would start with 1 or 2 baskets. Get 9″ rounds if you like baking round boules or 10″ ovals if you plan on batard shapes. I had a problem with my KneadAce cotton rope baskets and got such amazing customer service (and replacement baskets without any hassle) that I would try more KneadAce products. (Note while I personally don’t prefer rope baskets somebody else might like them for other reasons. Cooking equipment can be quite personal!)
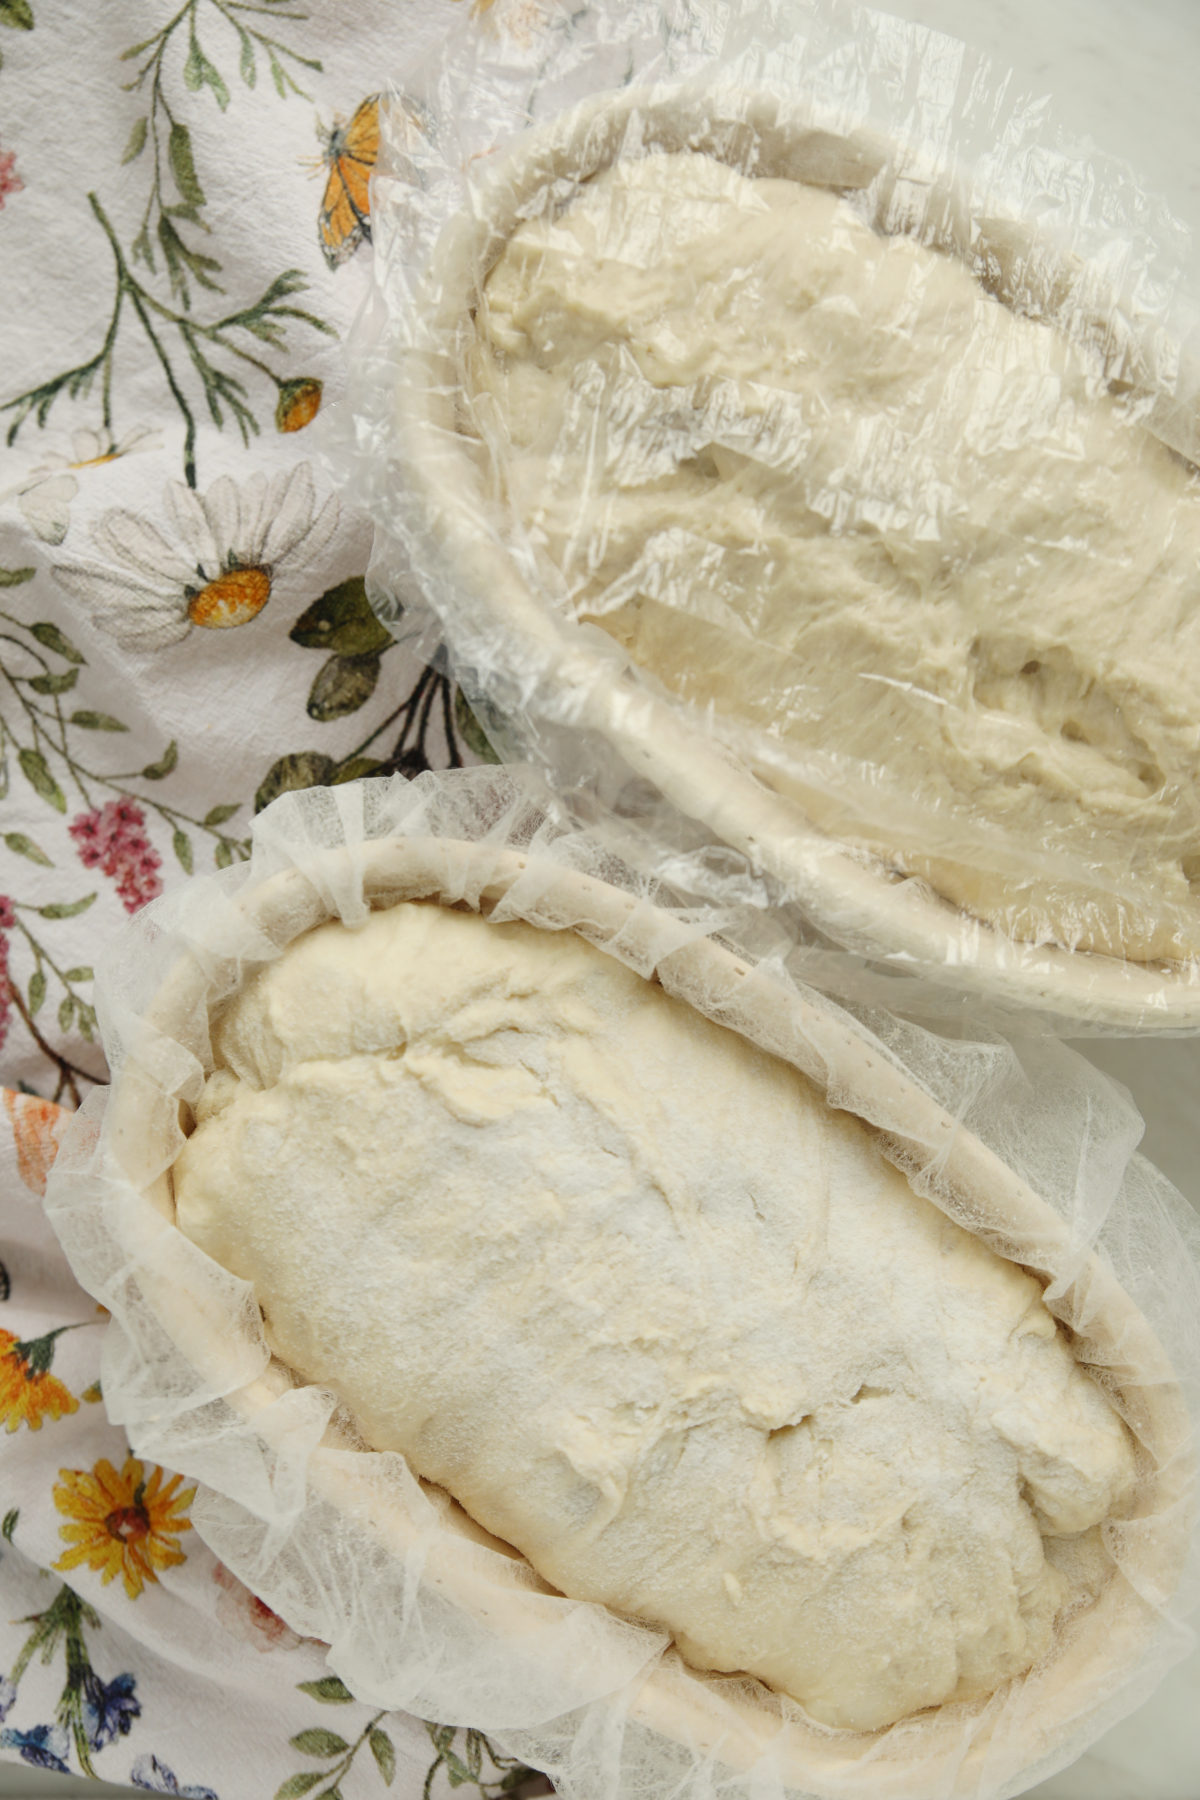
The hairnet creates a breathable liner that prevents sticking without trapping moisture like plastic wrap, giving you the perfect skin for scoring.
Shower Caps: Plastic wrap gets annoying fast! Now I use cheap, disposable plastic shower caps to cover my bowls through every step of the process. I hang them up to dry after and reuse them quite a few times before tossing them. You can also buy a reusable shower cap or a beeswax bowl cover (I haven’t tried these because I don’t want to deal with the care.) Bottom line it is a great level up to get a quick on and off bowl cover option.
Hair Nets: This sounds crazy, but a disposable hair net is the best bowl liner. The cotton liners that come with proofing baskets don’t allow enough air flow to the dough and it doesn’t form the correct skin for scoring. I find that beginners experience less frustration by using something to line the basket in addition to rice flour. It really helps avoid stuck dough which leads to torn loaves. I buy the bag of 100 bouffant caps, 21″ size.
Rice Flour Shaker: A shaker with a cap is an inexpensive way to store and shake on your rice flour without making a mess. Storage and dispenser in one! I have a 14oz size shaker.
Digital Thermometer: Once you want to truly understand your dough’s behavior or ensure your loaf is perfectly baked, a digital thermometer is essential. I’ve trusted ThermoWorks for over a decade—they are the industry leaders for a reason. They offer a great range of options for every budget:
-
The Splurge: The Thermapen is the fastest and most durable (my personal favorite). My husband even forgets it outside overnight by the BBQ and it lives on year after year!
-
The Budget-Friendly: The ThermoPop is a fantastic, high-quality entry point.
Whatever you choose, aim for an “instant-read” model. It removes the guesswork so you know exactly when your bread has reached that perfect internal temperature.
The Bread Lame (Scoring Tool): A lame (pronounced lahm) holds a razor blade at the perfect angle so you can “draw” patterns or create a deep “ear” without the dough dragging. While you can start with a sharp paring knife, a lame is the key to those professional-looking loaves. (Complete guide to sourdough bread scoring here.)
My Top Pick: The Baker of Seville ($22) This is my #1 recommendation because it’s the most versatile. It’s easy to change the blades (no terrifying finger-wrestling required!) and can be set up as either a straight or curved lame. It’s safe, durable, and comes with a storage case.
Other Lame Options I’ve Tested:
-
St. Germain: This one is inexpensive, but I found it frustrating to set up as a beginner. It’s for curved scoring and comes with a leather cover, but the blade assembly is a bit finicky. (By which I mean it made me into a crazy woman…)
-
KneadAce Magnetic: I loved that this one was retractable and stuck to my fridge! It’s great for straight cuts and reasonably priced (around $14). BUT it doesn’t offer a curved option for big “ears.”
Pro-Tip: Use the Right Blades Whatever lame you choose, buy a box of Astra blades. They are loved across the sourdough community for good reason. They are sharp, inexpensive, and universal. You can typically use each of the four corners of a blade for 5–10 loaves before you need a fresh one.
Blade Disposal: My husband seems to think throwing razor blades in the trash is a bad plan. Strange, huh? (Yes, that was sarcasm…) I bought a cute little blade storage thing to keep them for safe disposal. This is useful for me because I bake 20+ loaves a week sometimes which translates to frequent blade changes. You might not need this kind of solution.
Pizza Stone: I always put a 16″ stone on the bottom rack of my oven to prevent the bottom from burning – game changer! I also own a 2nd that I use to create a pizza oven environment for sourdough pizza!
Pretty Tea Towel: If you are looking for the Sourdough For The Rest of Us Tea Towel in all the photos it is a vintage flower towel from Miss. Adola. Having a few pretty tea towels is a nice little extra for serving your sliced bread without drying it out.
The Hidden Sourdough Tools
These are my other favorite sourdough tools that are worth considering.
Bread Knife Cleaner: When you start using your bread knife every day you realize you need a good way to clean those serrated teeth without risking a trip to the ER. I use a Joseph Joseph blade brush that wraps around the knife. It lets me safely scrub anything off of the knife without damage to the scrub brush or me. And just wait until you make a loaf with inclusions like chocolate chips! Now THAT is a knife clean up job you seriously need this brush for.
Quality Apron: A good apron is always great for cooking and when it comes to baking sourdough you will save a lot of shirts! I love my cotton canvas Crossback Apron from Hadley and Bennett. The crossed straps prevent neck strain and the apron is easy to wash and very durable. Expect it to hold up to many years of hard use. H and B aprons are pricy 🙁 You can look around for options that fit better into your budget!
Reusable & Washable Bread Bags: A zip top bag doesn’t fit most loaves of rustic sourdough. Plastic bags also catch and tear very easily on thin plastic bags! I suggest investing in a few good quality reusable bread bags that will fit your loaves. These are the bread bags I have but there are many options now. Whatever you do, don’t use trash bags for your bread! They can be treated with chemicals and generally are not meant for food!
Plastic Bread Bags: I always keep a stash of these for gifting loaves to neighbors. They’re more affordable than Ziplocs, fit sourdough loaf sizes better, and mean I don’t have to worry about getting my reusable bags back. They look surprisingly professional, too—Jonathan recently flew from Boise to Houston with a boule in one, and the airline let him carry it on as an extra item because it looked like a high-end gift shop find! It’s the perfect way to share fresh bread across the country.
Save Your Money: The “Don’t Bother” List
Marketers have lots of opinions on all the things that will change your life. Sometimes it helps to cut through the noise and focus on what NOT to buy. These are my top sourdough tools to avoid.
All-in-One “Sourdough Kits”: These usually contain flimsy plastic tools and lots of them to make them seem valuable. You’re much better off buying a few high-quality pieces than a box of low-grade clutter.
Specialized Bread Warming Mats & Proofing Boxes: Unless your house is chronically 60°F, you don’t need these and they are counter space hogs. That being said… If you DO need something like this I would start my research with the Brod and Taylor Folding Proofer.
Bench Flour Brushes: I see these everywhere, but let’s be real—you have hands, right? A quick swipe with a damp cloth is all you need to clear your workspace without adding another “specialty” brush to your drawer.
Fancy Wooden Dough Troughs: These look beautiful for a photo op but practical / useful they are not.
Build Out Sourdough Tools That Work for You
The best sourdough setup isn’t the most expensive one; it’s the one that actually keeps you happy in the kitchen. Start with the minimalist basics, learn how your dough behaves, and only invest in “Level Up” gear once you identify a specific problem you need to solve.
I want to hear from you! What is the one piece of gear in your kitchen you use every single time you bake? Or did you buy a “must-have” that ended up being a total “don’t bother”? Drop a comment below. I’m always excited to hear what other people are loving and not loving.
New to sourdough? Start Here! How To Feed Sourdough Starter Beginners Guide Easy Sourdough Bread Recipe for Beginners (Artisan Loaf)
Lindsay says
Mirlandra, this post is everything!! I’ve been baking sourdough for years but I’m adding practically everything on your list to my Amazon cart. Haha!! Thanks for field testing all the tools for us and loving a good deal as much as I do!!
Mirlandra Neuneker says
Thank you, Lindsay! I’m so thrilled this is helpful to you! I think the tool aspect was kind of overwhelming for me when I was starting out and I love a good practical tool list! Maybe too much 😉