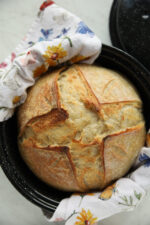
You don’t need a heavy Dutch oven to get a beautiful, artisan sourdough loaf in the oven you already have. I’m going to show you exactly how to bake sourdough without a Dutch oven using a simple roasting pan.
The crust is perfectly crisp every time and the crumb will have you drooling. Grab your butter and let’s get to it.

New to sourdough? Start Here! How To Feed Sourdough Starter Beginners Guide Easy Sourdough Bread Recipe for Beginners (Artisan Loaf)
The Secret to Success: How to Bake Sourdough Without a Dutch Oven Using a Roaster
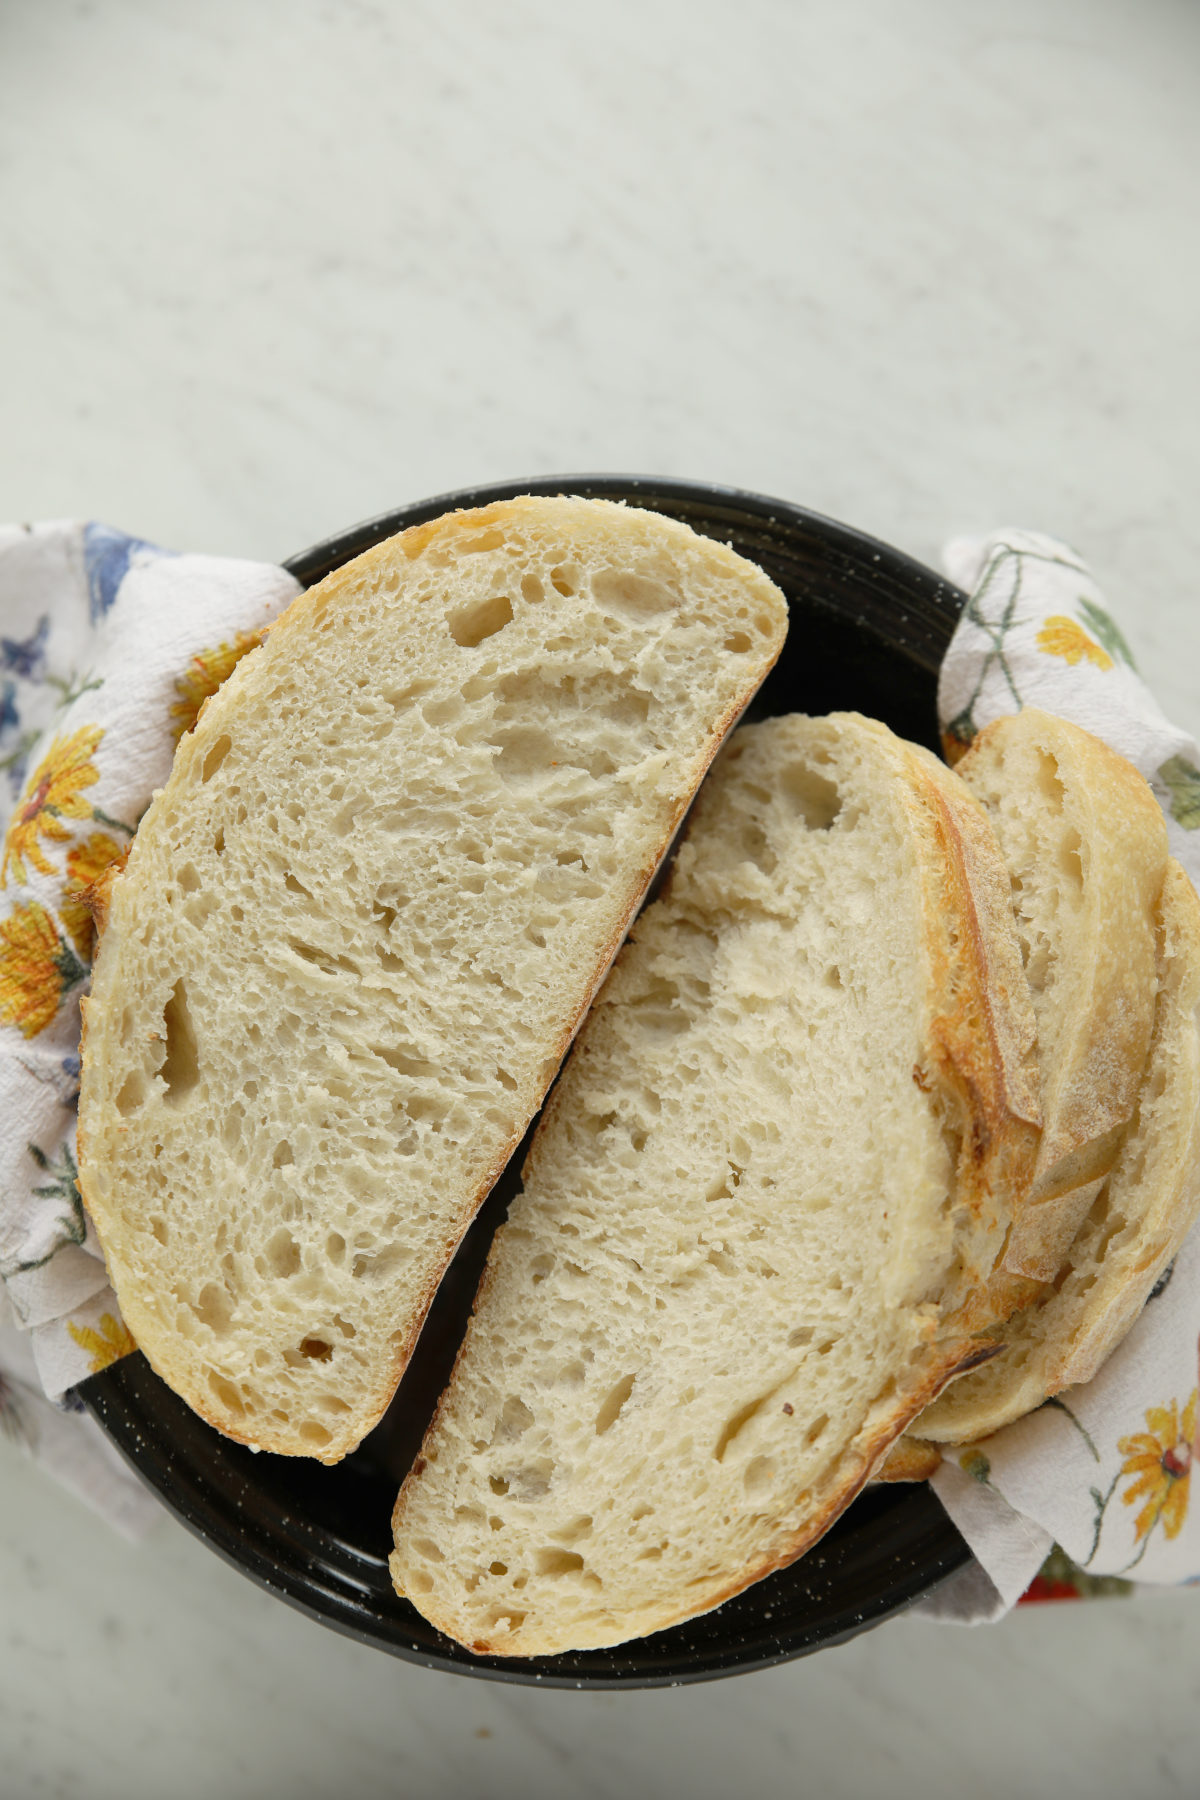
Using a graniteware roaster for sourdough is a game-changer for beginners and experienced sourdough cooks alike. It’s lightweight, affordable, and produces a crust that is just as thin and crackly as the pricey alternatives.
Graniteware: The Budget-Friendly Dutch Oven Alternative
Do you remember that black, speckled turkey roaster your mom pulled out at Thanksgiving or maybe your grandma’s canning pot that was black with speckles? This is called Graniteware and it used to be the pot of choice just one generation ago.
Graniteware is one of the best tools for baking sourdough because it mimics a professional steam oven perfectly without the heavy lifting (or the high price tag) of a cast iron Dutch oven.
It’s possible you or your mom have one lurking in the back of your cupboard or that you can nab one inexpensively at a thrift store. But if not, I grabbed a round graniteware roaster for about $20 on Amazon.
Why Graniteware Works for Sourdough
Graniteware is made of thin steel coated in porcelain enamel. While it doesn’t hold heat as long as heavy cast iron, it has two major advantages for bakers:
- Rapid Heat Transfer: It gets up to temperature much faster than heavy ceramic or iron.
- Deep Steam Chamber: The high-domed lid provides plenty of vertical space for your bread to “spring” upward without hitting the top.
Graniteware vs. The Dutch Oven: Which is Right For You?
Both tools will produce great sourdough! You get to choose what pan is the right fit for you.
The Pros of Graniteware
- Weight: A cast iron Dutch oven can weigh 12 to 15 pounds. Trying to maneuver that in and out of a 450F oven is a workout! I’m only in my 40s but I have known difficult seasons of health where lifting a Dutch oven was NOT happening. If you are dealing with surgery recovery, arthritis or any number of other situations you might want to consider an alternative to the Dutch oven. Graniteware is incredibly light and easy to handle.
- Shape: Many people only own one Dutch oven. If you want to try another shape it’s easy to grab a graniteware pot.
- Price: You can often find these at thrift stores for $5 or new for $20. It’s the ultimate low-barrier entry to sourdough baking.
- No Preheat! With graniteware we preheat the oven but not the pan. Instead of a 450F pot you get to load your dough into a cool pan and then put it into a hot oven. It is a safer option for young bakers or distracted ones. (Not naming any names here people…)
- Great Oven Spring: The porcelain enamel coating on this pan heats up really quickly giving you great oven spring.
- Limits Spread: Some newer bakers who are still learning to get dough proofed right find that this kind of baking dish keeps the loaf from spreading out too wide. It can be a helpful tool while you are learning.
- Multiple Loaves: Many bakers get 4-6 of these in a standard electric oven with great success and bake a lot of sourdough at once. With Dutch ovens, two is about your limit for space.
The Cons
- Hot Bottoms: Because the metal is thin, the bottom of your loaf can scorch more easily than it would in thick cast iron. (Don’t worry, I have a “shield” trick below to solve this perfectly!)
- Aesthetics: Some people just truly enjoy the ritual of using a Dutch oven. I’ll admit, I love the weight and the feel of lifting a heavy pot out of the oven; it’s a satisfying part of the process for me. If that’s you, that is okay! Choose the method that brings you the most joy in the kitchen.
If you are looking for a recipe that uses a Dutch oven check out my Easy Sourdough Bread Recipe for Beginners.
Why this is my favorite “No-Dutch Oven” Method
There are so many sourdough “tricks” to get great bread without a Dutch oven, and I think I have tried all of them. I even sent my husband to the farm store for a huge bag of lava rock and spent my afternoon cleaning up pans of rock just to bake with! (My four year old thought I was making him tasty rock soup! I guess it is nice he trusts that if I’m cooking rock it will be delicious!)
I’ve used pizza stones and tried every “steam hack” on the internet. I spent time learning from the owner of a micro-bakery which was amazing but what she does isn’t practical for most of us just baking for our families.
Some methods work better than others, but nothing I experimented with matched the simplicity and cost-effectiveness of using graniteware to replace a Dutch oven. After all those trials, I can honestly say that using a roasting pan is the easiest non-Dutch oven method I’ve found. It gives you the best, most consistent results without any of the stress of open-oven steaming. It’s a simple, elegant solution that just works.
How to Use a Roasting Pan for Sourdough (Step-by-Step)
This is where the magic happens. Unlike the traditional method where you have to wrangle a screaming-hot pot, this process is much more low key. (Hint – If you want a way to teach grade school kids sourdough this is the perfect method for young bakers!) Here is how we do it:
- Preheat the Oven: Set your oven to 450F and let it get nice and hot. Leave your roasting pan sitting right on the counter.
- Prep Your Dough: Tip your cold dough out of the banneton onto a piece of parchment paper. Score it however you like. (Grab my guide to score sourdough bread with confidence here!)
- The Cold Load: Use the parchment to lift the dough and lower it gently into the room temperature roasting pan.
- The “Steam Seal”: Place the lid on the roaster. Because the dough is cool and the pan is closed, the moisture from the bread will create its own perfect steam chamber the second it hits the oven.
- Bake Covered: Slide the whole setup into the oven. We’ll bake it covered for 30 minutes to get that glorious “oven spring.”
The “Shield” Trick: No More Burnt Bottoms
Since graniteware is much thinner than cast iron, it doesn’t have any buffer to protect the bottom of your loaf from the direct heat of the oven element. If you aren’t careful, you can end up with a crust that’s perfect on top but a little too “extra special” on the bottom.
Luckily, the fix is incredibly simple and uses things you already have. We just need to create a heat shield!
Option 1: The Cookie Sheet Deflector
The easiest way to do this is to take a cheap, thin baking sheet—the kind that might be a little warped from years of roasted veggies—and slide it onto the rack directly below your roasting pan. This simple layer breaks the intensity of the heat rising from the bottom of the oven, allowing the bread to bake evenly without scorching. (Don’t use your nice coated pans – high heat can damage them.)
Option 2: The Pizza Stone Buffer
If you happen to have a pizza stone or a baking stone, you can place it on the the rack directly under the rack you are baking on. Let the stone preheat with the oven. The stone absorbs that initial harsh heat and creates a steady, even base for your roaster to sit on.
Finding the Right Fit: What Size Graniteware Pan Do You Need?
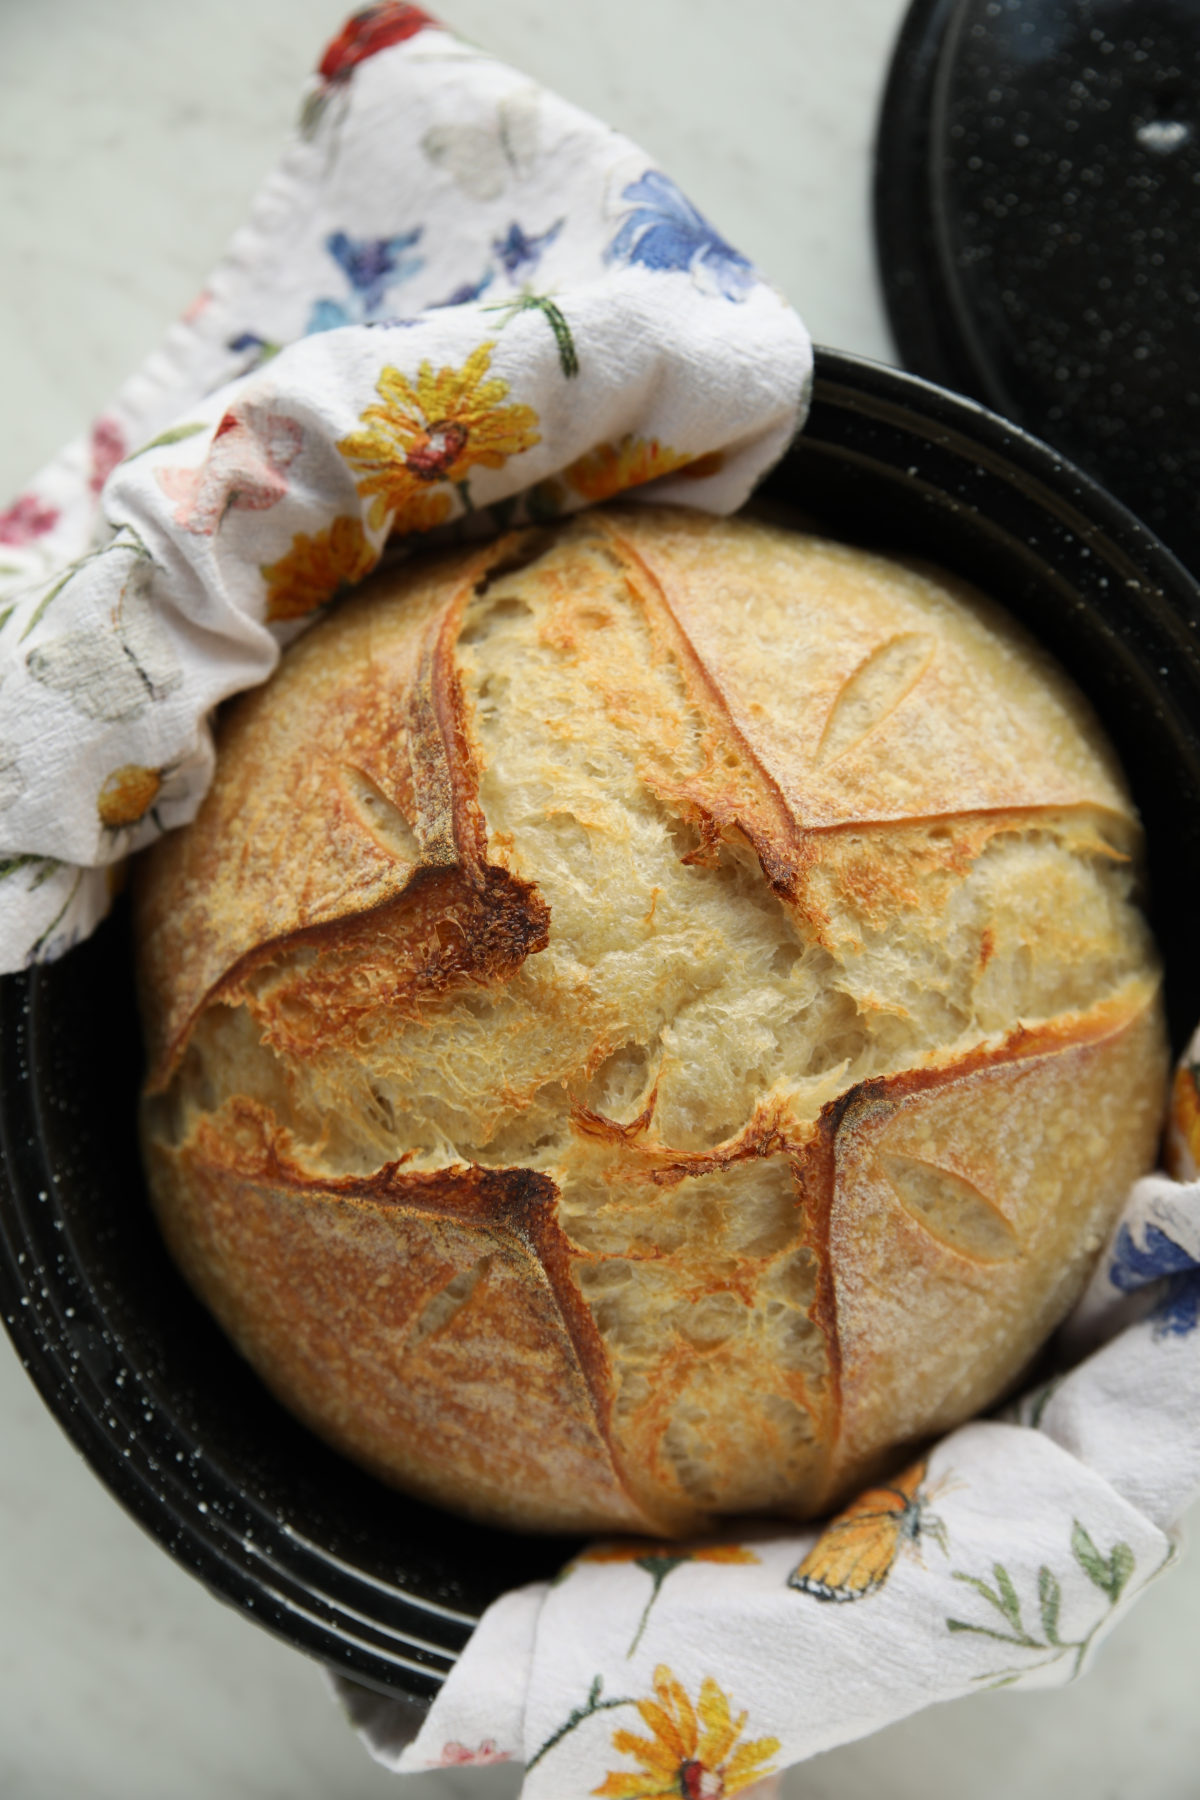
For a round loaf (boule) this nice little 3 pound capacity round roaster is perfect. It is just under 9″ in diameter and I paid about $20 for mine. It is the roaster in my photos for this post.
For a oval loaf (batard) look for a 13″-15″ roaster pan in an oval shape. This one is slightly more expensive new than the round.
Need more information on Sourdough Tools? Get my Ultimate Sourdough Tool Guide Here.
Give it a Go!
Baking incredible sourdough shouldn’t feel like a high-stakes workout or a strain on your wallet. By reaching for a simple roasting pan, you’re choosing a path that’s easier on your back and just as delicious for your table. So, go ahead and clear a spot on your counter, grab that speckled lid, and get ready for the most stress-free loaf you’ve ever baked!
P.S. Have questions about words in this post? I have a Plain English Glossary of Everything You Need to Know About Sourdough Words here.
Want to learn more about what sourdough is? Read my Simple Explanation of Sourdough Bread here.
How to Bake Amazing Sourdough Without a Dutch Oven
Ingredients
- 350 g lukewarm water
- 100 g active sourdough starter fed and happy
- 500 g Bread Flour see Note #1 about flour types
- 10 g fine grain sea salt
- rice flour optional for flouring bottom of loaf
Instructions
Autolyze – Mixing the Dough and Resting It Before Stretch and Folds
- In a large mixing bowl, add the water, starter, flour, and salt. Mix with a dough whisk or wooden spoon until you get a shaggy dough. Make sure all the flour is mixed in so there are no dry patches left.
- Cover the bowl with plastic wrap or a shower cap and let it rest on the counter for about 1 hour.
Stretch & Folds – Creating Structure (See video tutorial here if needed.)
- Get your hands wet to prevent sticking. In the bowl, grab one side of the dough and pull gently until the dough starts resisting you. You can use your other hand to keep the other side of the dough in the bowl. Fold the dough in half back into the bowl.
- Rotate your bowl ¼ turn and do another stretch and fold. Continue to rotate ¼ turn each time until you have completed four stretch and folds in total. This is considered 1 set of stretch and folds.
- It might be helpful to make a checkmark each time you complete a set of stretch and folds so that you know where you are in the process.
- Cover the dough and let it rest for 30 minutes.
- Do this three more times for a total of four sets of stretch and folds over about two hours.
Warm or Room Temperature Rise (Called Bulk Ferment)
- Cover your dough and let it rest at room temperature or a warm place. This could take 6 hours or 12. The temperature of your home and strength of your starter will decide how long this takes.
- I suggest taking a quick photo of how your dough looks at the start of the warm rise period. Check on your dough every few hours if you are new to sourdough baking.
How to Know When the Dough is Done with the Warm Rise:
- Timers are for checking on the dough. But your job is to learn how to read the dough! It will tell you when it is ready. Watch for these four things:
- Did the dough double? If it did not, do not move on.
- Does the dough look pillowy and like a soft marshmallow? Is it slightly domed on top?
- If you gently shake the dough, does it jiggle a little bit?
- Can you see big bubbles through the sides of the bowl and lots of little ones?
- When you can see these four things happening, move on to shaping your dough.
Shaping The Dough
- After the dough has doubled, begin the shaping process on a clean counter.
- A 10” banneton basket is a perfect shaping container but if you don’t have one see Note #2 on how to use a bowl.
- If you are using a disposable hair net (see post) line the banneton with it. Then sprinkle rice flour liberally on it.
- Now we are going to shape the dough gently into a round loaf called a boule. (To shape the dough into an oval batard please see Note #3.)
- The goal of shaping is to create surface tension in the dough while protecting the gases and air bubbles that formed during the bulk ferment.
- Grab your flexible dough scraper and use a spray bottle to lightly mist the counter, scraper and your hands.
- Use the silicone dough scraper (or a rubber spatula) to gently ease the dough out of the bowl so it lands with the soft top down on the counter and the sticky side up.
- To Shape a Round Boule: You don’t have to shape dough perfectly to have a great loaf! Picture the dough on your counter as a sort of odd-looking pie. Imagine that it is cut into 8 slices. Now grab the edge of the dough on one imaginary slice and pull it to the middle of the “pie”. Now do that for the other seven “slices”.
- As you pull each edge to the middle pinch it into the center of the “pie”. You will start to see a sort of flat ball forming.
- Once you have brought all eight sides of the pie to the middle you should have a more or less tight ball of dough. Gently lift the ball of dough and put it into the banneton or bowl. Keep the pinched part as the top for now. It will become the bottom before baking so any odd-looking parts will be hidden.
- If it looks a little flat after you put it into your shaping container you can pull the pie tightening trick again.
Cold Ferment AKA The Long Cold Rise
- Loosely cover the dough in its shaping container. (I use a shower cap for this.)
- Put your container of dough into the fridge. You can leave it there for up to 36 hours but as little as 5 hours. See Note #4 to learn more about time.
Preparing Your Oven and Pan
- Set the top rack of your oven at a comfortable height to fit roaster pan.
- If you have a pizza stone set it on the bottom rack of your oven.
- Preheat your oven to 450F with just the pizza stone in the oven. Set a timer and let everything preheat for a full hour so the oven and pot are really good and hot. (Note: If you are used to Dutch ovens please note that you should NOT preheat your graniteware roasting pan at all.)
- Leave your dough in the refrigerator until the last minute for the best oven spring (rise).
Baking Time!
- After the preheat, cut a piece of parchment paper long enough to create handles to lift your dough into the hot Dutch oven.
- While the dough is still in the shaping container sprinkle rice flour on the exposed top to prevent burning and sticking.
- Center the parchment paper on the dough and put a hand on top of the parchment paper and one on the bottom of your container. Gently flip the container so that the shaped dough is sitting on the parchment.
- (If the dough does stick some to the edge of the banneton, it will be ok. Use your fingers to loosen it until it comes out. Using a mesh hair net liner prevents this.)
- Score your bread with at least one long slash so the bread can expand correctly. You can use a lame, sharp knife or clean razor blade. (My complete guide to scoring bread can be found here.)
- Use the parchment paper as handles to gently set the dough into the graniteware roaster
- Spritz your dough all over with a nice mist of water, put the lid the roaster and put it into the oven.
Timing Your Bake:
- Bake for 30 Minutes with the lid on at 450F.
- Remove the lid, quickly spritz the dough several times with water again and leave the lid off for the rest of the bake. Turn the oven down to 410F. Bake 10-15 more minutes until the top is as dark as you want it.
- If you are concerned about the bread being done, you can use a digital cooking thermometer to double check. The internal temperature for baked sourdough bread is 205F – 210F
After The Bake:
- After baking, use your oven gloves to remove the loaf from the roaster right away and set it on a baking rack to cool.
- Leave the pizza stone in the oven to cool down slowly. (Quick temperature changes can cause things to crack.) Open the oven a few inches if you want things to cool off faster.
- Sourdough bread continues to cook after being removed from the oven. If you cut it while it is still warm the bread will be gummy. I suggest waiting at least 3 hours before slicing. (I do love to eat hot bread but I save that for commercial yeast bread instead of doing it with my sourdough loaves.)
Helpful Recipe Notes
Your Rating Matters
When you leave a comment or star rating, it means more than you might think. It helps me understand what you’re enjoying, builds trust for other readers, and supports real, tested cooking content. If you have a moment, I’d truly appreciate you sharing your experience. – Mirlandra
Nutrition Estimate
A Note on Nutrition
Nutritional info is an imperfect estimate. Please take it with a grain of salt.
New to sourdough? Start Here! How To Feed Sourdough Starter Beginners Guide Easy Sourdough Bread Recipe for Beginners (Artisan Loaf)
Pin for Later

Leave a Reply