Curious about fresh, homemade sourdough? My practical approach gets you baking right away! This easy sourdough recipe is for true beginners—no commercial yeast, no kneading, and no confusing jargon. No experience needed! It might ruin store bought bread for you forever….

Why You Will Love This Easy Sourdough Bread Recipe
- Forgiving for Beginners: No technical perfection required—this dough is flexible and works with you, not against you.
- Fits Real Life: I have three kids who are homeschooled and run a business out of my home. This sourdough recipe fits into my crazy life beautifully with plenty of hands-off time.
- Consistently Delicious: That crusty, golden exterior and signature tang… reliable, every time.
- Personal Support In The Comments: Questions? Confused? A food blog is a living recipe book! Ask your questions in the comments and I will coach you through.

New to sourdough? Start Here! How To Feed Sourdough Starter Beginners Guide Easy Sourdough Bread Recipe for Beginners (Artisan Loaf)
What is Sourdough Bread
Sourdough bread is the OG way of making bread—flour, water, salt, and a natural starter instead of commercial yeast. That starter is a living mix of wild yeast and good bacteria that slowly ferments the dough, giving sourdough its signature tang, chewy texture, and deep flavor. It’s simple, a little magical, and once you get the hang of it, surprisingly low-maintenance. (Learn more about what Sourdough Bread is here.)
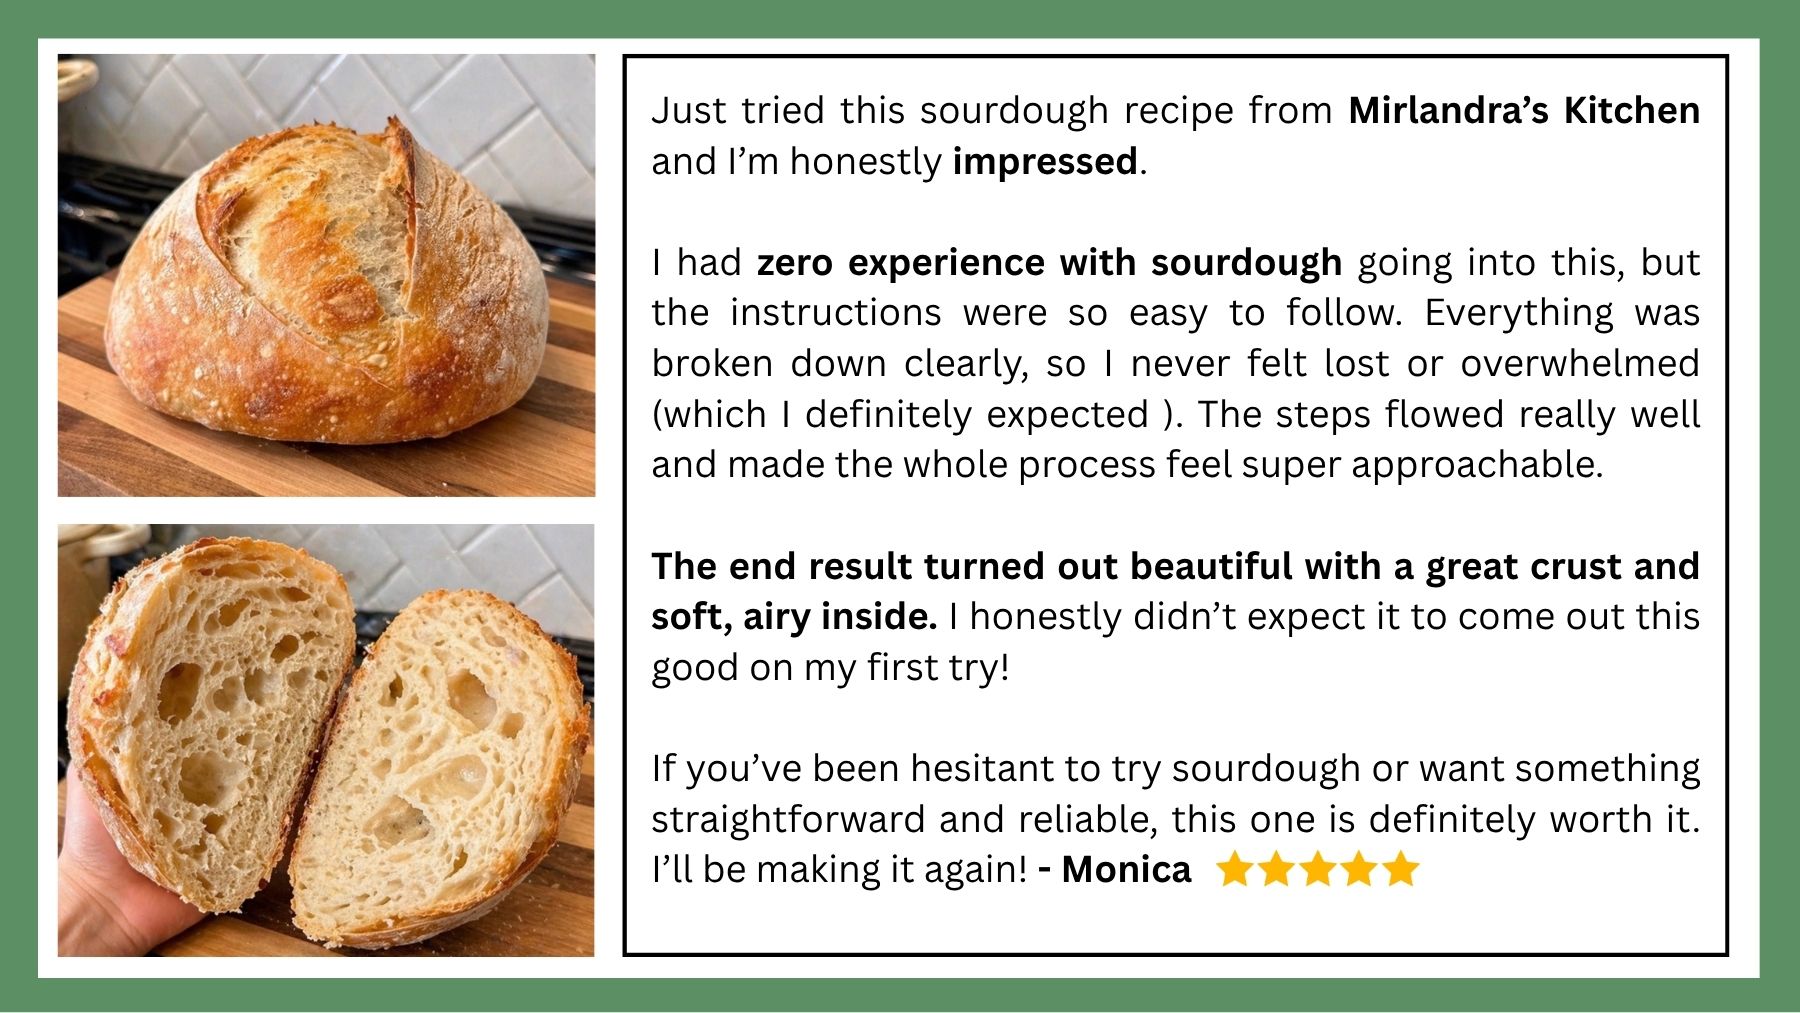
Reader Testimonial (Her Amazing First Loaf!)
How to Make Easy Sourdough Bread (Step by Step)
Sourdough gets a reputation for being complicated, but once you understand the rhythm of it, it’s really just a few simple steps repeated in the right order. The key is learning what the dough looks and feels like at each stage. I’ve got you every step of the way. Heads up sourdough baking has lots of new words. If you are not sure about some of them, grab my Sourdough for Beginners Glossary Here.
I’m going to break down every detail of the process so nothing is confusing.
Step 1: Mix the Dough
Start by mixing your active / fed sourdough starter with water, salt and flour. Mix until no dry bits remain. (I talk about how to know your starter is ready in the ingredients section below.)
At this stage, the dough will look a little rough and shaggy—that’s exactly what you want.
At the end of mixing cover the dough and leave it to rest. This is called “autolyze.”
During this autolyze or rest:
- The flour hydrates fully
- Gluten starts forming naturally
- The dough becomes smoother and easier to work with
It’s one of those “do less, get better results” steps—which is always a win in sourdough.
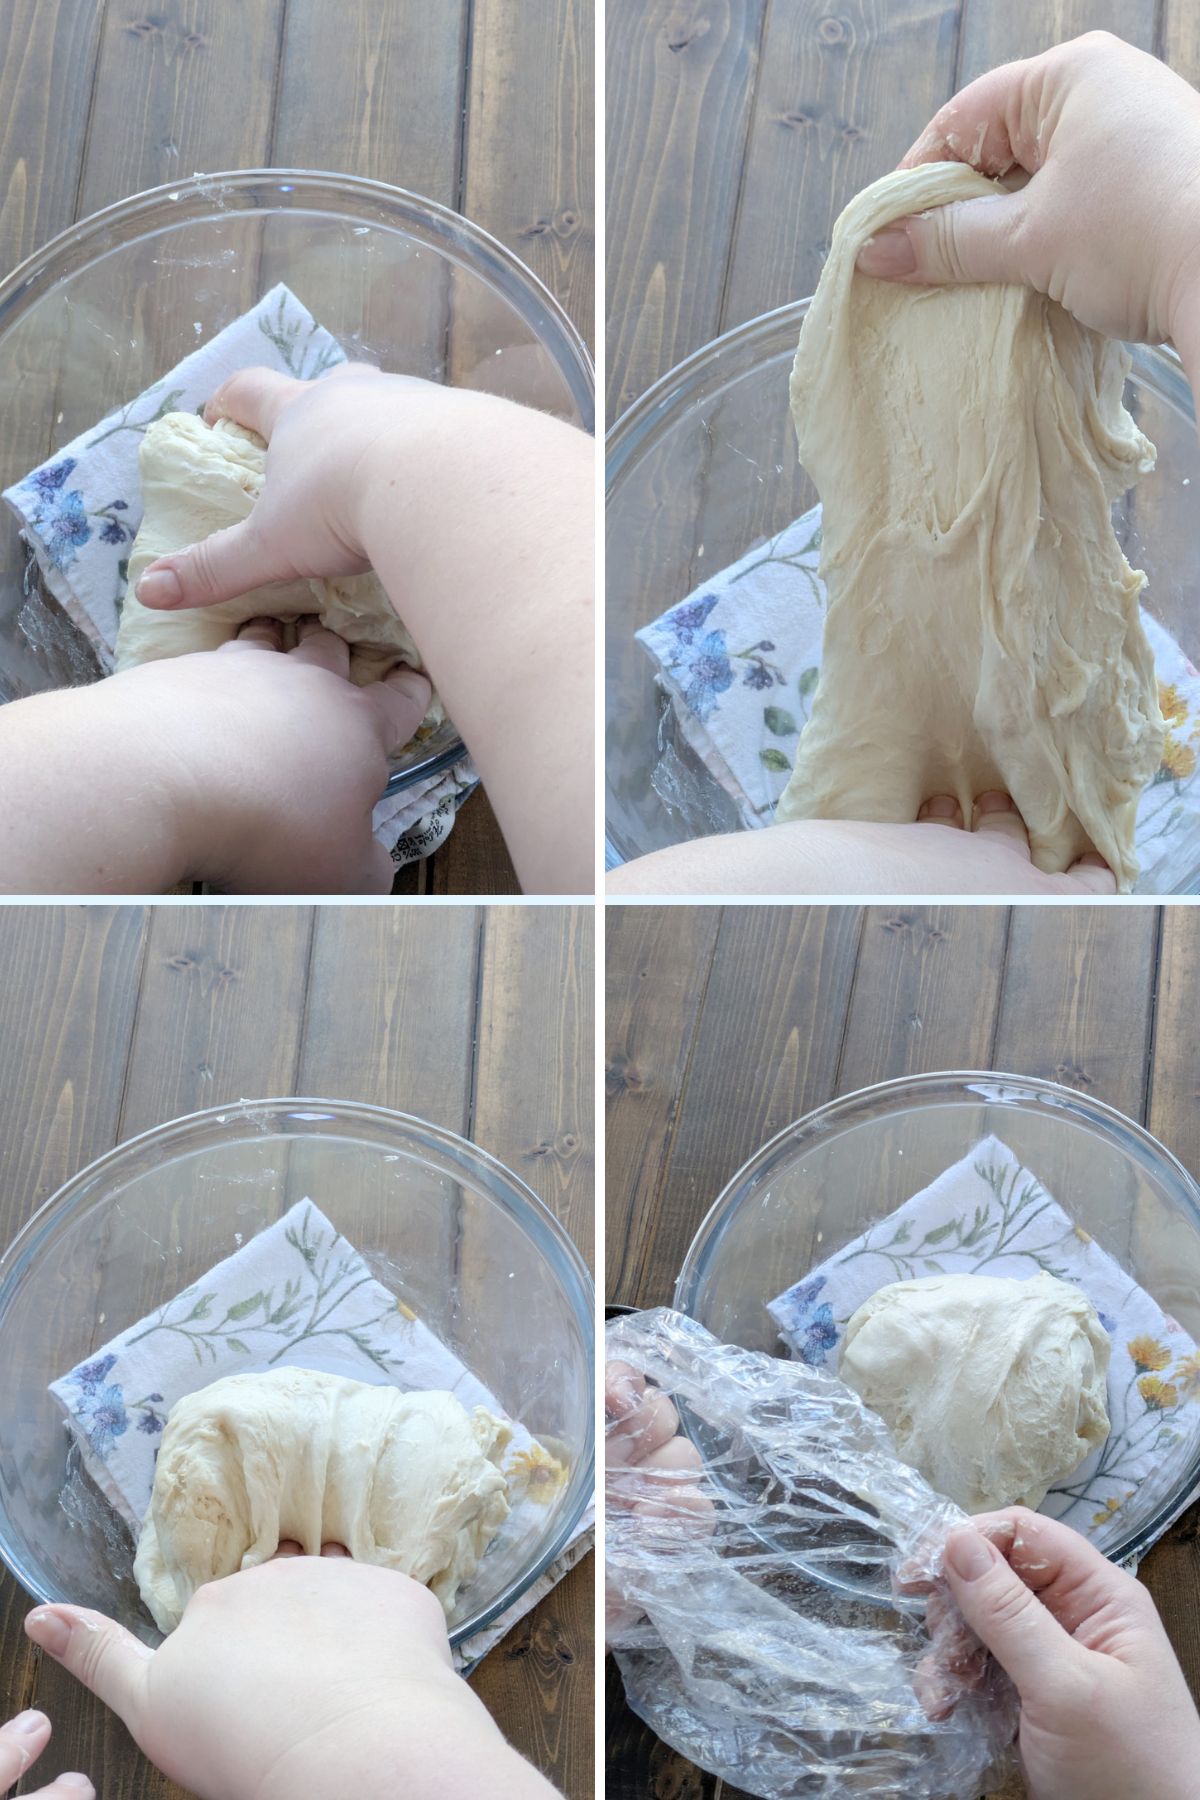
Stretch and Folds In The Bowl
Step 2: Stretch and Folds
Now we start building structure.
Over the next couple of hours, you’ll do four sets of stretch and folds—gently pulling the dough up and folding it over itself every 30 minutes.
If you want the full breakdown, I’ve got a complete video guide here for stretch and folds you can follow along with. It sounds complex but it’s simple.
Are stretch and folds optional?
Well… I wouldn’t skip them. I know there are people who do but for the sake of success and consistent results I recommend doing four sets.
Stretch and folds are one of the simplest ways to strengthen your dough without kneading, and honestly—they’re kind of fun once you get the feel for it. You’ll literally watch the dough transform from loose and sticky to smooth and elastic right in front of you.
It’s a small step that makes a big difference.
Step 3: Bulk Rise AKA Bulk Fermentation AKA Bulk Ferment
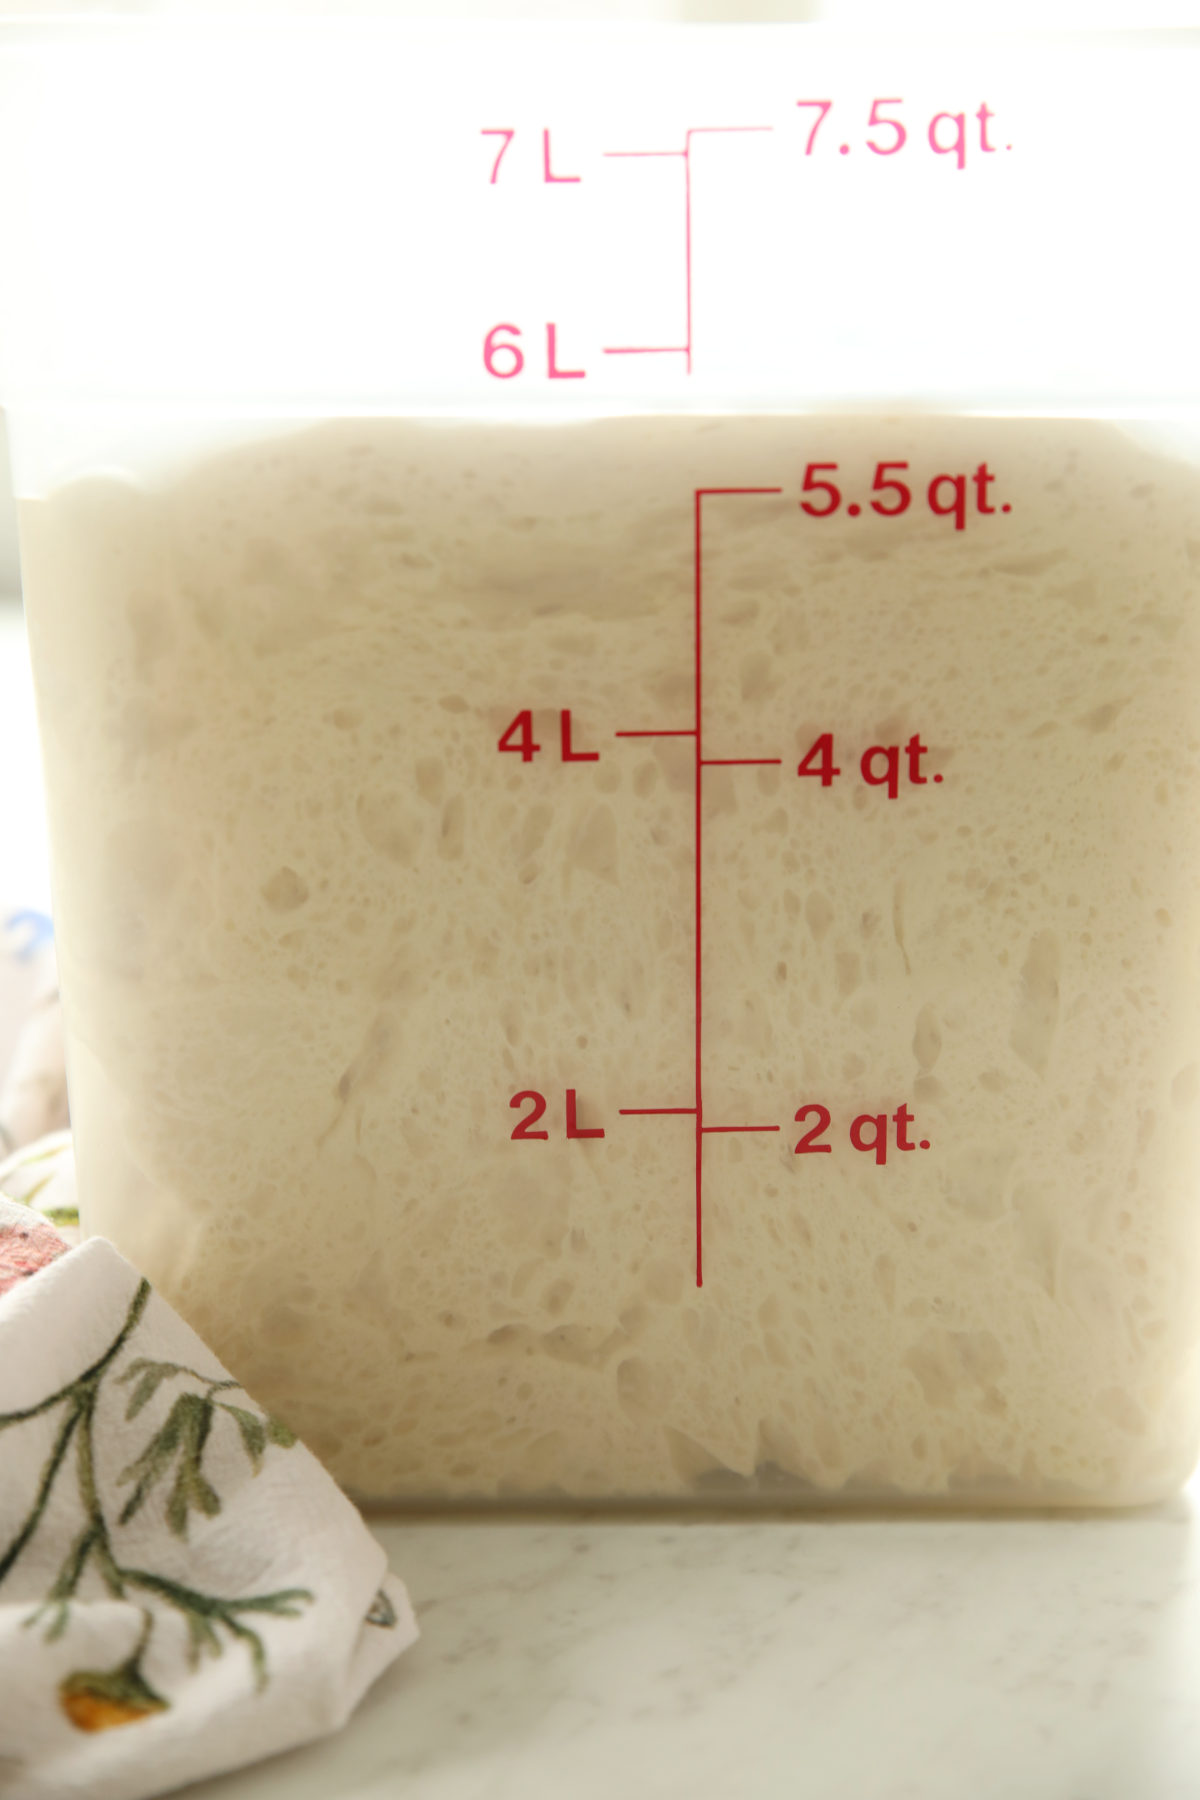
Watch for this beautifully, airy, bubbly structure in your fermented dough! (Note that this is dough for two loaves.)
This is where sourdough really becomes sourdough and it is magic! This always happens at room temperature.
These are my top signs to watch for to know that your bulk ferment is done.
- Size – the dough needs to double. (Pro Tip: Take a photo at the beginning to compare.)
- Marshmallow Appearance – The dough will have a smooth, rounded top that is soft and pillowy.
- What Do You See Through The Bowl? Bubbles forming along the sides and bottom and a light airy structure. See photo above.
- What Do You Feel? The dough feels lighter and jiggles a bit if you shake the bowl. The dough is a little tacky to the touch but not super sticky.
How Long Does Sourdough Take to Rise?
Bulk Fermentation happens slowly in cool temperatures and more quickly in warm temperatures. This means that I can’t just say “six hours” and give you honest, accurate information. So let’s talk this through:
- Cooler Temperatures: Let’s say your kitchen is around 64-70F. Give yourself 6-10ish hours for a healthy fermentation time.
- Warmer Temperatures: Let’s say your kitchen is warmer – around 75-94F. Watch your dough closely and expect it to take around 4-6 hours
I wish I could give you a one size fits all answer. But sourdough doesn’t run on a clock—it runs on fermentation. That means you’ll eventually need to learn to read the dough, not just follow a timer. You will need to learn to look at your dough and know if it is ready or not. This is easier than it sounds and in a few loaves you will start to understand what the dough is saying. You will find it is actually fun to develop the confidence to bake by feel!
Tips For Oven Proofing Setting or Proofing Box: I LOVE my proofing setting on my oven. BUT I learned fast to watch it closely. It is a warm, toasty environment and that fermentation can go super fast and catch you off guard! While you are new to sourdough I suggest staying home with the dough and checking on it every hour or so when it is in a really warm proofing environment.
If you are having trouble with an extra cold proofing environment you can look into buying a proofing box to create a controlled temperature environment to work with.
Step 4: Shape the Dough
Once your dough has finished bulk fermentation, it’s time to shape it. There are dozens of different ways to shape your dough but I want you to take away TWO key ideas:
- The goal of shaping is to create surface tension in the dough while protecting the gases and air bubbles that formed during the bulk ferment. As long as you get that, you win. You can get more fancy later if that’s your heart’s desire!
- Please don’t flour your counter! I see experienced people do this all the time and it mystifies me. Adding flour isn’t a great plan for the bread. Buy a cheap misting spray bottle and use it to spray your hands, the counter and your flexible scraper! It is the magic non-stick formula for great bread without adding flour where you don’t want it.
Start by lightly misting your clean counter with water. Use the silicone dough scraper (or a rubber spatula) to gently ease the dough out of the bowl so it lands with the soft top down on the counter and the sticky side up
To Shape a Round Boule: You don’t have to shape dough perfectly to have a great loaf! Picture the dough on your counter as a sort of odd-looking pie. Imagine that it is cut into 8 slices. Now grab the edge of the dough on one imaginary slice and pull it to the middle of the “pie”. Now do that for the other seven “slices”.
As you pull each edge to the middle pinch it into the center of the “pie”. You will start to see a sort of flat ball forming.
Once you have brought all eight sides of the pie to the middle you should have a more or less tight ball of dough. Gently lift the ball of dough and put it into the banneton or bowl. Keep the pinched part as the top for now. It will become the bottom before baking so any odd-looking parts will be hidden.
If it looks a little flat after you put it into your shaping container you can pull the pie tightening trick again.
To Shape an Oval Batard: The easiest way to shape a batard is to make a dough taco! Gently slide your hands under the left and right of the dough. Bring your hands together to fold the dough into a big taco shape. You are just making a big fold – not smashing the dough. Gently set it into the banneton with the folded side up. (This side will become the bottom of your loaf later.)
Pinch the seam together all the way along the taco.
Practice Is Key
The first loaf you shape will feel awkward and weird. I promise that after you shape a few more it starts to feel very natural and sane!
One challenge with sourdough is that you only get to shape a loaf each time you bake. If you want more shaping practice you can always grab some Play-doh and try pretend shaping. This can build your confidence and move you more quickly to the point where shaping feels like second nature.
Step 5: Long Cold Rise (Overnight Proof)
Cover your dough and place it in the refrigerator for a slow, cold fermentation.
This step:
- Deepens flavor
- Improves structure
- Makes scoring easier
- Gives you flexibility in baking timing
Long ferment sourdough is left for 36 hours at this stage. It will have a more sour flavor and form more of a skin making it easier to score.
I like a medium ferment and a mild flavor so I put mine into the fridge in the evening and leave it 12-16 hours until I bake it the next morning. This gives me a nice flavor and good crust without having to wait a full 36 hours.
Step 6: Preheat Your Oven
This is not a “wait until it feels hot” situation—this is a full commitment preheat.
Place your Dutch oven inside the oven and preheat it for a full hour. With a timer. If you are using a pizza stone on the bottom rack it gets preheated too.
A properly preheated Dutch oven = better oven spring and a better crust.
Feel free to hop in the comments and tell me I’m crazy but I will just tell you it takes one to know one…
Step 7: Scoring Your Bread
Scoring is more than just making your bread look beautiful. It is actually a vital step in the baking process. When your dough hits the hot oven, the gases inside expand rapidly. This is called “oven spring.” If you don’t provide a designated “escape route” by cutting the surface of the dough, the bread will burst at its weakest point, often resulting in lopsided loaves or “blowouts.”
I have a complete guide to 10 Simple Sourdough Scoring Designs here with every detail you want about scoring sourdough!
Right before baking sprinkle the bottom of your loaf with rice flour and turn your dough out onto parchment paper.
At a minimum you need to make an expansion score so the bread has somewhere to, well, expand!
Use one hand to hold tension on the dough and use the other to take a sharp knife or a bread lame (specialized razor blade for bread) to make a quick decisive slash from top to bottom. Don’t hesitate – just slash with panache! Go about 1/4″ deep at a 90 degree angle.
Beyond that you can get as fancy as you want but the one expansion score is key.
Step 8: Bake the Bread
Use the parchment paper as handles and carefully place the dough into your hot Dutch oven, spritz well with a misting spray bottle, cover with the lid, and bake.
The first part of baking is all about steam—this is what allows the bread to rise fully before the crust sets.
After the first 30 minutes remove the lid, spritz again and then lower the temperature to bake another 15 minutes until the bread is deep golden and crusty.
Step 9: Cool (Do Not Skip This)
This is the hardest step for a lot of us. *raises hand*
Fresh bread smells incredible. It’s tempting to cut right in. But cutting too early releases steam and will make your bread gummy.
Let it cool completely before slicing. Crazy enough but the bread actually continues to cook inside of the loaf at the beginning of it’s time out of the oven!
Yes, it’s annoying. Yes, it matters. And yes—I absolutely ignored this advice on my first few loaves and regretted it every time.
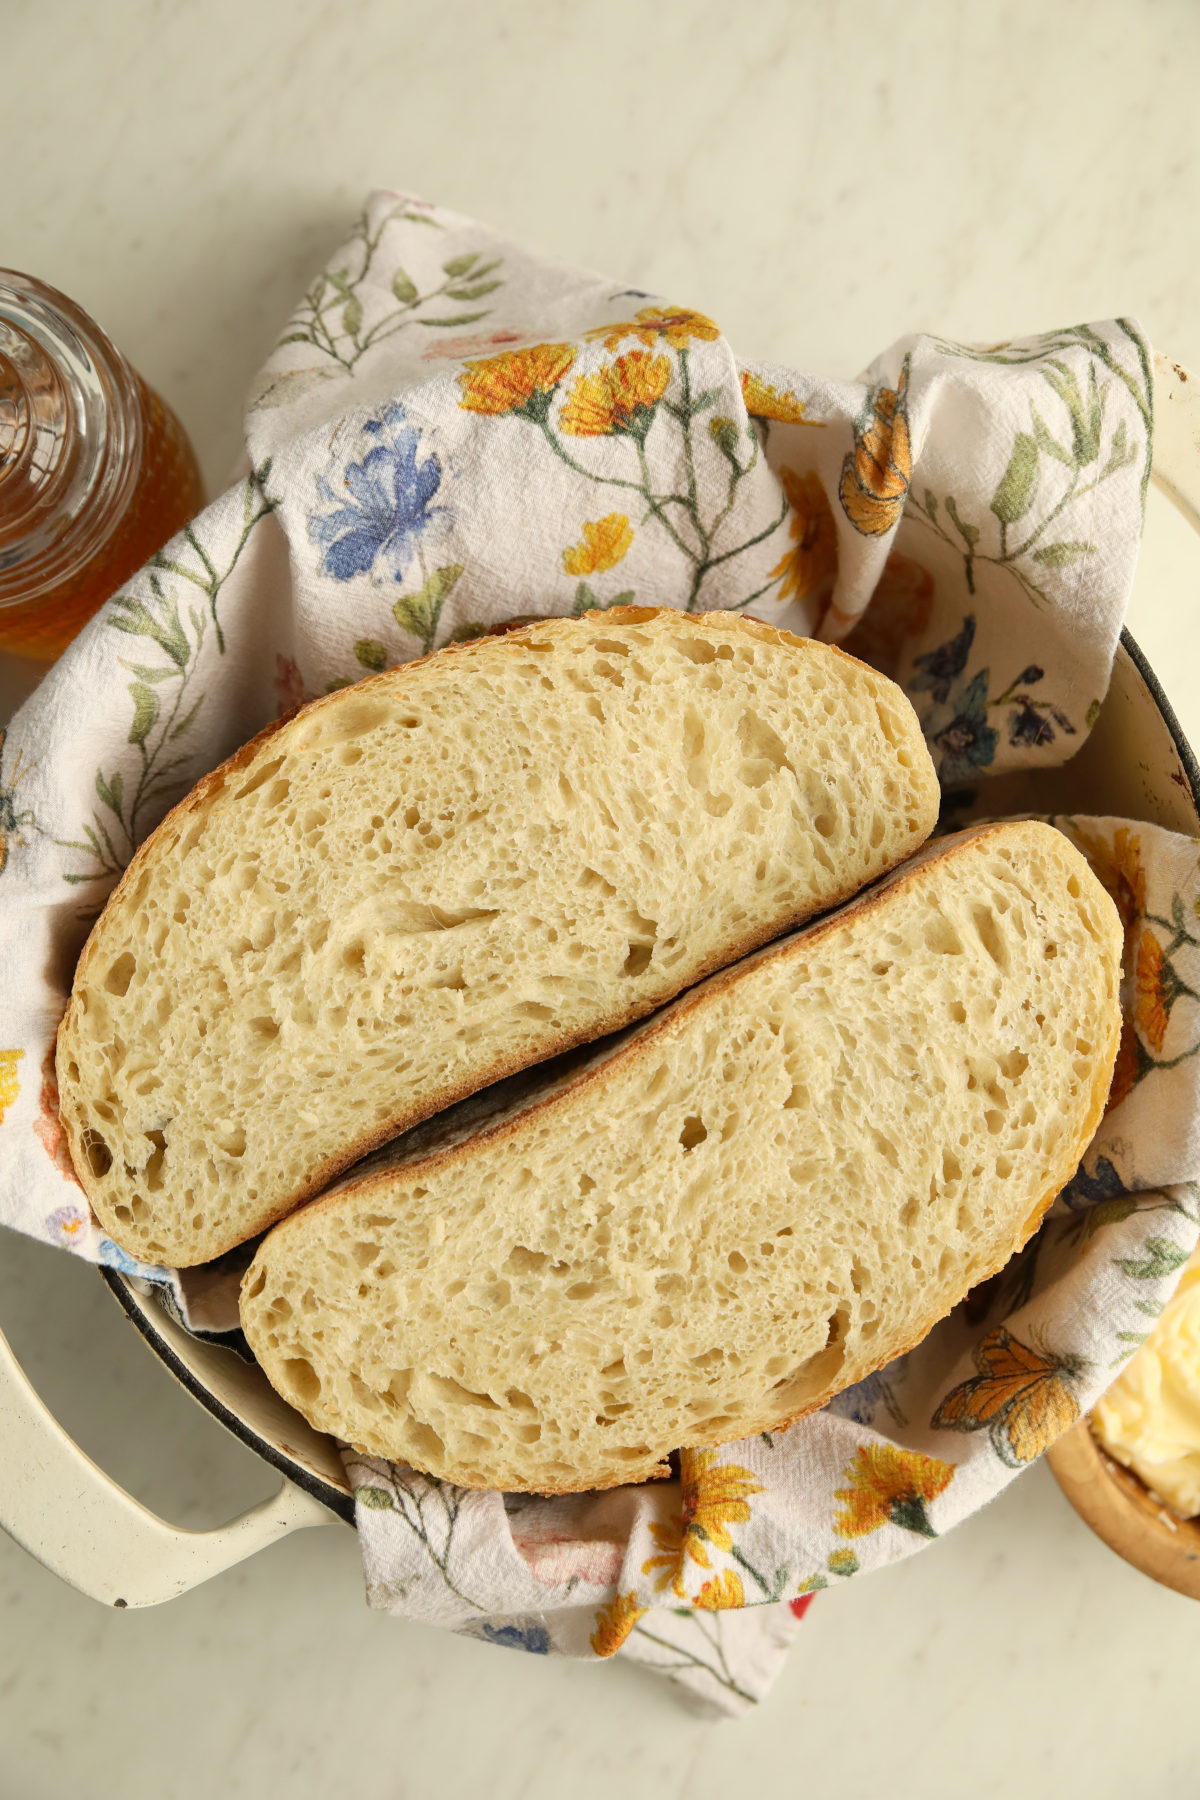
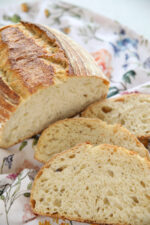
How beautiful your bread looks if you wait to cut it until it is cool.
Easy Sourdough Bread Recipe Ingredients
This sourdough bread keeps things simple on purpose. You don’t need anything fancy—just a few basic ingredients and a starter that’s ready to do its job.
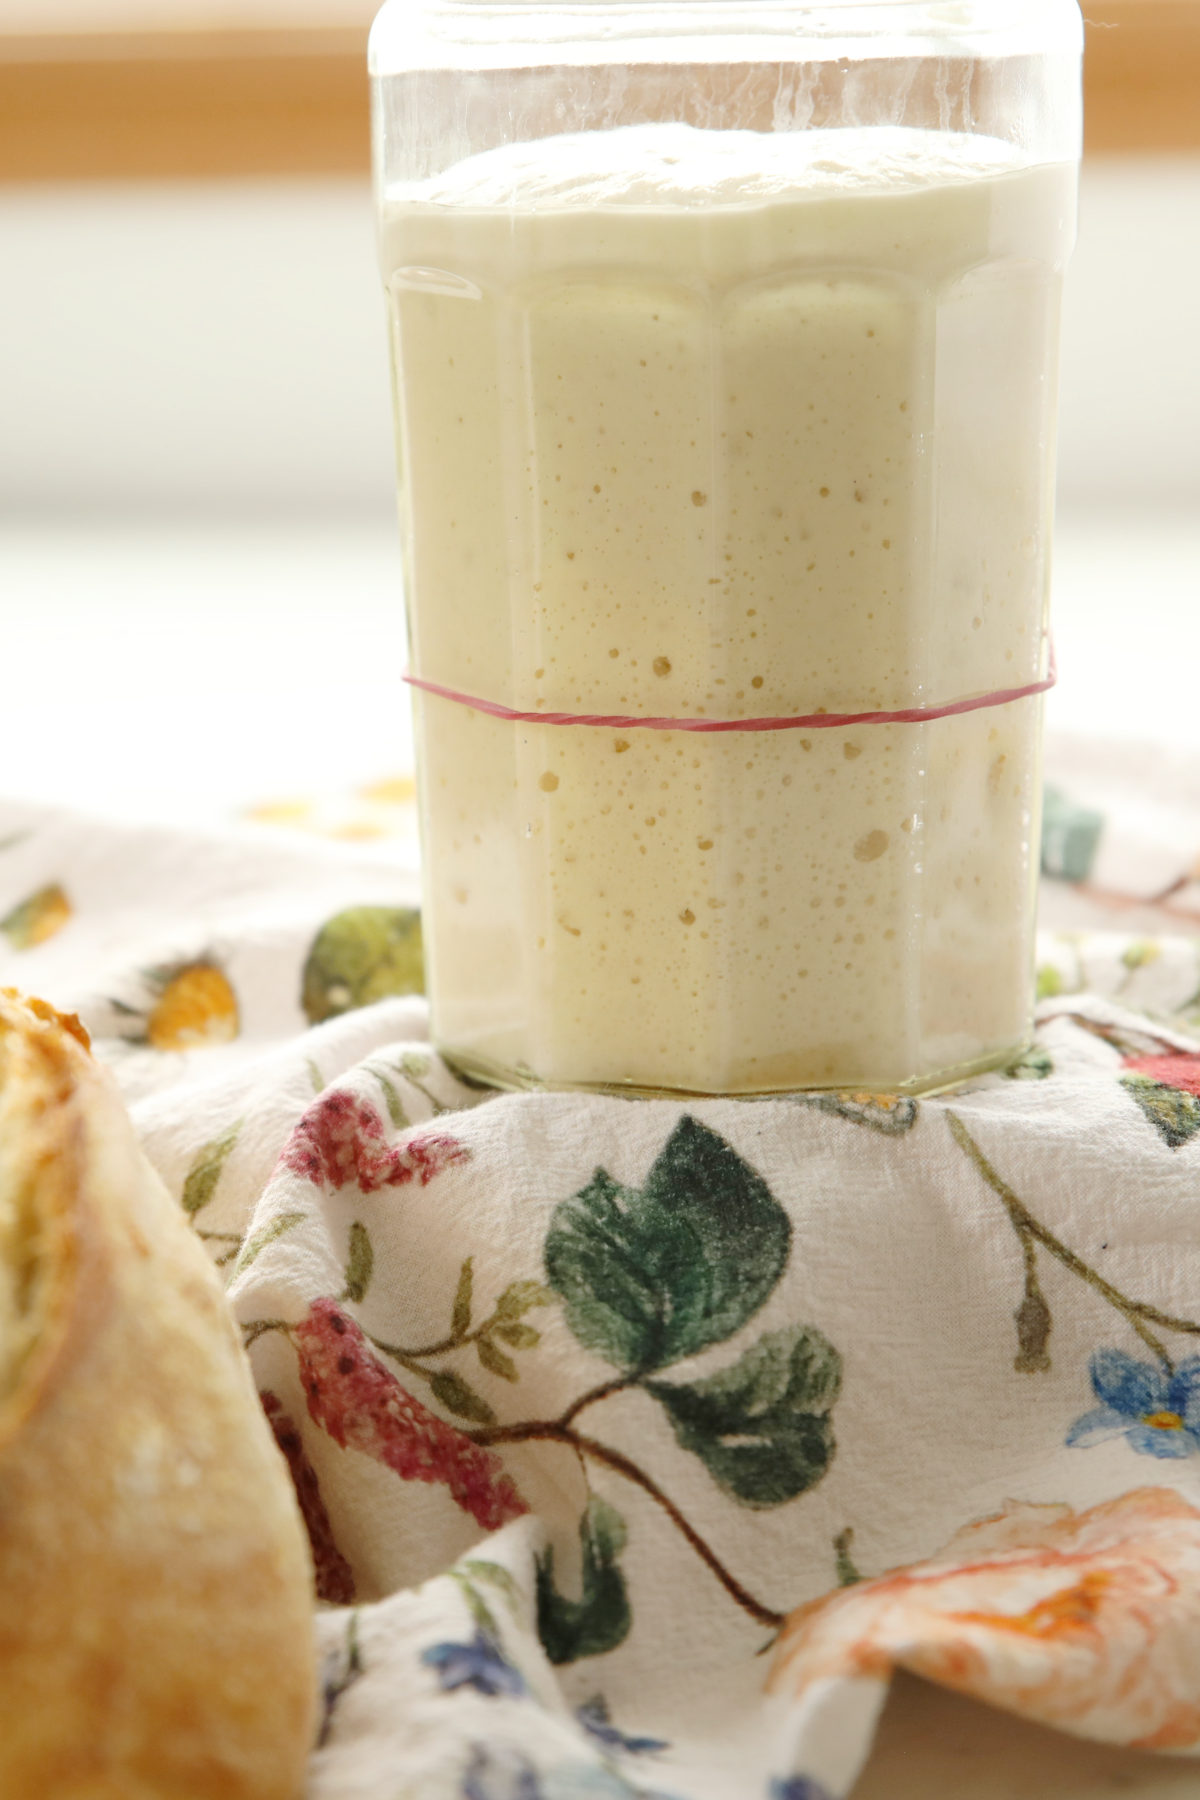
Starter that is fed and active – ready for baking! Note it has doubled and looks slightly rounded on top.
Sourdough Starter (Active and Bubbly): Your starter is the heart of this bread, so let’s talk about what “ready” actually means. Get my complete guide on sourdough starter here.
A healthy, active starter should look:
- At least doubled in height (mark where it is when you feed it and watch for that double spot!)
- Bubbly and airy (you should see lots of tiny bubbles throughout)
- Recently fed and at or near peak (usually 4–8 hours after feeding, depending on temperature and starter strength)
- Puffy and slightly domed on top (not collapsed or liquidy)
- Smell-wise: pleasantly tangy, like yogurt or mild vinegar—not harsh, overly sour, or acetone-like
If your starter is sluggish or flat, the dough will usually follow suit—so this step really matters.
Bread Flour: I built this recipe to use a nice strong bread flour. From a baking perspective, bread flour gives you more structure and a slightly chewier loaf. It’s the easiest and most fail safe option for beginning sourdough bakers. I’m using Turkey Brand because my Costco carries it but any bread flour will work well for you.
Tap Water: Simple, room-temperature water works best. If your tap water is super heavily chlorinated, filtered water can help your starter and dough stay happier. I address this in more detail in the sourdough starter guide.
Salt: Salt isn’t just for flavor—it also strengthens the dough and helps control fermentation so everything develops evenly. Please don’t swap for iodized table salt or some other random salt.
Pro Tip about Salt: I often see new bakers grab for their pink Himalayan or Real Salt. I know those are SO tasty but if they see a pink streak of salt later they often mistake it for mold and panic. Save the confusion and skip the pink salt until you know sourdough well enough to not get thrown by an unexpected pink streak!
Rice Flour (for dusting): This is one of my favorite small but meaningful choices in this recipe. Instead of using regular flour for dusting your banneton basket or bowl / towel, I use rice flour, and here’s why:
- Prevents Sticking and Burning: Rice flour doesn’t absorb moisture the same way wheat flour does, so it creates a drier barrier that helps prevent the bottom of the loaf from sticking or over-browning. (My amazing friend, Holly, from Risen Artisan Sourdough taught me to use rice flour on the bottom of my loaves and it was a game changer!)
- Cleaner, More Beautiful Finish: It gives that signature artisan look without the heavy, dusty flour coating you sometimes see on sourdough.
- Helpful for Some Dietary Preferences: Some people choose sourdough because they’re trying to reduce unfermented gluten exposure, and rice flour keeps the exterior dusting gluten-free and simple.
It’s a small swap, but it makes a noticeable difference in both appearance and handling. Make sure to get a rice flour meant for baking and not something more powdered for Asian cooking. I use the Bob’s Red Mill option because it is easy to get nationally.
Most Important Sourdough Tools
You can absolutely start baking sourdough with the tools already in your kitchen. There are a few things that you need but most are optional – helpful but not something you have to buy before you begin. I have a complete Sourdough Tool Guide here with everything you might consider and what you should not buy. It has all the brands I suggest and details if you need more information.
Large Clear Glass Bowl (2-3 quart size)
I encourage a clear glass bowl for watching your dough. You can actually see exactly what the dough is doing as it rises. You’ll notice bubbles forming, the dough relaxing, and fermentation happening in real time—which is incredibly helpful when you’re learning. You can also buy whatever clear glass bowl you want at a thrift store if you don’t have one!
Kitchen Scale
This is the hill I will die on. Ingredients measured in cups are not precise enough for sourdough. Volume and weight measurements are different for flour, water and salt! You will have struggles and outright failures. Scales start under $10. Don’t try sourdough without one.
Banneton Basket (or towel-lined bowl)
A banneton basket helps the dough hold its shape during the final rise and allows enough air flow to develop a beautiful skin that becomes your crust. I suggest a 9″ or 10″ diameter round for this recipe. (If you get an oval buy a 10″.)
If your banneton is brand new it can be misted with water and then well dusted with rice flour. This helps season it.
Sometimes new bakers get some dough stuck to the basket (it shouldn’t but if it does) you can gently hand wash it with water and a plastic bristle brush. Don’t use soap and make sure it gets completely dry after even if that means a 200F oven for a bit. Otherwise enjoy the good build up of rice flour seasoning and just tap out loose chunks if needed.
If you don’t have a banneton just use a similar size bowl lined with a clean kitchen towel that’s been well rubbed with rice flour or flour to prevent sticking.
Dutch Oven (5-6 quart size)
This is what gives sourdough its signature oven spring and crackly crust. The enclosed heat and steam environment mimics a professional bread oven and helps the loaf rise beautifully before the crust sets. I’ve done crazy things with my home oven (baking with lava rock for example) to try to replicate a great sourdough crust without baking it in a container and nothing replaces a Dutch oven style container with a lid.
If you’ve ever wondered how sourdough gets that gorgeous blistered crust—this is the reason. However, you can also use a cheap little roaster pan like this if you don’t have a Dutch oven. I think it is more important to just start baking than to buy all the perfect tools before you even try!
Parchment Paper
A small but mighty helper. It makes it easier to transfer your dough into the hot Dutch oven without deflating the dough. I Kirkland but whatever your grocery store sells can get you started.
Mesh Hair Nets AKA Bouffant Caps
Ok, hear me out here… One of the tricky things for beginners is getting the dough back out of the banneton basket. Hairnets are amazing for that! I 100% recommend grabbing some while you are learning and lots of bakers use them for LIFE so be ready to get hooked.
I absolutely use these over and over more than 10x per net so they last a LONG time. Sorry to be the one to tell you but the liner that came with your banneton basket is basically clutter in your kitchen. It is useless. There just isn’t enough air flow to your loaf.
Plastic Shower Caps
Did I mention sourdough gets weird sometimes? I legit put my dough on a hairnet and cover it with a shower cap. Plastic wrap works fine but it gets annoying pretty darn fast. I use disposable shower caps to cover my bread at every stage until it goes in the oven and I’m a huge fan. It works great and is so easy to get on and off quickly. Some people like to get reusable shower caps but I like to write on mine because I so often have five or more loaves going at once and I’m recipe testing so disposable is my friend. I hang them to dry and use them for many loaves before they tear.
Pizza Stone
If you don’t have a pizza stone don’t run out and buy one today! But some ovens are a little more “special” than others. A pizza stone is very helpful in preventing the bottom of the loaf from overbrowning or outright burning.
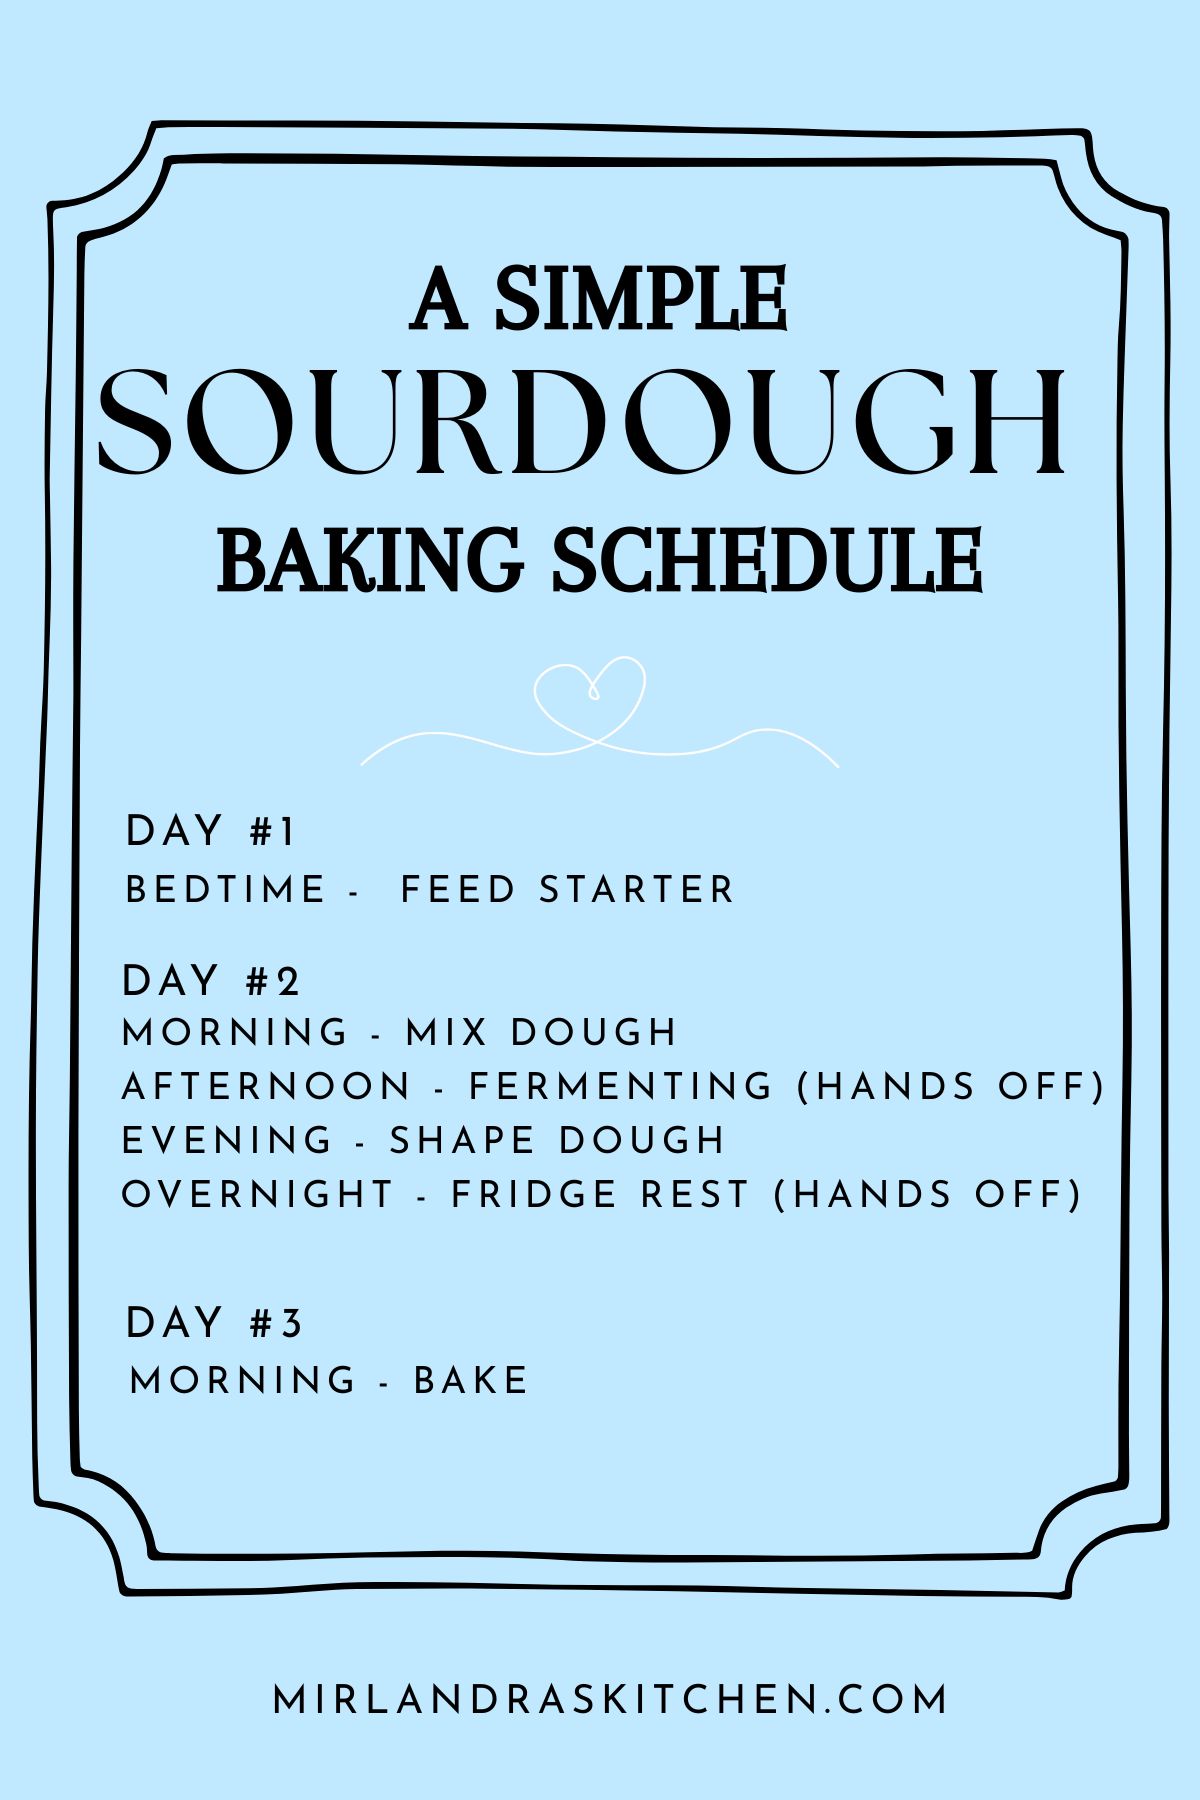
Before You Start: A Simple Sourdough Schedule
One of the best ways to get great sourdough bread is to think through the timeline in advance so you are not taken by surprise. This simple sourdough schedule is one example of how a sourdough might fit well into your life! Within this basic example there is a lot of hands off time and flexibility in timing.
Keep two things in mind for this schedule:
-
Most of the time, your dough is just sitting on the counter doing its thing—no babysitting required.
- Once you feel comfortable with sourdough it is easy to bake two loaves every time! Eat one and put one in the freezer. They thaw out beautifully!
Mirlandra’s Recipe Tips
Sourdough is not as complicated as the internet makes it out to be. These are my best tips for succeeding the first time! And yes, you CAN succeed the first time!
Tip #1: Use active starter. Make sure it is fed and doubled. If the starter isn’t active you don’t have wild yeast and nothing else you do will matter.
Tip #2: Read the recipe. From start to finish. Make sure you understand the timeline. One of my worst rookie mistakes when I started sourdough was trying it on a busy day and starting late in the day! While you are learning start by feeding your starter the night before and then be available the nest day to watch what happens. One of my first loaves was SO dense because I didn’t have time to finish the right steps so I actually just tried switching some things around to see if it might work. Yeah… Edible but not great. The timing isn’t complicated but it does matter.
Tip #3: Use a scale. Please use a scale. Oh, did I mention you need a scale? FYI – get a scale. Call your mom and ask her to get you a scale. Just use the scale…. You can start with a $10 version but use it. No scale = no good bread. The end. No arguments. (I have a four year old – I’m a well seasoned debater. You will lose 😉
Tip #4: Beginners tend to under ferment dough. But I personally know it is possible to maybe go to dinner and then get to having a great time and come home a lot later than intended. I have come home to a giant balloon ball of dough before. Whoops! Go ahead and continue through – it will be dense and possibly flat but you can still cube it up for French toast casserole or bread pudding! Crotons? Just know it happens and you are learning. Give yourself some grace and try another loaf!
Final Tip: Enjoy yourself. Bread is life giving and nourishing. The process can bring great joy and excitement or it can hit your perfectionism trigger and make you into a nut. I suggest choosing option A and finding joy in it! Sourdough has a lot to teach you about patience and process and fulfillment if you are open to the adventure of it.
Final Thoughts on Starting to Bake Sourdough
There are a ton of great recipes for sourdough bread but I’ve tried to make this the beginner guide I wish I had started with. I hope it gets you off to the best possible start.
Start here. Get comfortable with this recipe and then go adventuring! I have lots of fun recipes you can experiment with and they are all broken up into beginner and intermediate categories so you can work with recipes at your current comfort level.
From here I suggest trying your hand at sourdough sandwich bread – easy and beautiful loaves perfect for PBJ or toast and branching out into sourdough focaccia which is so tasty and rewarding with little effort. (In this case I mean no kneading, no stretch and folds and no shaping!)
After you have made a few loaves sourdough will become another life rhythm in your world and you will feel more confident that you might expect!
Easy Sourdough Bread Recipe for Beginners
Ingredients
- 350 g lukewarm water
- 100 g active sourdough starter fed and happy
- 500 g Bread Flour
- 10 g fine grain sea salt
Instructions
Autolyze - Mixing the Dough and Resting It Before Stretch and Folds
- In a large mixing bowl, add the water, starter, flour, and salt. Mix with a dough whisk or wooden spoon until you get a shaggy dough. Make sure all the flour is mixed in so there are no dry patches left.
- Cover the bowl with plastic wrap and let it rest on the counter for about 1 hour.
Stretch & Folds - Creating Structure (See video tutorial here if needed.)
- Get your hands wet to prevent sticking. In the bowl, grab one side of the dough and pull gently until the dough starts resisting you. You can use your other hand to keep the other side of the dough in the bowl. Fold the dough in half back into the bowl.
- Rotate your bowl ¼ turn and do another stretch and fold. Continue to rotate ¼ turn each time until you have completed four stretch and folds in total. This is considered 1 set of stretch and folds.
- It might be helpful to make a checkmark each time you complete a set of stretch and folds so that you know where you are in the process.
- Cover the dough and let it rest for 30 minutes.
- Do this three more times for a total of four sets of stretch and folds over about two hours.
Warm or Room Temperature Rise (Called Bulk Ferment)
- Cover your dough and let it rest at room temperature or a warm place. This could take 6 hours or 12. The temperature of your home and strength of your starter will decide how long this takes.
- I suggest taking a quick photo of how your dough looks at the start of the warm rise period. Check on your dough every few hours while you are learning.
How to Know When the Dough is Done with the Warm Rise:
- Timers are for checking on the dough. But your job is to learn how to read the dough! It will tell you when it is ready. Watch for these four things:
- Did the dough double? If it did not, do not move on.
- Does the dough look pillowy and like a soft marshmallow?
- If you gently shake the dough, does it jiggle a little bit?
- Can you see big bubbles through the sides of the bowl and lots of little ones?
- When you can see these four things happening, move on to shaping your dough.
Shaping The Dough
- After the dough has doubled, begin the shaping process on a clean counter.
- A 10” banneton basket is a perfect shaping container but if you don’t have one see Note #2 on how to use a bowl.
- If you are using a disposable hair net (see post) line the banneton with it. Then sprinkle rice flour liberally on it.
- Now we are going to shape the dough gently into a round loaf called a boule. (To shape the dough into an oval batard please see Note #3.)
- The goal of shaping is to create surface tension in the dough while protecting the gases and air bubbles that formed during the bulk ferment.
- Grab your dough scraper and use a spray bottle to lightly mist the counter, scraper and your hands.
- Use the silicone dough scraper (or a rubber spatula) to gently ease the dough out of the bowl so it lands with the soft top down on the counter and the sticky side up
- To Shape a Round Boule: You don’t have to shape dough perfectly to have a great loaf! Picture the dough on your counter as a sort of odd-looking pie. Imagine that it is cut into 8 slices. Now grab the edge of the dough on one imaginary slice and pull it to the middle of the “pie”. Now do that for the other seven “slices”.
- As you pull each edge to the middle pinch it into the center of the “pie”. You will start to see a sort of flat ball forming.
- Once you have brought all eight sides of the pie to the middle you should have a more or less tight ball of dough. Gently lift the ball of dough and put it into the banneton or bowl. Keep the pinched part as the top for now. It will become the bottom before baking so any odd-looking parts will be hidden.
- If it looks a little flat after you put it into your shaping container you can pull the pie tightening trick again.
Cold Ferment AKA The Long Cold Rise
- Loosely cover the dough in its shaping container.
- Put your container of dough into the fridge. You can leave it there for up to 36 hours but as little as 5 hours. See Note #4 to learn more about time.
Preparing Your Oven and Pan
- Set the top rack of your oven at a comfortable height to fit your Dutch oven.
- Place your Dutch oven with its lid on the top rack of your oven.
- If you have a pizza stone set it on the bottom rack of your oven.
- Preheat your oven to 450F with this equipment IN the oven. Set a timer and let everything preheat for a full hour so the oven and pot are really good and hot.
- Leave your dough in the refrigerator until the last minute for the best oven spring (rise).
Baking Time!
- After the preheat, cut a piece of parchment paper long enough to create handles to lift your dough into the hot Dutch oven.
- While the dough is still in the shaping container sprinkle rice flour on the exposed top to prevent burning and sticking.
- Center the parchment paper on the dough and put a hand on top of the parchment paper and one on the bottom of your container. Gently flip the container so that the shaped dough is sitting on the parchment.
- (If the dough does stick some to the edge of the banneton, it will be ok. Use your fingers to loosen it until it comes out. Using a mesh hair net liner prevents this.)
- Score your bread with at least one long slash so the bread can expand correctly. You can use a lame, sharp knife or clean razor blade. (My complete guide to scoring bread can be found here.)
- Safety Note: Please be very careful – this Dutch oven is now crazy hot and oven gloves are a really helpful safety tool to keep you from burning yourself. I use a baking rack to set my Dutch oven on while I’m putting the dough in.
- Put on your oven gloves and remove your Dutch oven from the oven. Use the parchment paper as handles to gently set the dough into the hot Dutch oven.
- Spritz your dough all over with a nice mist of water, put the lid back on the Dutch oven and then put the Dutch oven back into the oven.
Timing Your Bake:
- Bake for 30 Minutes with the lid on at 450F.
- Remove the lid, spritz the dough quickly with water again and leave the lid off for the rest of the bake. Turn the oven down to 410F. Bake 10-15 more minutes until the top is as dark as you want it.
- If you are concerned about the bread being done, you can use a digital cooking thermometer to double check. The internal temperature for baked sourdough bread is 205F - 210F
After The Bake:
- After baking, use your oven gloves to remove the loaf from the Dutch oven right away and set it on a baking rack to cool.
- Leave the Dutch oven and pizza stone in the oven to cool down slowly. (Quick temperature changes can cause things to crack.) Open the oven a few inches if you want things to cool off faster.
- Sourdough bread continues to cook after being removed from the oven. If you cut it while it is still warm the bread will be gummy. I suggest waiting at least 3 hours before slicing. (I do love to eat hot bread but I save that for yeast bread instead of doing it with my sourdough loaves.)
Helpful Recipe Notes
Your Rating Matters
When you leave a comment or star rating, it means more than you might think. It helps me understand what you’re enjoying, builds trust for other readers, and supports real, tested cooking content. If you have a moment, I’d truly appreciate you sharing your experience. - Mirlandra
Nutrition Estimate
A Note on Nutrition
Nutritional info is an imperfect estimate. Please take it with a grain of salt.
New to sourdough? Start Here! How To Feed Sourdough Starter Beginners Guide Easy Sourdough Bread Recipe for Beginners (Artisan Loaf)
Monica Lim says
Love all her recipes! Mirlandra has inspired me to start sourdough and looking forward to using this recipe!
Mirlandra Neuneker says
Thank you! That is really high praise 🙂
Suey says
So thorough! A very well thought out recipe for the home baker! thanks Mirlandra!
Mirlandra Neuneker says
You are most welcome! I’m so glad you are enjoying it!!!!