Great sourdough bread starts with a healthy starter. Keeping one alive is actually easier than most people think—it doesn’t have to run your life. This beginner’s guide covers everything you need to know about how to feed a sourdough starter without losing your mind. My own starter, Henrietta, has lived in my kitchen for years, and we’ve definitely found a rhythm that works for both daily baking and those times when I need to put her “on ignore” for a while.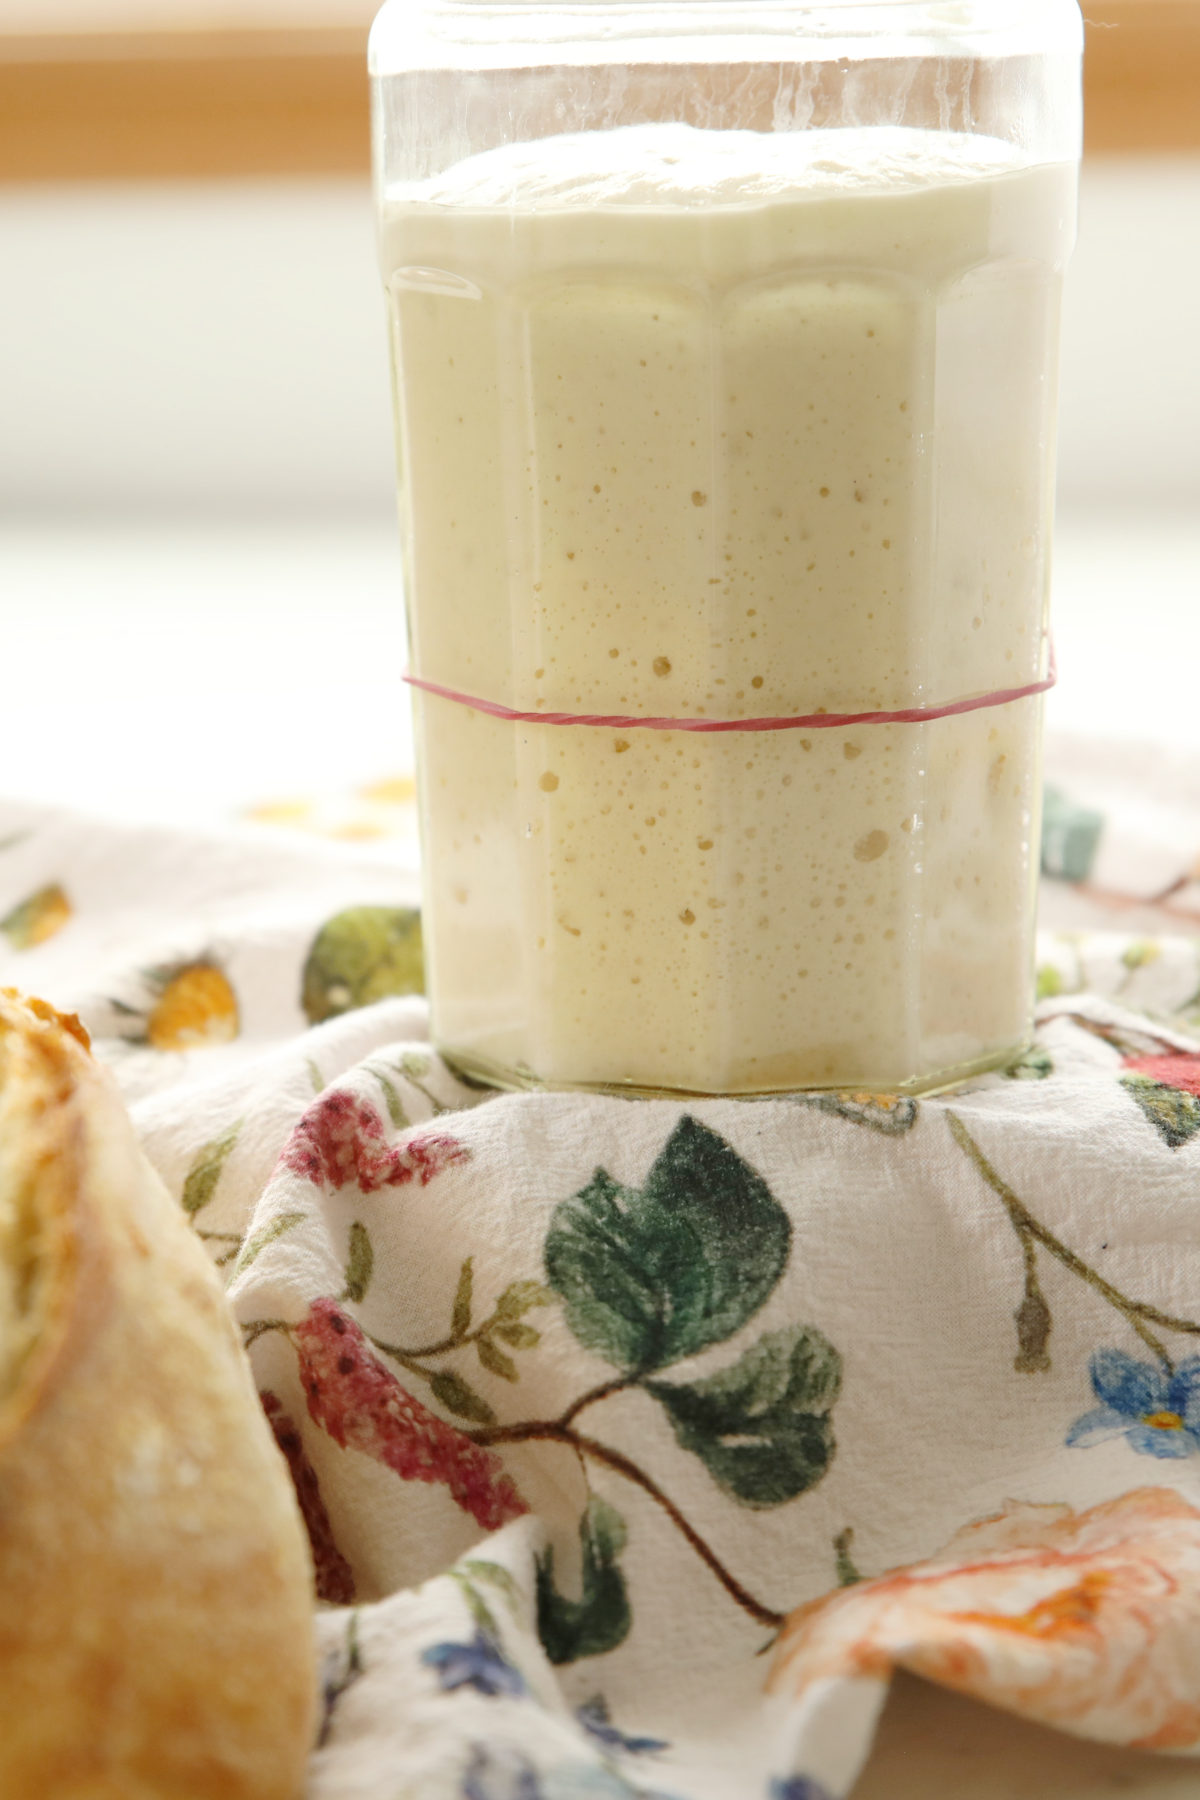

New to sourdough? Start Here! How To Feed Sourdough Starter Beginners Guide Easy Sourdough Bread Recipe for Beginners (Artisan Loaf)
What Is A Sourdough Starter?
At its most basic level, a sourdough starter is a simple mix of flour and water that captures wild yeast and beneficial bacteria from the flour and the air around it.
This natural duo works together to create fermentation, which is the engine that gives sourdough its signature tang and helps your bread rise. Think of it as a natural, “wild” version of those little paper packets of commercial yeast you buy at the store—only with way more flavor and personality.
While your starter is technically “alive,” it isn’t nearly as fragile as people suggest. It’s surprisingly resilient and doesn’t require a degree in microbiology to maintain. As long as you provide that flour-and-water “fuel” every so often, the fermentation process handles the heavy lifting.
You can read more about What Sourdough Bread is here.
What Kind Of Flour Should I Feed My Sourdough Starter? (What If I Run Out)
Want to know my secret? Cheap, unbleached all-purpose flour is the perfect option for your starter. While it’s tempting to think your starter needs “premium” ingredients to thrive, using expensive bread flour is a waste of money.
Bread flour has a higher protein content designed to give structure to a finished loaf of bread, but your starter doesn’t care about structure—it just wants simple starches to eat. Feeding those extra-strong proteins to a jar of yeast is like fueling a lawnmower with rocket fuel; it’s expensive, unnecessary, and won’t make the grass any shorter.
If you happen to run out of AP (all-purpose) flour, don’t overthink it—you can use whole wheat or bread flour for a feeding or two until you get to the store. Just steer clear of self-rising flour or anything with added salt.
A Quick Note on Bleached Vs. Unbleached: This is one of the places where I break the rules because it works best for me! I use bleached AP flour to feed my starter. It isn’t recommended but it works fine for me.
If you ever do have issues with your starter, go back to following the rules until things are working well again for you.
City Water and Hard Water – Do I Have To Give My Starter Bottled Water?
The general recommendation is to use filtered water in your starter for the health of your yeast. While the science is sound, you have more flexibility than people suggest. I live in Idaho and have very hard city water, yet I’ve used it straight from the tap for years with zero issues.
While high chlorine levels can technically slow fermentation, a healthy, established starter is usually tough enough to handle it. If your water smells like a swimming pool, just let a jar sit on the counter overnight to let the chlorine dissipate, or use a simple Brita filter.
“While most starters are tough, The Pantry Mama notes that high levels of chlorine or chloramine in city water can sometimes slow down your fermentation.”
But honestly? If your tap water tastes good enough to drink, it’s probably good enough for your bread. Don’t waste money on plastic bottles if your starter is bubbly and your bread is rising. As always, if you do start having issues, go back to following the “bottled water” rules until things are sorted out.
Measuring Ingredients: How to Feed Sourdough Starter Using a Scale
If you want the honest, long-term wisdom on keeping a healthy starter, here it is: Yes, you need a digital scale. While some people measure with cups or eyeball things until they “feel” right, both methods eventually cause problems. (Get my full sourdough tools guide here with my thoughts on a good scale and other tools!)
Using a scale is superior because weights are deceptively different:
- 1 cup of water: ~237 grams
- 1 cup of flour: ~120 grams (varies wildly by how you scoop)
Because water is nearly twice as heavy as flour by volume, a “one cup of each” ratio is actually a watery, high-hydration mess. For a true equal-weight ratio, you’d need almost two cups of flour for every cup of water.
Eyeballing the texture works for people who’ve been baking for decades—the same people who can probably train children perfectly and throw flawless dinner parties. For the rest of us, eyeballing isn’t reliable. Without consistency, your starter’s health will eventually decline.
Sourdough thrives on consistent ratios; when those get out of whack, your starter’s health declines. A scale removes the guesswork, leads to fewer dirty dishes, and ensures your starter gets exactly what it needs every time.
Pro-Tip: The “One-Jar” Method
To save time and dishes, write the weight of your empty jar on a post-it note in your cupboard. This allows you to measure everything directly in the jar:
- Check your starter: Place your jar on the scale and subtract the jar’s weight to see how much starter you have.
- Discard: Remove starter until you have your target amount (like 100g).
- Add Water: Zero the scale, add your water.
- Add Flour: Zero the scale again, add your flour, and stir.
That’s it! You get perfect ratios every time without dirtying a single measuring cup. A $10 digital scale is the best investment you’ll make for a drama-free kitchen.
How To Feed Sourdough Starter: Feeding Ratios Simply Explained
Sourdough people are always talking about numbers. When I first started doing sourdough it sounded complicated but I quickly learned it is very simple. Most people feed their starter equal parts flour and water. This is called a “one to one-to-one ratio.”
You will see it written out like this, “1:1:1”. This is just shorthand for how much you are feeding your starter. The first number is your starter, the second is water, and the third is flour.
For example, if I have 50 grams of starter and I want to feed a 1:1:1 ratio I feed the starter 50g of water and 50g of flour. This is the standard “maintenance” feeding.
Plenty of sourdough bakers always feed a 1:1:1 ratio. It’s easy, consistent and it works well in most baking rhythms. But it is not the only way to feed a starter. Sometimes people suggest a 1:2:2 or even 1:5:5 ratio. All this means is that you are giving a small amount of starter a much larger meal.
You might do this if you won’t be home for a while or if your kitchen is very warm and the yeast is eating through its “fuel” too fast. Think of it like this: a bigger meal takes longer to eat, which buys you more time before the next feeding. If you do choose to use a bigger ratio you may need to adjust the recipe you are using. Standard sourdough recipes assume a 1:1:1 ratio unless they say otherwise.
How to Feed A Sourdough Starter for Daily Baking
This is my exact rhythm when I’m baking every day. I usually feed at night and bake in the morning, but you can flip this to fit your schedule. The key is just making sure you have enough starter ready when you want to mix your dough.
- The Quick Math: Decide what you’re baking tomorrow. If you need 300g of starter for your recipes, aim to make 360g total. That extra 60g ensures you have a “leftover” stash to keep the cycle going.
- The Overnight Feed: I weigh out my starter and feed it a 1:1:1 ratio (for example: 120g starter, 120g water, 120g flour). Stir it up, mark the level on the jar, and let it sit at room temperature overnight. (See above to learn about ratios.)
- The Morning Bake: By morning, the starter has peaked and is ready to work. I weigh out what I need for my recipes and get started. (Note: I skip the “float test”—it’s not nearly as accurate as just seeing that your starter doubled or tripled in the jar).
- Sending it “Home”: Once I’ve taken what I need, the jar needs to go back to its home. If I’m baking again tomorrow, it stays on the counter. If I’m taking a break, it goes straight into the fridge. Simple as that.
Consistency vs. Reality
The internet is full of “vocal” people who insist on rigid schedules and charts. While sourdough thrives on precision, it doesn’t have to be a burden. You can be flexible and fit this into a normal life without feeling like you’ve adopted a puppy that needs around-the-clock care. If you miss a feeding or change your timing, don’t sweat it—your starter is tougher than you think.
How To Feed A Sourdough Starter For Weekly Baking (The Fridge Method)
Everyone has a different baking rhythm, and those rhythms change with the seasons of life. Sometimes my schedule is too full for anything “extra” and I hit pause on baking for weeks—or months. That is perfectly fine!
You don’t live to serve sourdough; sourdough lives to serve you. When I’m only baking once or twice a week, my starter (Henrietta) lives in the refrigerator except for the 12–16 hours when I’m actually prepping a loaf.
Here is how I manage it:
Pull it Out (The Night Before): Take your jar out of the fridge. Don’t worry if there is a little hooch on top; just stir it in for a more sour flavor or pour it off to keep your starter’s flavor milder.
The Napkin Math: Decide what you’re baking tomorrow. If your recipes call for 200g of starter, aim to create 260g. This ensures you have 60g left over to go back into the fridge for next time.
The “Big Meal” Feed: Weigh out your starter and feed it a 1:1:1 ratio (see above to learn about ratios). Some people say they need to feed their starter more than once after it has been chilling for awhile in the fridge but my starter is strong and usually revives with one feeding. Stir, mark your jar, and leave it on the counter overnight.
Bake (The Next Morning): By morning, the starter should be bubbly and active. Measure out what you need for your dough and start your bake.
Back to Sleep: Once you’ve taken what you need, take that leftover 50g of “scrapings” in the jar, give it a tiny feeding if you want, or just pop the lid on and put it straight back in the fridge. It’s now ready to wait for you until next week.
Pro-Tip: If you forget to bake and your starter sits on the counter for two days, don’t panic. Just feed it again, wait for it to bubble, and then put it back in the fridge. It’s much harder to kill a starter than the internet makes it seem!
The “Discard” Myth: Why We Don’t Throw Out Starter
Do you really have to throw away your starter? Absolutely not. In sourdough baking, “discarding” is just a fancy word for repurposing. Instead of the trash, your extra starter goes into a “Discard Jar” in the fridge to wait for recipes your family will love.
The Exponential Problem
Remove a portion before every feeding or prepare to be overrun. Sourdough grows exponentially. Without discarding, a small jar becomes a gallon almost overnight. Within a week, you’d need a five-gallon bucket—and a second mortgage—just to keep up with its appetite!
Why It Matters
Think of your Discard Jar as cold storage. Moving a portion out of your active jar does two things:
- Saves Money: It keeps your daily feeding amount small and affordable.
- Balances Acidity: It prevents old acid from building up and weakening your yeast.
From Trash to Treasure
Once your starter is established, that refrigerated jar is gold. It’s the secret ingredient for blueberry muffins, brownies, crackers, pancakes, or chocolate chip cookies where you want that tangy sourdough flavor but don’t need the rise. You aren’t wasting food; you’re just saving it for a different recipe.
What Kind of Jar Should I Use For My Starter? Does It Need be To Be Airtight?
While there are plenty of “starter kits” for sale, most experienced bakers just use a wide-mouth pint or quart mason jar. They are inexpensive, easy to stir, and simple to clean. Any clear glass jar allows you to see the starter’s activity to know what it is doing.
To track growth, skip the fancy gear—just use a rubber band or a Sharpie to mark the starting line. Sharpie wipes off easily with a damp rag later.
If you use a mason jar, I prefer the plastic screw-top lids, but the traditional two-piece metal lids work fine too. When I’m testing recipes or baking in bulk for this “Sourdough For The Rest of Us” series, my starter (Henrietta) lives in a one gallon glass cookie jar! However, unless you’re baking five loaves a day, you don’t need anything that big!
One pro-tip: Avoid bail-top (clamped) jars. They look cute on a counter, but the lids are awkward to wash and easy to chip in the sink. I broke my first one in less than a month. Keep it simple and stick to something you can easily get a scrub brush into.
Do I Need to Use a Clean Jar Every Time?
I have met amazing sourdough bakers who put their starter in a clean sanitized jar every day and amazing sourdough bakers who haven’t washed their primary sourdough jar in over 12 years.
Both options work fine and one isn’t better than the other based on science. I fall somewhere in the middle. I occasionally wash my jar but I don’t do it on any real schedule. Don’t tell anybody but that’s about how I wash my kids too…
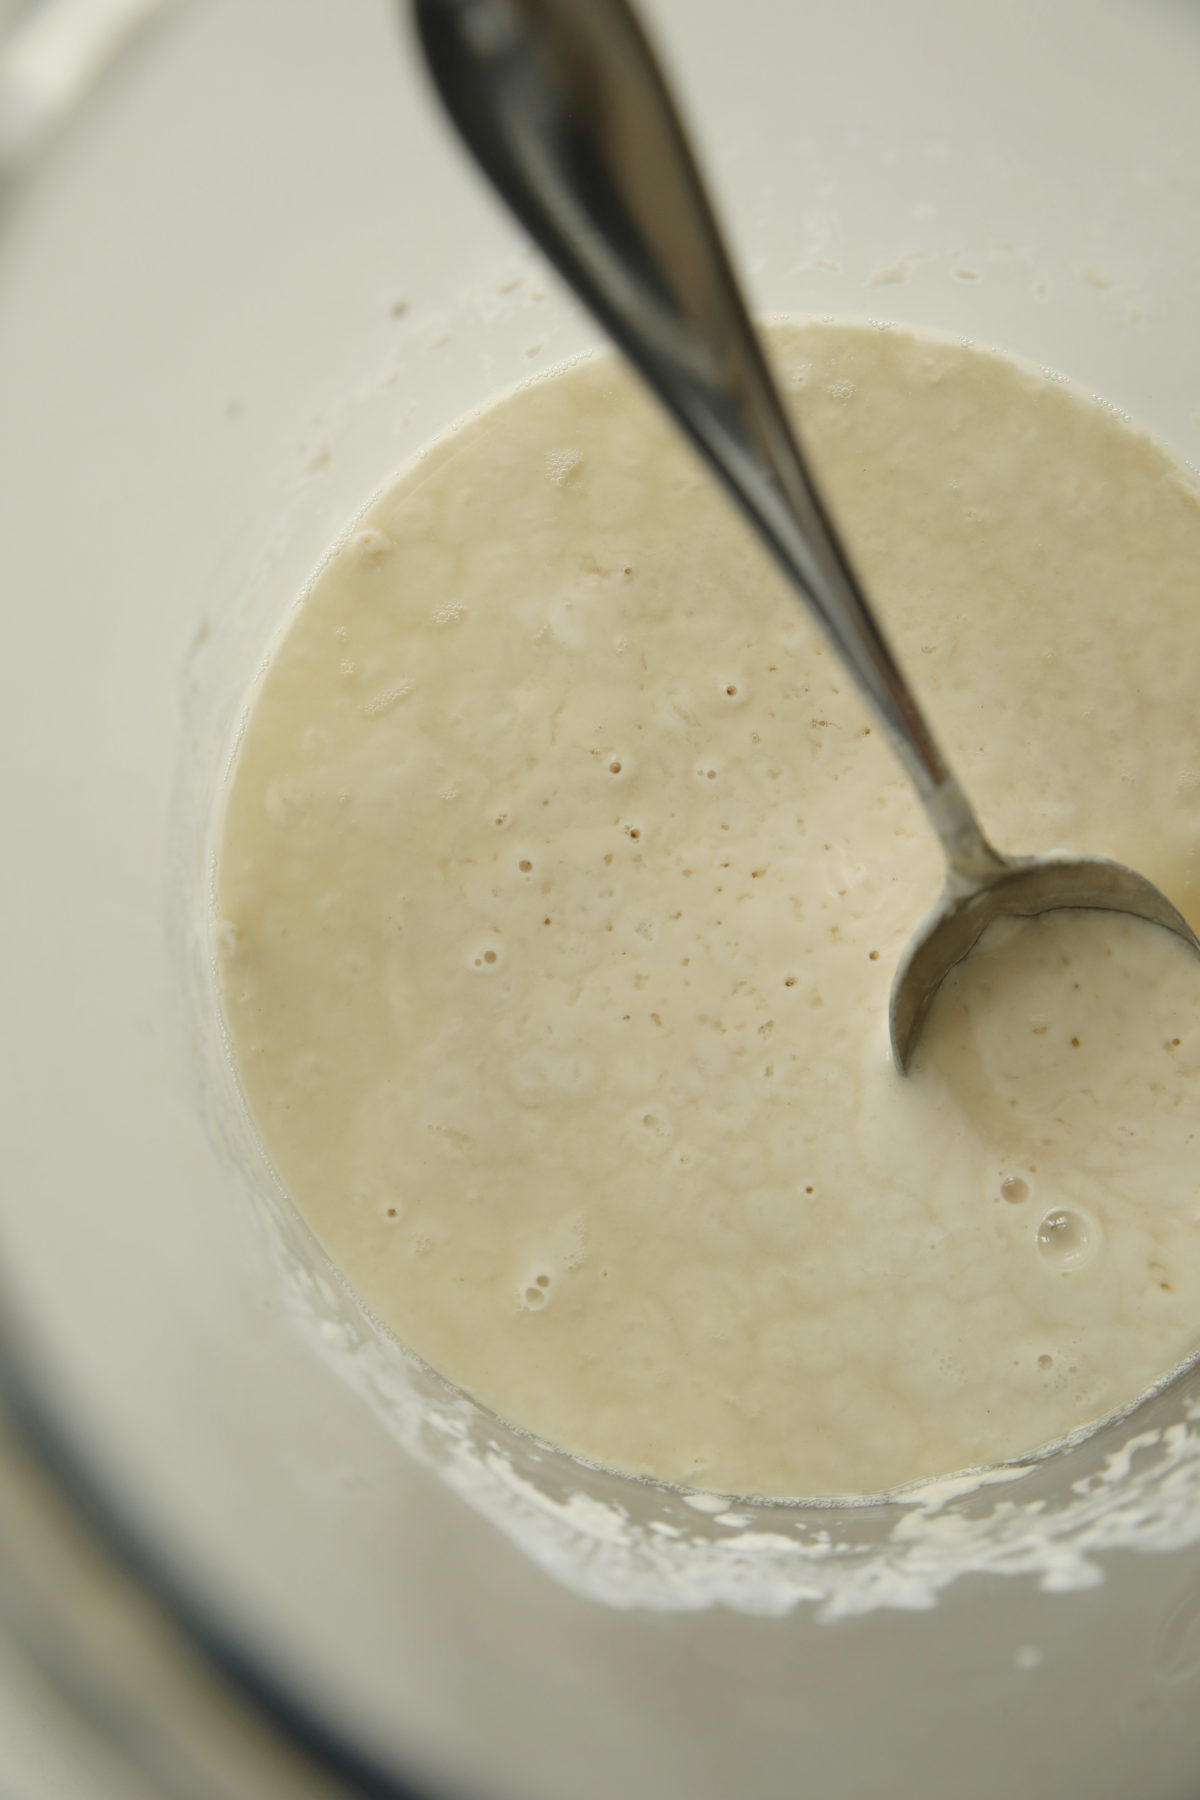
What Should My Starter Smell Like?
Don’t panic if your starter doesn’t smell like a fresh bakery right away. A healthy starter should generally smell tangy, fruity, like ripe bananas or like yeasty beer. As it sits between feedings, that scent will sharpen into something more like vinegar—that’s just the “sour” in the sourdough doing its job.
However, keep an eye (or nose) out for two red flags.
- If it smells like acetone or nail polish remover, it’s starving; just give it a fresh feeding. Sometimes I leave my starter on the counter and forget to feed it for a few days (real life, people)! It gets hungry and stinky but there is no need to toss it. After a feeding it is right back on track. Occasionally missing a few feedings at room temperature storage won’t do any real harm.
- If it smells truly foul, like rotting gym socks or trash, something has gone wrong. Usually, a few days of consistent feedings will reset the aroma, but as always: if it looks fuzzy or smells like decay, toss it and start over. I know making that choice feels tricky in the early weeks of sourdough baking but I promise you will get more comfortable making that choice.
This is my starter, Henrietta, after living unfed for a few days on the counter. You can see the Hooch starting to gather on the top.
Hooch VS. Mold – How Do I know If It’s Safe?
If you open your jar and see a layer of dark, clear, or greyish liquid on top, don’t panic—that’s hooch. It’s simply a byproduct of fermentation that tells you your starter is hungry and has run out of “fuel.” You can either stir it back in for a more sour flavor or pour it off. I like a mild starter so I always “dump the hooch” (pour off the liquid down the sink). Either way, it’s perfectly safe; just give your starter a good feeding.
Mold, on the other hand, is a dealbreaker. While hooch is just liquid, mold is fuzzy, furry, or appears in bright colors like pink, orange, or green. If you see actual fuzz or colorful spots on the surface or the sides of the jar, the starter is no longer safe.
Unlike hooch, mold cannot be stirred back in or “saved.” If it’s fuzzy or colorful, toss the whole batch, sanitize your jar, and start fresh. PLEASE don’t be that person that scrapes off the top layer and then uses what is underneath. If you have mold, it is all through and it is not something you should eat!
Did You Know Why We Call IT “Hooch”?!?
During the 1897 Gold Rush, Alaska’s “Sourdough” miners named the boozy, fermented liquid on their starters after Hoochinoo—a potent local liquor. It’s literally the yeast making a tiny batch of “moonshine” because they’re hungry!
Keeping A Stash of Back Up Starter – Because Life Happens
I always keep a little stash of back up starter. At some point most bakers experience some sort of starter mishap. My friend’s husband cleaned the fridge and thought he was throwing out bad food. Glass jars of starter get dropped and broken. Mold happens (though thankfully this is rarer than you would think!) No matter how careful you are, accidents happen. To save yourself the frustration of starting from scratch, you need an insurance policy: a “failsafe” jar in the back of your fridge.
Put about 50 grams of fed starter into a small, clean jar and tuck it away. You don’t need to feed this regularly, but I recommend replacing it with fresh starter every 6 to 12 months just to keep the culture vibrant. Even if it develops a thick layer of hooch or looks gray, the “mother” culture at the bottom is incredibly resilient and can be revived with a few days of feedings. For ultimate peace of mind, you can even smear a little starter on parchment paper, let it dry completely, and store the flakes in a baggie—it will last for years that way.
Meet Henrietta
Did you know it’s a sourdough tradition to name your starter? It’s a nod to the fact that these bubbly cultures are very much alive.
My starter, Henrietta, comes from a great lineage—she’s the “daughter” of my sister-in-law’s starter, Henry. Since then, Henrietta has become a “mother” herself! I’ve shared her with friends, teachers, cousins, and uncles across the country. One friend even kept the name Henrietta for her own batch.
Henrietta is proof that a good starter is resilient, easy to share, and—most importantly—part of the family. She’s also proof that you don’t need a science degree to keep a starter thriving; you just need a simple routine.
Does your starter have a name (or a “family tree”)? Tell me in the comments—I’d love to hear the story!
You’ve Got This – Enjoy Your Sourdough Baking!
At the end of the day, don’t let the internet’s obsession with perfection steal the joy of baking. A sourdough starter is just a simple culture of flour and water—it isn’t a fragile lab experiment. As long as you feed it occasionally, keep a backup stash for emergencies, and store it in the fridge when life gets busy, your starter will be just fine.
These cultures are incredibly resilient and have survived for centuries without fancy equipment or “perfect” conditions. Once you get comfortable with the basics, maintaining your starter becomes just another small kitchen rhythm—like brewing your morning coffee or putting away the groceries. No drama required. Now, grab your flour and your jar, and let’s get baking!
My 3 Easiest Sourdough Recipes To Start With
When you are new to sourdough it really helps to get a few great recipes that are intended for beginners! I suggest you start with these three and then see what else you are excited to try in my Sourdough For The Rest of Us Series.
Soft Sourdough Sandwich Bread – This is a true sourdough loaf that bakes up in a regular loaf pan. It is perfect for sandwiches and toast.
Easy Sourdough Bread Recipe – This is a tasty and simple artisan loaf that introduces you too all the traditional sourdough methods in a easy way. Readers are trying it for the first time and getting beautiful first sourdough loaves with perfect crumb!
Sourdough Focaccia Recipe – Focaccia is the sourdough bread you didn’t see coming. No stretch and folds. No kneading. No special shaping! No Dutch Oven. No scoring!!!! It is simple but amazing.
New to sourdough? Start Here!
How To Feed Sourdough Starter Beginners Guide
Easy Sourdough Bread Recipe for Beginners (Artisan Loaf)
Leave a Reply