Learning stretch and fold sourdough is a simple way to make great artisan bread. I’m going to show you exactly how to do it, step-by-step, so you can feel confident handling your dough from the very first loaf. We’ll also cover the basic science of why we stretch and fold instead of kneading, so you can understand exactly how it helps your bread rise.

New to sourdough? Start Here! How To Feed Sourdough Starter Beginners Guide Easy Sourdough Bread Recipe for Beginners (Artisan Loaf)
Why We Use Stretch and Fold Sourdough (Instead of Kneading)
If you’ve ever made bread with commercial yeast, you know most recipes call for 5-10 minutes of kneading time. Kneading is a great way to build a tight, even crumb in these recipes. For successful kneading to happen, you need some solid elbow grease from yourself or the stand mixer.
However, when it comes to stretch and fold sourdough, we use a different approach that is all about “gentle persuasion.” Instead of the physical workout of traditional kneading, we let time and gravity do the heavy lifting right in the mixing bowl.
The Science of Gluten vs. Gas
The goal of any bread-making technique is to build a gluten structure that acts like a balloon. The gases produced by your starter are the air inside that balloon. If the gluten is weak, the air escapes, and your bread stays flat. Unless you were trying for a flat bread pizza this is not the game plan!
In a typical kneaded bread, we are forcing those gluten strands to bond quickly through friction. But because sourdough dough is often wetter and takes longer to rise, we can use a more relaxed method. By gently stretching the dough and folding it over itself, we align the gluten strands gradually. This creates a strong, organized “web” that traps those gas bubbles as the dough ferments.
I think the method of sourdough stretch and fold is powerful because it doesn’t take the same strength and time commitment as a commercial yeast dough.
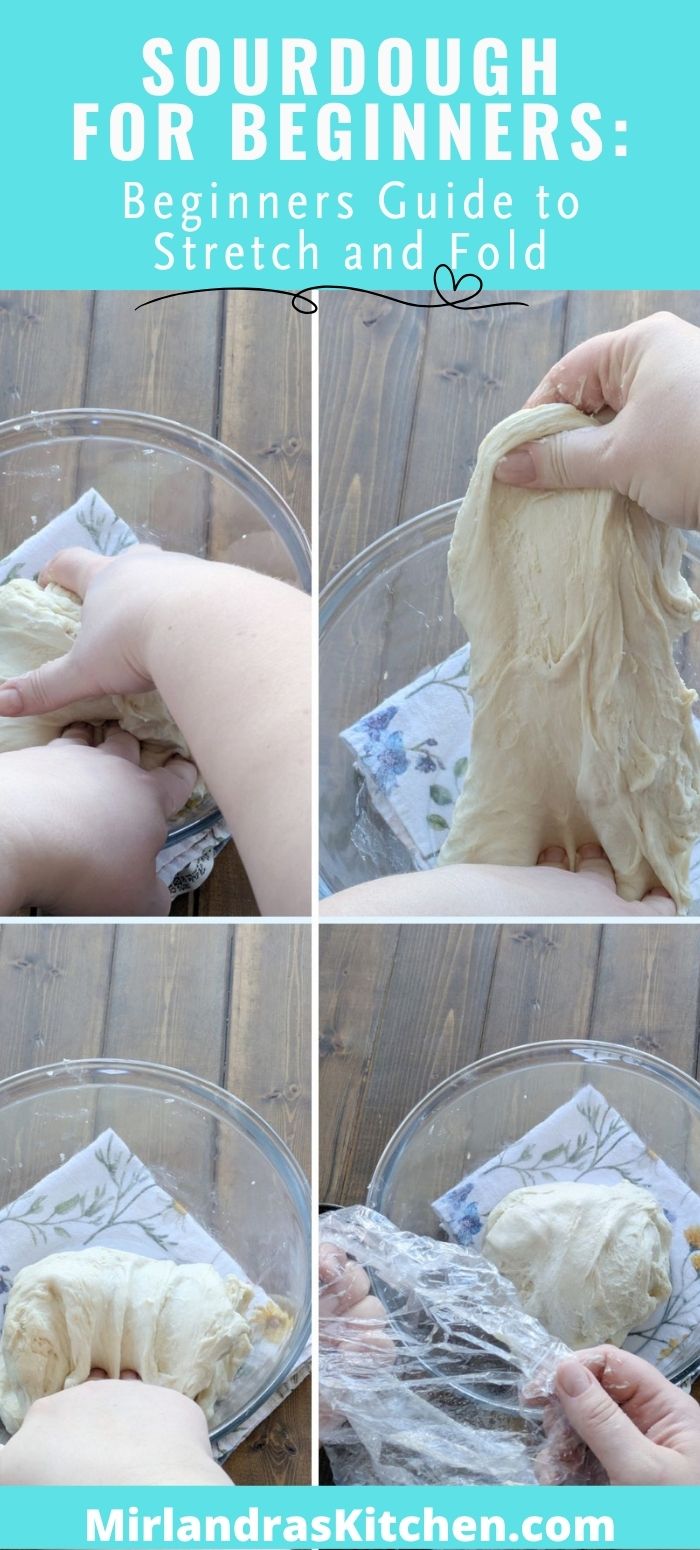
How to Stretch and Fold Sourdough Step-by-Step
Once you understand the “why,” the actual process of how to stretch and fold sourdough is incredibly simple. The best part? You don’t even have to take the dough out of the bowl.
Stretch and Fold Sourdough is going to follow a very similar process for most recipes.
- Wet hands
- Do a set of four stretch and folds
- Wash hands
- Wait about 30 minutes and then start over
- Repeat a total of four times over 2 hours. I promise it is simple!
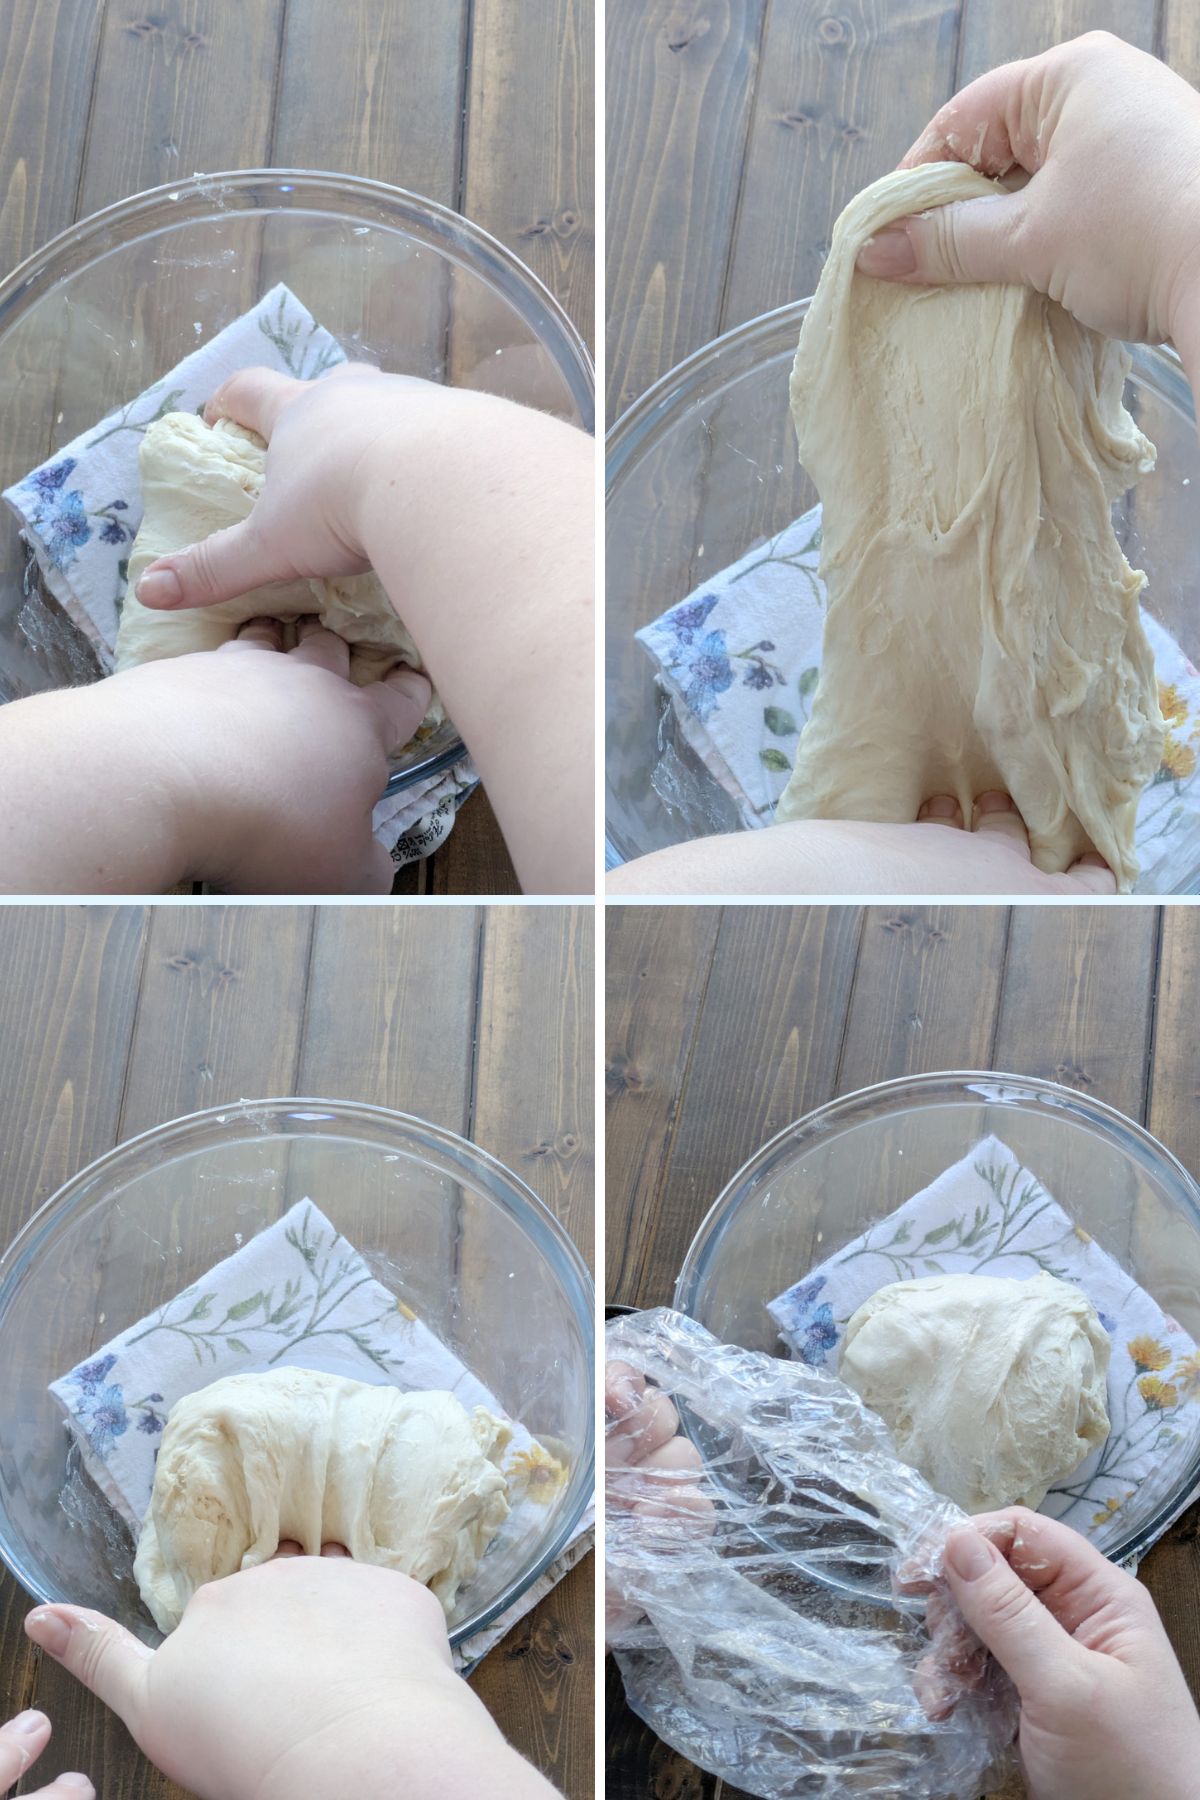
The Secret Ingredient Is Water: Before you touch the dough, dip your hands in a small bowl of room-temperature water. Sourdough is naturally sticky, and while your instinct might be to reach for more flour, water is actually your best friend. It acts as a natural non-stick barrier that keeps the dough in the bowl and off your fingers. This is the single most helpful tip for any beginner.
Stretch and Fold Video Tutorial
The Motions:
- Wet your hands enough to be wet but shake the drips off. We want the nonstick impact without adding a lot of water to the dough.
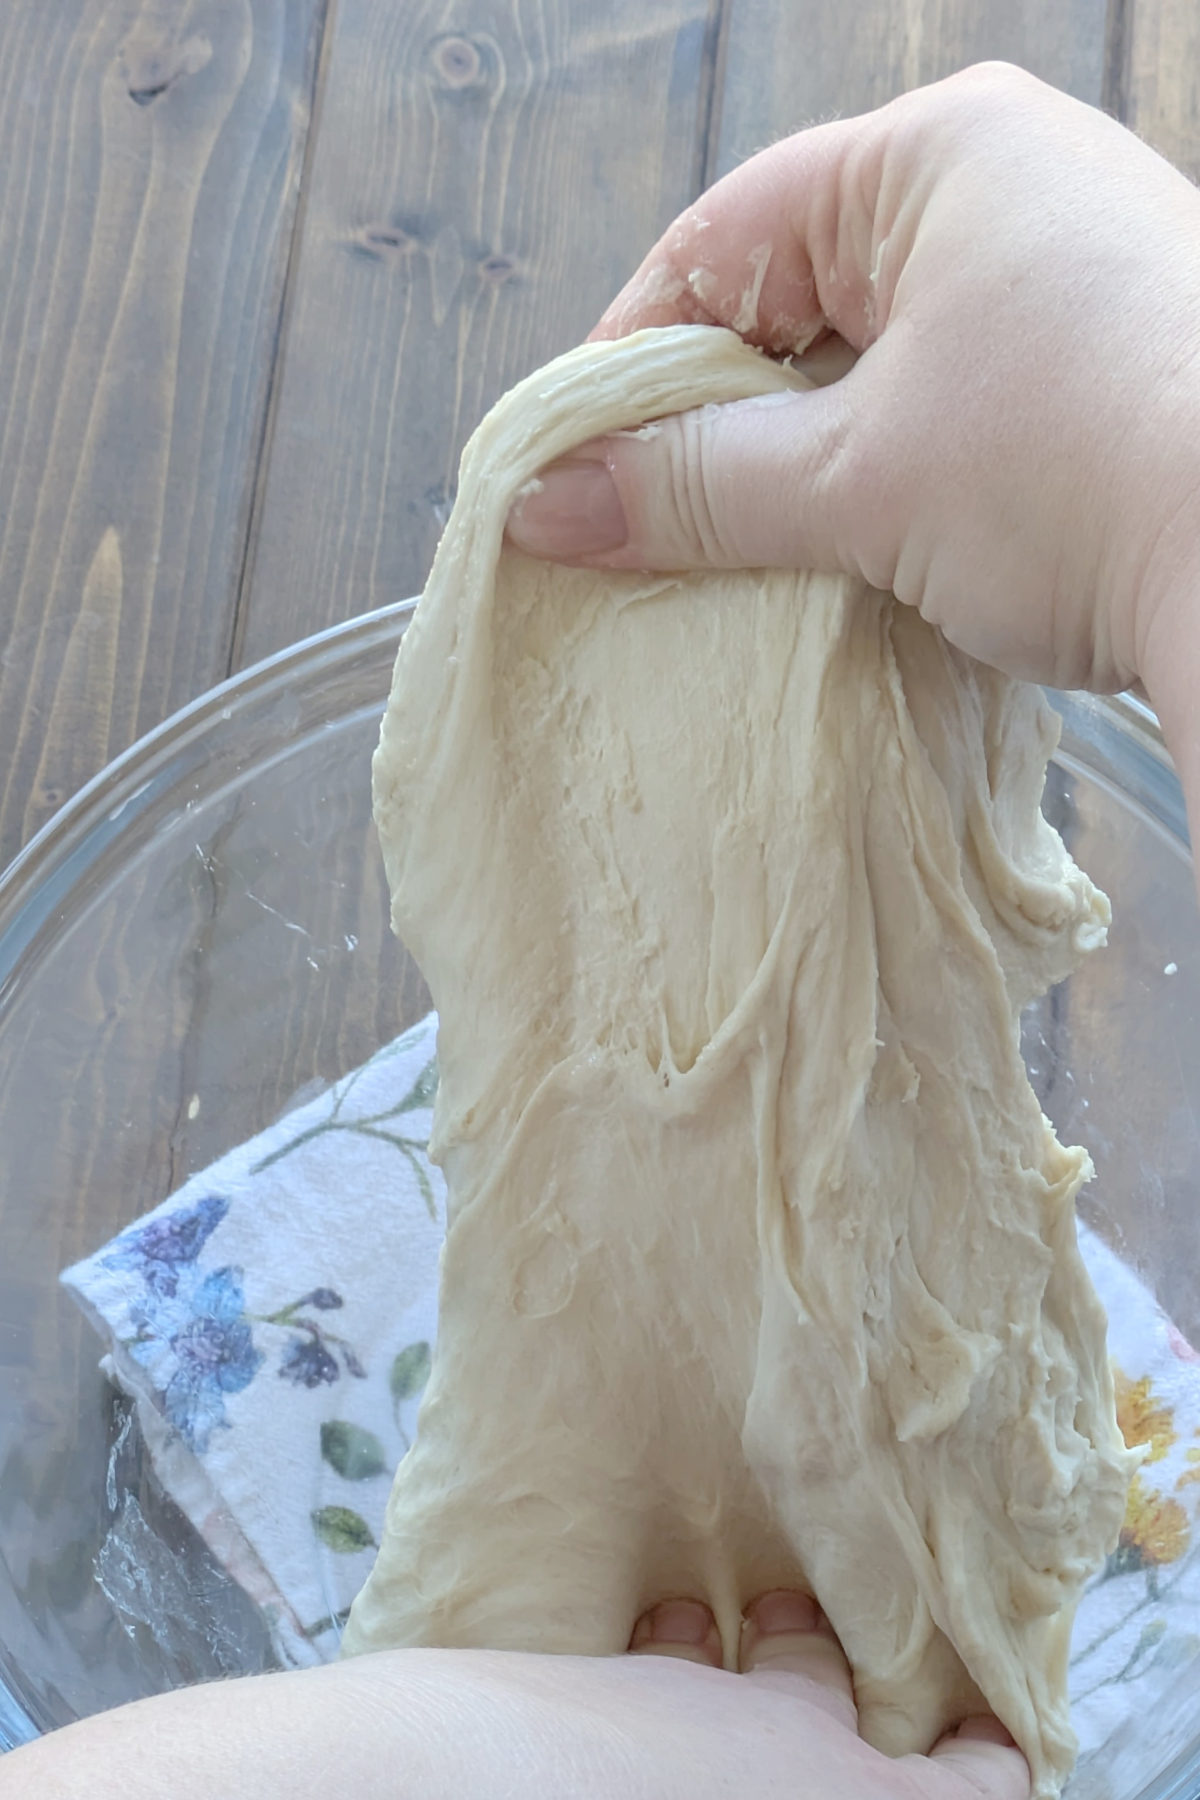
- Reach under one side of the dough, pull it up firmly, and fold it over the center.
- Rotate the bowl ¼ turn (90 degrees) and repeat. You will do this four times until you’ve gone all the way around the dough. This completes one “set” of stretch and folds. Pro Tip: Some people may find it helpful to think of this as a clock face. You do your first stretch and fold at 12 then rotate to 3 for the next one, then 6 and finally the last one happens at 9 on the clock face.
- Let the dough rest covered for about 30 minutes before performing the next set.
What You Will Feel Through Four Sets of Stretch and Folds
- The dough will start very loose and easy to stretch.
- During a set of stretch and folds you will start to feel the dough get tighter. You won’t be able to stretch it as far – that’s ok! Just pull as far as it naturally will go and fold it over.
- If you tried to do another set of stretch and folds 10 minutes after the first set you would notice the dough would be very tough and almost impossible to stretch. Remember time is your friend. Notice how the dough feels after a full 30 minutes. It is much more pliable and ready to work with you.
- By the end of the 4th set of stretch and folds you will notice that the dough is much more structured and developed. It is ready to go to the next step of bulk fermentation where time does the work and you feel quite satisfied to know you are doing absolutely nothing while amazing bread happens!
Pro Tip: If the dough is starting to tear slow down. Stretching takes a few seconds to do a gentle pull. Don’t rush. You want a nice taut stretch but not snapping or tearing. When my dough feels like it is resisting me I “jiggle” or “wiggle” it a little side to side as I pull slowly.
Sourdough Stretch and Fold: When to Stop
One of the biggest questions beginners have is when to stop doing stretch and folds. I’m going to tell you two different things because we know one size fits all is always a trick!
The Absolute Beginner: If you are in your very first loaves of sourdough, I want you to get a good beginner recipe and just follow the stretch and fold instructions. Learn what the recipe is teaching you. Get to know your dough. If something turns out funky in your bake, ask good questions!
Established Beginner: Once you feel like you understand the basic process a little bit and you know what your dough feels like you can start watching your dough more for visual clues. For most people this happens naturally as you become more comfortable with the experience.
The Visual Cues
- The Start: Your dough looks shaggy, lumpy, and “puddles” out to the edges of the bowl.
- The Finish: The dough looks smooth and matte. It should hold itself in a cohesive, rounded ball rather than slumping flat.
The “Muscle” Test By the fourth set of sourdough stretch and folds, the dough should feel like a strong muscle. If you try to pull it and it resists you or immediately wants to snap back, the gluten is developed.
Stretch and Fold Success Tips for the Best Sourdough Crumb
If you want to master the sourdough stretch and fold, keep these three tips in mind:
- Temperature is King: If your kitchen is very warm (above 75°F), your dough will ferment faster and might become slack more quickly. You may need to do your folds every 15–20 minutes instead of every 30.
- Don’t Rush the Rest: The 30-minute rest between sets isn’t for your convenience. That is when “autolysis” continues to happen—the flour is fully hydrating and the proteins are bonding. The rest is just as productive as the fold itself. (Grab my sourdough glossary for beginners here.)
- Be Gentle as You Go: Your first two sets of folds can be relatively firm. However, by the third or fourth set, the dough will have started to accumulate small gas bubbles. Be more gentle during these later sets so you don’t “degas” (aka get rid of the bubbles) the dough and lose that airy structure we’re working so hard to build.
How I Keep Track of Stretch and Folds
I use three different methods to keep track of stretch and folds depending on how many batches of dough I’m doing at once or how crazy my life is. (Three kids can be distracting and I’m here for it!)
The Sharpie: If you are using disposable shower caps or plastic wrap to cover your bowl, try making a check with a sharpie each time you complete a set of stretch and folds.
The Post-It Note: Put a post it on top of or next to your bowl. Make a check mark on your paper each time you complete a set of stretch and folds.
The Double Timer: I set one timer for 30 minutes and a 2nd timer for 2 hours. Every time the 30 minute timer rings I do my stretch and folds and then restart that timer. When the two hour timer goes off I know I’m doing my last set of stretch and folds. (Tip: Most cell phones can run multiple timers at once AND you can label them. I like to write down what my timer is for when I’m cooking!)
Should You Use Gloves for Sourdough Stretch and Folds?
The Day the Water Died: A Sourdough Emergency
I don’t usually wear gloves for my stretch and folds, but life happens. One afternoon, I had multiple bowls of dough going when my husband’s flooring project unexpectedly led to the main water being shut off. There I was with Jalapeño Cheddar dough that needed tending and absolutely no way to wash my hands.
Necessity is the mother of invention, so I grabbed a pair of disposable food-safe gloves, gave them a light misting with my bread-baking spray bottle, and got to work. It worked perfectly! The water mist kept the dough from sticking to the plastic, and I could simply toss the gloves when the set was done.
When to Keep Gloves in Your Sourdough Kit
While I still prefer bare hands most of the time, there are three specific scenarios where using disposable gloves is a total lifesaver:
- Spicy Inclusions: If you are making a Jalapeño or Habanero loaf, gloves are a must. There is nothing worse than finishing a set of stretch and folds and then accidentally rubbing your eye three hours later. Save yourself the “pepper burn” and glove up.
- Cuts and Band-Aids: If you have a fresh cut or are wearing a bandage, gloves are non-negotiable for food safety. It keeps your dough clean and prevents your bandage from becoming a sticky, doughy mess.
- Limited Water Access: Whether your spouse turns off the water for a DIY project, the power goes out, or you’ve (somehow) ended up doing stretch and folds at a park (I don’t judge!), gloves allow you to keep going when a sink isn’t available. It would be “over the top,” generally but perfect in this situation.
Common Questions About Stretch and Fold Sourdough
What happens if you don’t stretch and fold sourdough?
Without these folds, your dough will lack the strength to hold onto the gases produced during fermentation. Instead of rising upward in the oven, the dough will spread outward. You’ll likely end up with a “frisbee” loaf—flat, dense, and without that classic open crumb we all love in stretch and fold sourdough bread. I have seen (and tried) recipes with no stretch and folds. I have yet to be impressed…
However… I do have an amazing beginner level focaccia recipe that has zero stretch and folds!
Can you stretch and fold sourdough too much?
It is difficult to overdo it, but you can “over-work” it. If you continue folding late into the fermentation process, you risk popping the air bubbles that create a light texture. If your dough feels very tight and resists your pull, it’s telling you it has enough strength. At that point, the best thing you can do is walk away and let it rest.
How many stretch and folds should I do and how often?
For most recipes, four sets of folds are the magic number. You generally space these 30 minutes apart. This 30-minute window is vital because it gives the gluten time to relax. If you try to fold too soon, the dough will be too tight and it will put up a fight and then tear. (My sourdough sandwich bread is a fascinating exception to this rule. You get great bread loaves but only do one stretch and fold every 30 minutes instead of a set of four!)
What do I do after stretch and folds are finished?
Once your sets are complete and the dough is smooth, strong, and holding its shape, your active work is done! You simply cover the bowl and let it sit undisturbed in a warm spot. This is the “Bulk Fermentation” phase. You are waiting for the dough to grow in volume before you move on to shaping your loaf.
New to sourdough? Start Here! How To Feed Sourdough Starter Beginners Guide Easy Sourdough Bread Recipe for Beginners (Artisan Loaf)
Do You Have More Questions About Stretch and Folds?
Now that you’ve got the stretch and fold down, you’re ready to bake! If you still have a lingering question or a “what if” about how your dough is behaving ask me!
Leave a comment below so we can get it sorted out together. Otherwise, grab your starter and let’s head over to the Sourdough for Beginners guide to get that first loaf started!
Kathi says
After 4 stretch and folds, how long to wait before baking
Mirlandra Neuneker says
That is going to depend on the recipe you are using! Most recipes you will need to allow the dough to ferment at room temperature for 5-8 hours. I have a really simple recipe here that you can try if you want: https://www.mirlandraskitchen.com/easy-sourdough-bread-recipe/
With this recipe I usually do my stretch and folds during the first part of the morning and then the dough ferments until it has doubled and is jiggly. In the later afternoon or early evening I shape it and put it into the fridge for the night and then bake the next day. Your exact timing will depend on the temperature of your house and a some other factors. The recipe I linked here has lots more information to help you figure that out!