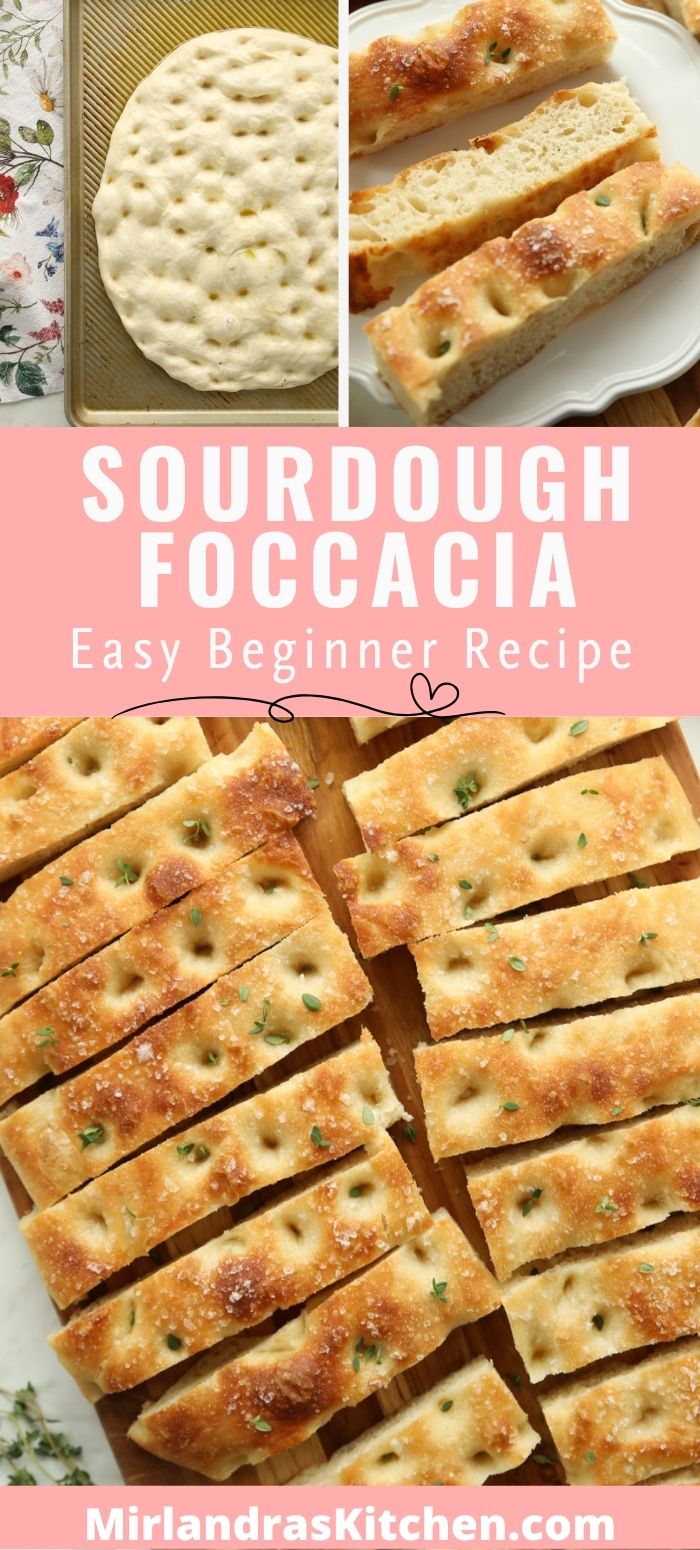
This sourdough focaccia recipe is addictively easy —no kneading, no stretch and folds, and no shaping! It’s just a simple dough that turns into golden, bubbly bread. With a hands-off method and flexible timing, you’ll get crispy edges, an airy center, and a serious “I made this?!” moment on your very first try.

New to sourdough? Start Here! How To Feed Sourdough Starter Beginners Guide Easy Sourdough Bread Recipe for Beginners (Artisan Loaf)
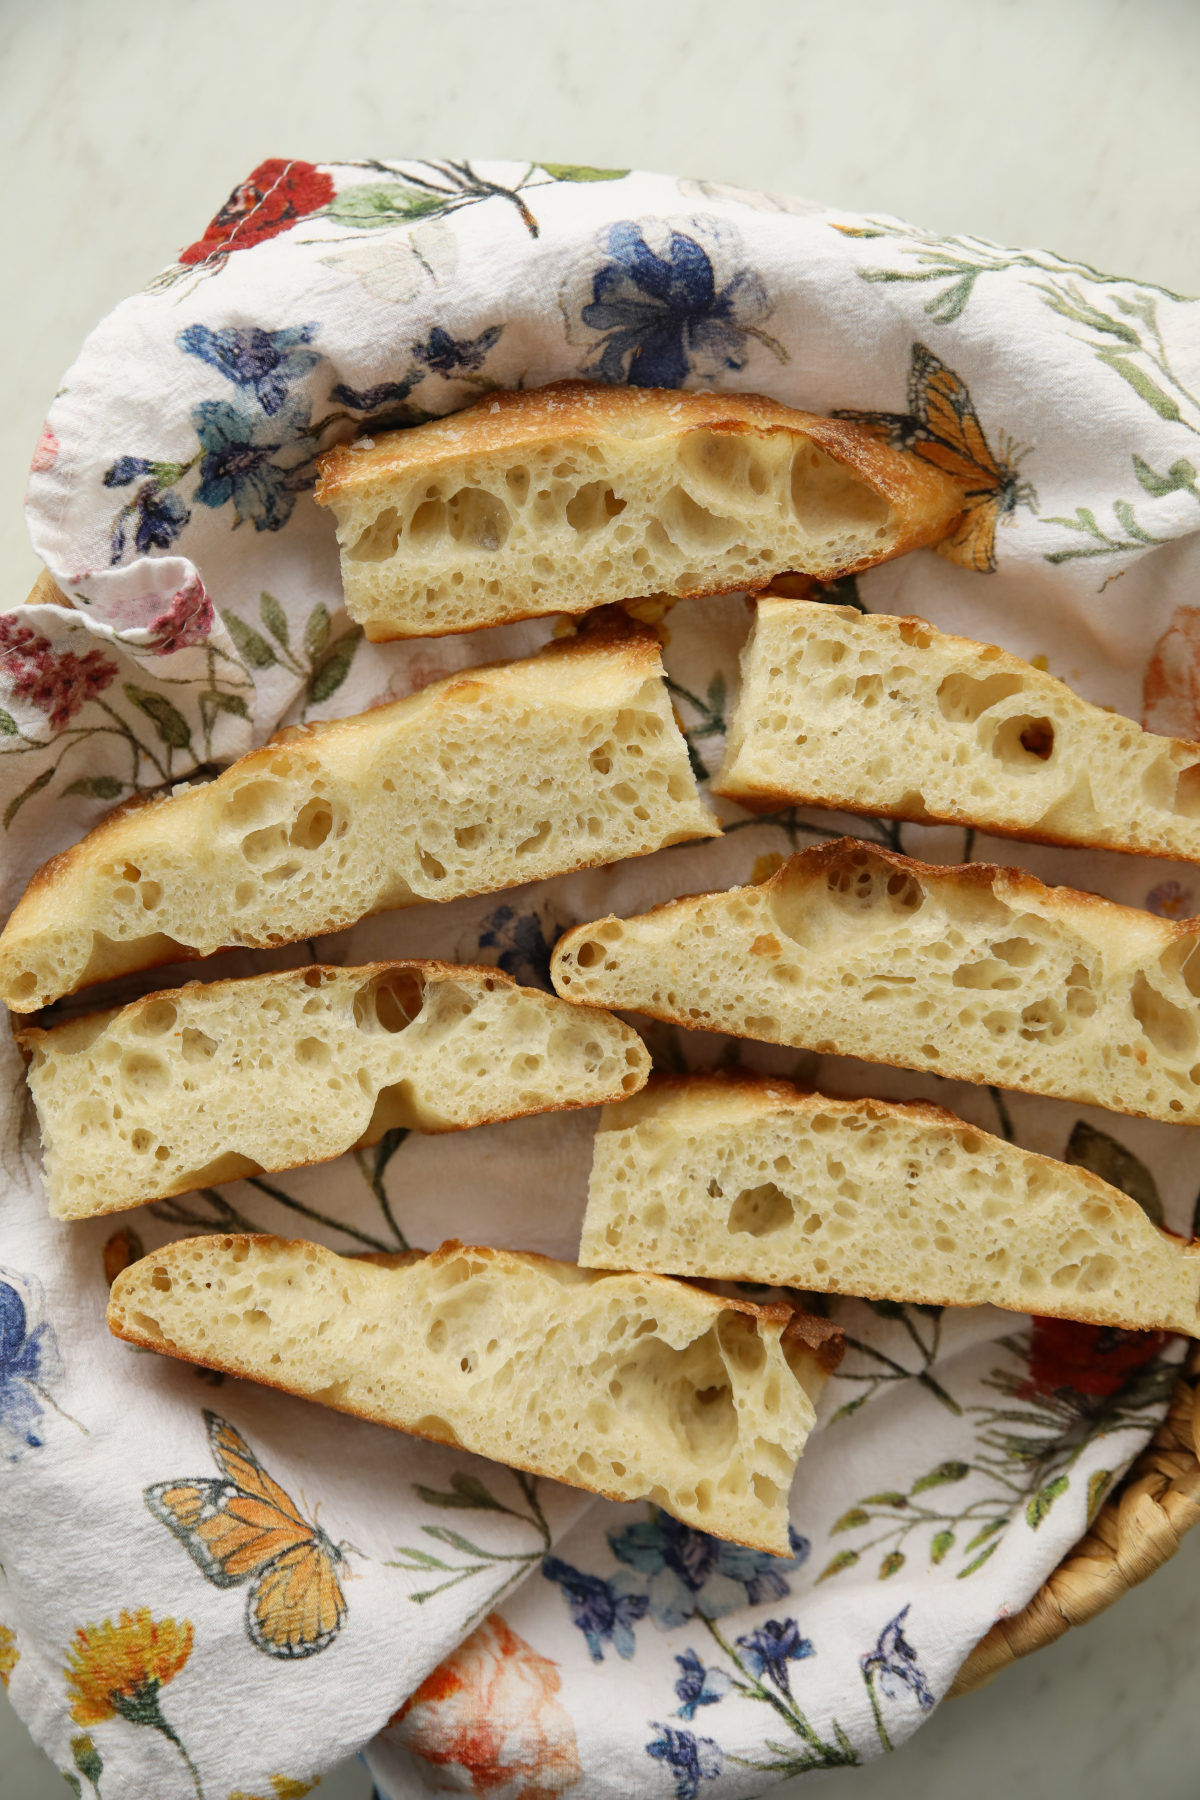
Here is my focaccia story: I knew what focaccia was but had never eaten any that was particularly memorable. My SIL dropped off some sourdough focaccia off at my house and the first piece was amazing. And so was the next piece and the next piece and the next.
By the end of the bag I was totally hooked on day old focaccia. I tried baking my own almost immediately and it was SO easy! I absolutely didn’t understand why more sourdough bakers didn’t tell people to start with a good focaccia recipe to learn more about sourdough.
Now I’m spreading the word. Sourdough Focaccia is All. The. Things. Welcome to getting hooked on easy, delicious, bubbly, golden bread!
Why This Sourdough Focaccia Recipe Works So Well for Beginners
Why This Sourdough Focaccia Recipe Works So Well for Beginners
If you’ve been circling sourdough for a while but haven’t quite jumped in, this is your moment.
This sourdough focaccia recipe is one of the easiest, most forgiving ways to get started. No kneading. No stretch and folds and no complicated shaping. You don’t have to stress about perfection. This is just a simple dough that does most of the work for you.
The “secret,” if there is one? Wet dough and time. This sourdough focaccia recipe is made with a higher hydration dough that is still easy to work with but time does all the heavy lifting.
That sticky, shaggy dough might look a little wild at first, but it’s exactly what gives you that airy, bubbly texture and those golden, crispy edges. Pair that with a flexible schedule, and suddenly sourdough feels a whole lot more doable.
Why You’ll Love This Sourdough Focaccia Recipe
- This recipe is so easy it feels like cheating. You. Are. Welcome!
- No kneading OR Stretch and Folds!
- Flexible timing (same-day or overnight giving you a nice 12-24 hour range of options)
- Soft, airy interior with crispy edges
- Simple ingredients you likely already have
- Beginner-friendly with lots of visual cues
- No tricky jargon – everything is clearly explained for you!
Ingredients for This Sourdough Focaccia Recipe
This is a short list, but each ingredient pulls its weight:
- Active sourdough starter – This is your rise. Make sure it’s fed, bubbly, and ready to go. (Learn more about feeding and maintaining your starter here.)
- Bread flour – This is not the place to swap. Bread flour gives you the chewy, structured crumb that makes focaccia so good.
- Water – A higher hydration dough = those beautiful air pockets.
- Honey – Just a touch for flavor balance and to support fermentation.
- Fine sea salt – For flavor and structure.
- Olive oil – Generous amounts for that classic crispy, golden finish.
Essential Tools for Sourdough Focaccia Baking
Look! A sourdough recipe where you don’t have to go shopping for 10 tools first! Are you also breathing a sigh of relief? Hopefully most of this is already in your kitchen.
- A kitchen scale. I know, I know but you really do need one. You can start with a $10 one or pay a bit more for my favorite high quality scale. Sorry – I promise you will be glad you got it.
- A large mixing bowl – glass is a great option when you are learning. It lets you see everything happening in the dough.
- A dough whisk or sturdy wooden spoon
- A flexible scraper (this makes handling sticky dough so much easier and they are cheap)
- A 9×13-inch pan or rimmed baking sheet – I’m loving USA Pans for most of my bakeware right now. Quality and reasonable prices make them worth the investment for my kitchen.
- Glass Olive Oil sprayer – Not a necessity but it is my favorite new tool for olive oil. It both sprays and drizzles in one tool! I use mine every day and it is delightful for drizzling oil all over my focaccia!
If you want more detailed information on sourdough baking tools I have a complete guide here of what to buy and what to avoid.
Choose Your Schedule (Before You Start)
I’ve created two different schedules for baking this focaccia bread. Pick what fits your life! Please note both of these options START with a fed and active starter. I teach you everything you need to know about your starter here.
Morning Start (Same-Day Bake)
- Mix dough in the morning
- Bulk rise in a warm spot
- Shape, second rise, and bake by dinner
Overnight Option (24-Hour Process)
- Mix dough before bed
- Let it rise overnight at room temp
- Shape in the morning
- Bake later in the day
The key variable? Temperature.
Warmer = faster rise. Cooler = slower, longer fermentation. Keep an eye on your dough, not just the clock.
Remember, I’m always available in the comments to help you so absolutely hit me with all your questions so we can get you baking the best bread of your life!
How to Make This Sourdough Focaccia Recipe (Step-by-Step)
1. Mix the Dough
In a large bowl, whisk together your starter, water, and honey. Add the bread flour and salt, then mix until you have a shaggy, sticky dough.
Cover and let it rest for 30–60 minutes. This gives the flour time to fully hydrate.
2. Form the Dough
With wet hands, gently bring the dough together into a loose ball. It will still feel sticky—perfect.
Transfer it to a lightly oiled bowl.
3. Bulk Rise
Cover and let the dough rise until doubled in size.
- Warm environment (75–98°F): faster rise, same-day bake
- Room temp (around 68–70°F): slower, overnight rise
You’re looking for dough that looks airy, soft, and expanded—not dense. Think marshmallows and pillows and soft downy bunnies. (Ok, I’m kidding about the bunnies- your dough should NOT be furry!)
4. Second Rise in the Pan
Pour olive oil into your baking pan and spread it around generously. (You can get away with a few Tablespoons of oil here but I go full Italian Mama impersonation here and really let the dough have it.)
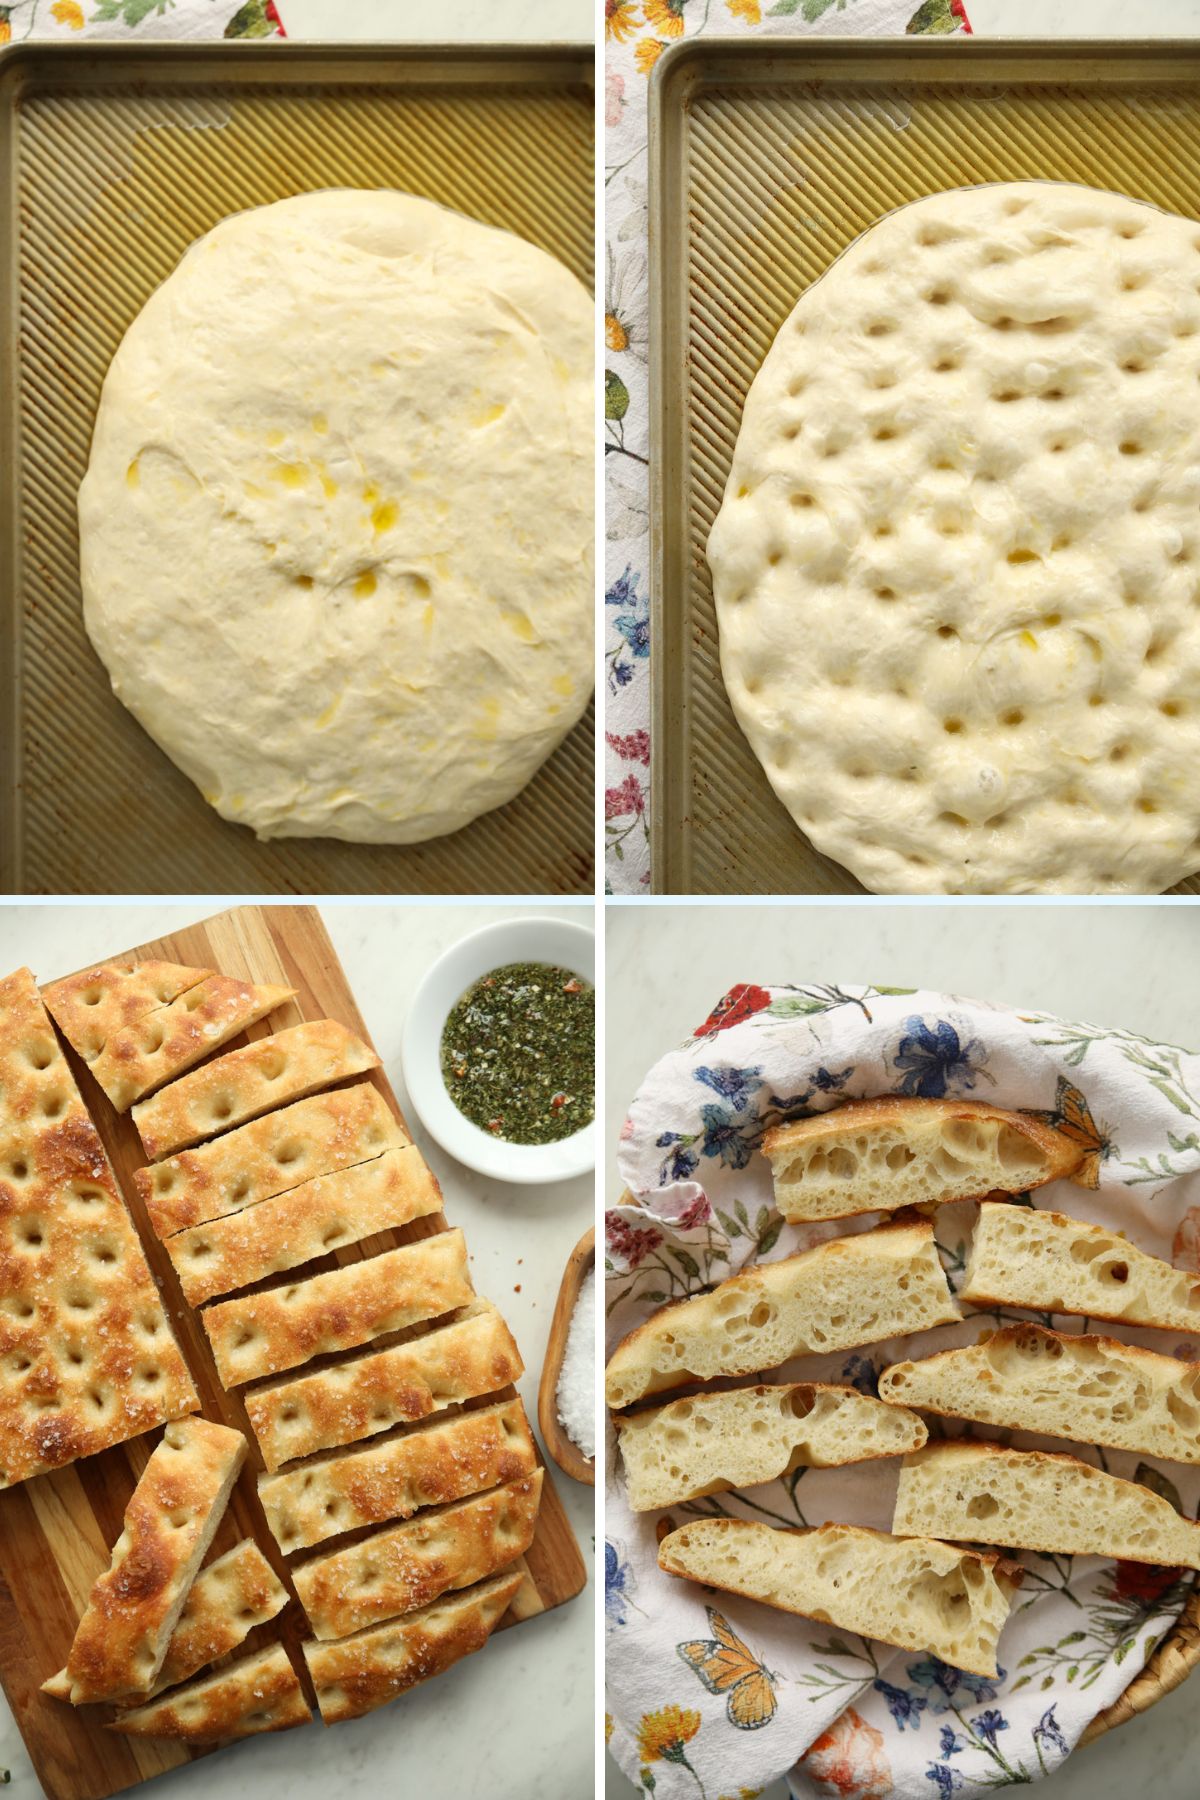
Turn the dough out onto the pan, flip it to coat both sides in oil, and gently spread it out.
Cover and let it rise again for 1½–2 hours, until very puffy and soft. It should look like a pillowy, slightly wobbly surface.
5. Dimple and Top
Preheat your oven to 425°F.
Oil your fingertips, then press them into the dough, creating deep dimples all across the surface. Don’t be shy here—this is what gives focaccia its signature texture.
Drizzle with more olive oil and add your toppings.
6. Bake
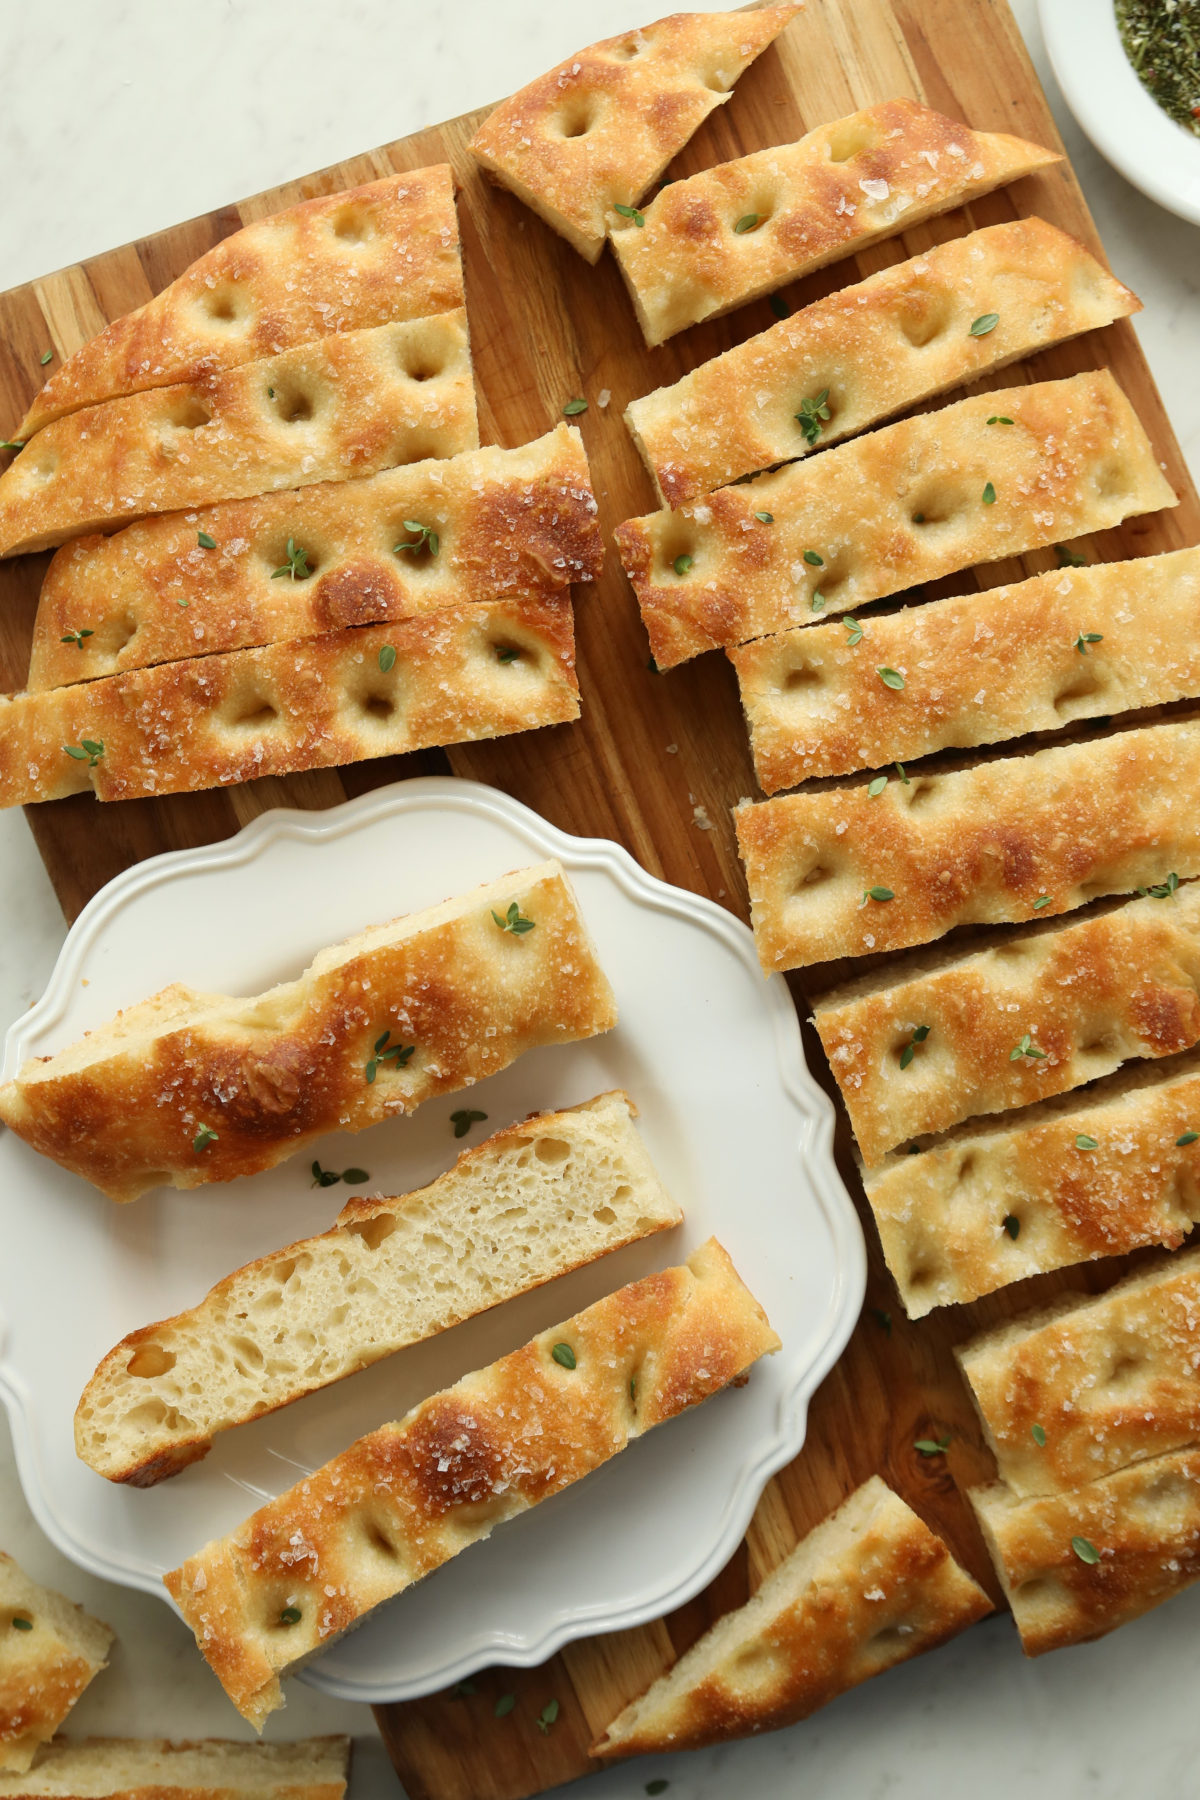
Bake for 20–25 minutes until the edges are golden brown and crisp.
Slice and enjoy. (Then start planning another batch for tomorrow because it is that stupid good.)
Tips for That Perfect Dimpled, Bubbly Texture
- Don’t fight the stickiness – Wet dough = airy focaccia
- Use plenty of oil – It creates those crispy edges and rich flavor
- Go deep with your dimples – This helps distribute oil and creates texture
- Watch the dough, not the clock – Puffy and airy beats exact timing every time
Easy Topping Ideas For Sourdough Focaccia
Keep it simple or have fun with it:
- Flaky sea salt
- Fresh cracked black pepper
- Italian seasoning
- Grated parmesan
Troubleshooting Flat or Dense Focaccia
If your sourdough focaccia didn’t turn out quite right, here are the usual suspects to put an APB out for:
- Weak starter – It should be bubbly and active before using
- Under-proofed dough – It needs to look puffy and full of air before baking
- Too cool environment – Slows everything down more than expected. Sometimes bakers give up a bit too early when it has been awhile and they don’t see progress. Maybe sure your environment is warm enough for fermentation to happen and give it time to happen.
When in doubt, give it more time.
How to Store, Reheat, and Serve Focaccia
Focaccia is best fresh, but you’ve got options:
- Store at room temperature for up to 2 days
- Reheat in the oven at 350°F for a few minutes to bring back that crispy edge
- Slice horizontally for sandwiches
- Serve warm with olive oil
- Serve as a dipper with minestrone soup!
My Easiest Sourdough Recipes For Beginners
My Sourdough for the Rest of Us Series has lots of great introductory recipes but these two recipes are intended to get you off to a great start on your sourdough journey.
Beginner’s Dutch Oven Loaf – Your First Easy Sourdough Bread Recipe for an Artisan Loaf
Soft Sourdough Sandwich Bread – Easy Sourdough Loaves baked in bread pans. These are perfect for PBJs and toast!
New to Sourdough? Get a simple explanation of what Sourdough Bread IS here.

Easy Sourdough Focaccia Recipe
Ingredients
- 75 g fed and active sourdough starter – nice and bubbly
- 375 g water approx. 1 2/3 cups
- 20 g honey
- 500 g bread flour approx. 3 ½ cups – see note
- 10 g fine grain sea salt about 1 ½ teaspoons
- 2-3 Tablespoons olive oil for coating the pan
- Topping Ideas Flaky sea salt such as Maldon, grated parmesan cheese, Italian herbs, fresh ground black pepper
Instructions
Baking Schedule Options: There are two great ways to prepare this sourdough focaccia with simple schedules. Pick one and then begin making the dough.
Morning Start for Dinner Tonight:
- Use starter that is fed and active (can be fed the night before)
- Stir and rest the dough first thing in the morning
- Bulk rise in a very warm place (This dough can be started in the morning and baked the same day in time for dinner.
- Shape / 2nd Rise / Bake
Night Before Schedule (24 Hour Process):
- Use starter that is fed and active (can be fed morning or midday of this day)
- Make and rest dough before bedtime
- At bedtime leave the dough to do a long (bulk) rise at moderately cool house temps 68-70 F for up to about 12 hours
- In the morning shape, 2nd Rise
- Bake in the early to late afternoon
Make the Dough:
- In a large bowl, whisk the sourdough starter, water and honey together with a dough whisk or wooden spoon
- Add the bread flour and salt. Mix to combine and form a shaggy ball of dough. It will feel sticky and look shaggy. Cover and let the dough rest and absorb the water for 30-60 minutes (choose the time that fits your schedule, either will work).
- After the rest, use wet hands to casually form the dough into a ball. It will be wet and sticky – don’t add more flour. Transfer the ball into a clean, oiled bowl.
Bulk Rise (The fermentation and dough development step):
- Cover the bowl of dough with lightly oiled plastic wrap. If you are doing same-day baking, put your dough in a very warm spot 75F-98F to develop. If you are doing an overnight rise leave the dough at room temperature (about 68F-70F) for around 12 hours before moving on. Either way you are looking for the dough to become light and airy and about double in size.
- Note: Keep in mind if your house is hotter than about 70F the dough is going to rise faster than 12 hours. You will need to adjust your time based on how warm the environment is for your dough.
Second Rise: When the dough has doubled in size you are ready to move to the second rise.
- Pour 2 or 3 Tablespoons of olive oil onto a rimmed sheet pan such as a cookie sheet or 9”x13” rectangular baking pan. Use your hands to spread the oil all over the bottom of the pan.
- Use your oiled hands and a flexible rubber scrapper to remove the dough from the bowl. Gently plop it onto the baking sheet and then flip it over so that both sides get oiled.
- Use a second sheet pan placed upside down or plastic wrap to cover the dough for the rise.
- Let the dough rest for 1 1/2- 2 hours or until very puffy. I use the proofing setting on my oven and then set the pan on the warm oven while it preheats. The dough will become soft and bubbly and look like a beautiful pillow top bed.
Assembly:
- Preheat your oven to 425 F.
- When the oven is almost preheated, coat your fingertips with oil to dimple the dough. You can even spray a little (or a lot) more olive oil on here if you feel inclined. I do a pretty solid drizzle!
- Start at one end of the pan and press your fingers into the dough most of the way to the bottom. Your fingers will leave lovely dimpled texture in the focaccia. Continue to work your way across the dough until you have finished. (How many dimples you make and how close together is up to you.) As you work your way across the dough it naturally stretches into a rustic oval or rectangle. You don’t need to press it into the corners of the pan – just let it go where it wants.
- Generally, I do spread it close to the edges so it bakes up a little bit thinner. I like to have all the dough about the same height for even cooking. The edges will be just a bit thinner, which makes it crispy but you don’t want the middle super thick.
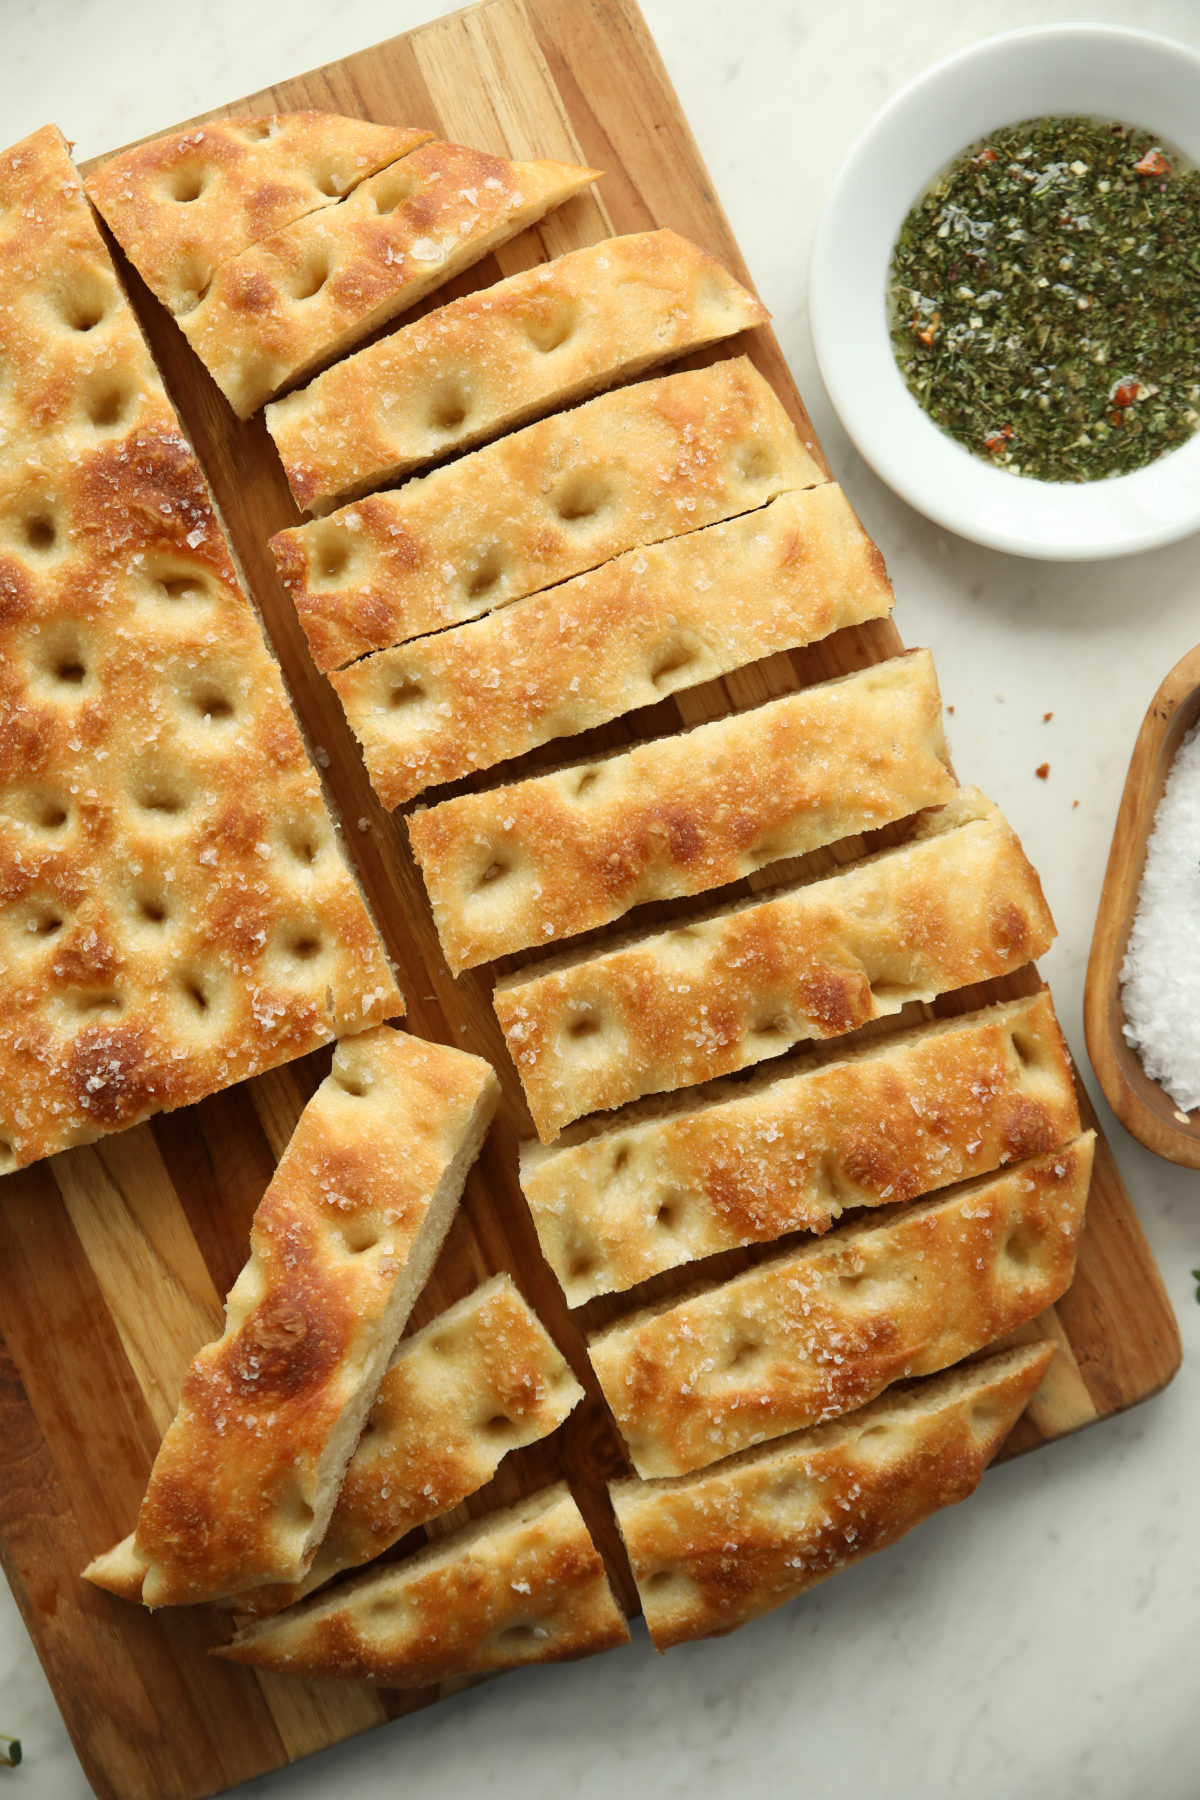
- Add Your Favorite Focaccia Toppings: Sprinkle on flaky sea salt such as Maldon or parmesan cheese or some Italian seasoning or fresh ground black pepper or whatever sounds good to you!
Bake the Focaccia:
- Place the dough onto the center rack. Bake for 20-25 minutes until the edges are crisp and golden brown and the center is cooked.
- Cut slices or squares and serve warm or cool on a wire rack and split to make sandwiches.
Helpful Recipe Notes
Your Rating Matters
When you leave a comment or star rating, it means more than you might think. It helps me understand what you’re enjoying, builds trust for other readers, and supports real, tested cooking content. If you have a moment, I’d truly appreciate you sharing your experience. – Mirlandra
Nutrition Estimate
A Note on Nutrition
Nutritional info is an imperfect estimate. Please take it with a grain of salt.
New to sourdough? Start Here! How To Feed Sourdough Starter Beginners Guide Easy Sourdough Bread Recipe for Beginners (Artisan Loaf)
Leave a Reply