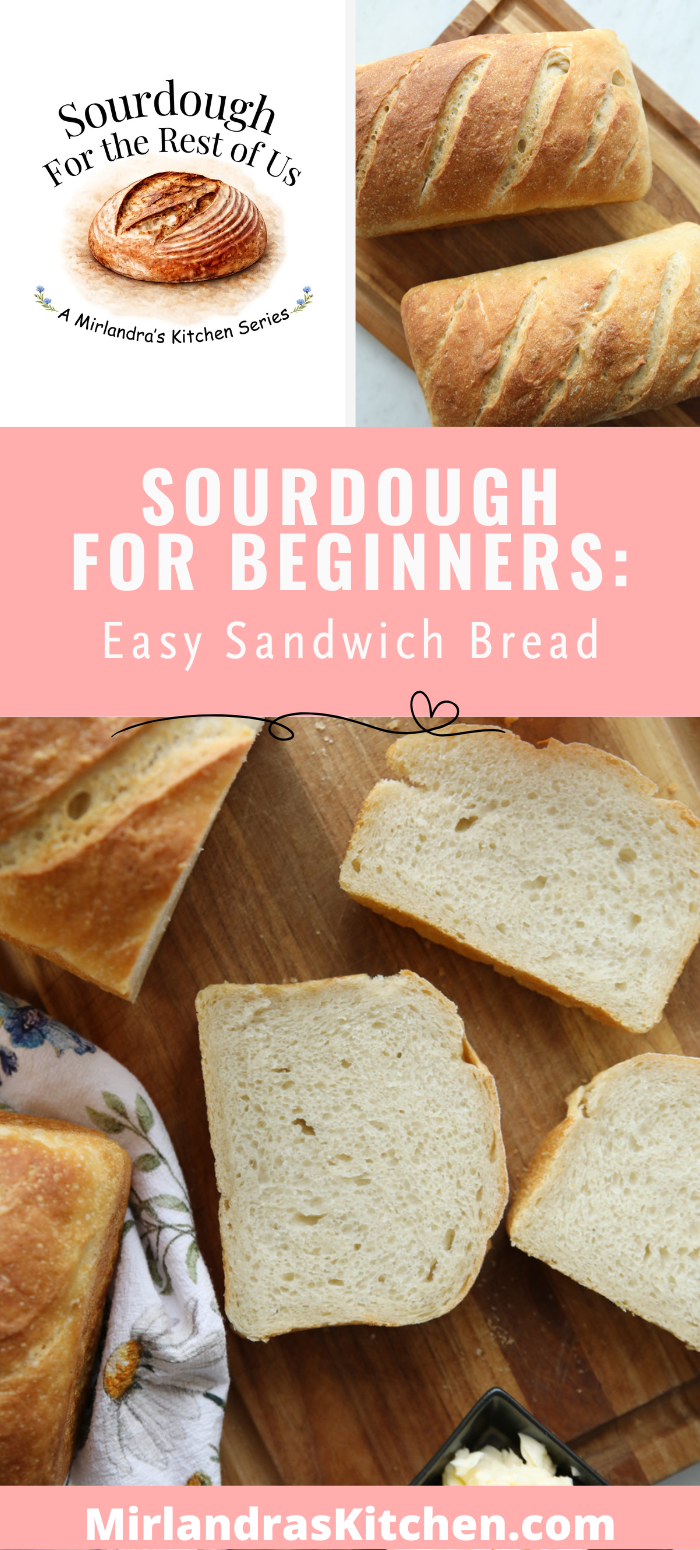
This easy sourdough sandwich bread recipe is soft, tender, and perfect for everything from everyday sandwiches to morning toast. I designed this recipe with beginners in mind, keeping it simple and approachable from start to finish. You don’t need any sourdough experience to bake a loaf that’s truly delicious and reliable.

New to sourdough? Start Here! How To Feed Sourdough Starter Beginners Guide Easy Sourdough Bread Recipe for Beginners (Artisan Loaf)
Why You’ll Love This Sourdough Sandwich Bread Recipe
This sourdough sandwich bread is all about practicality. It’s soft, reliable, and made for real kitchens—not perfect Instagram moments.
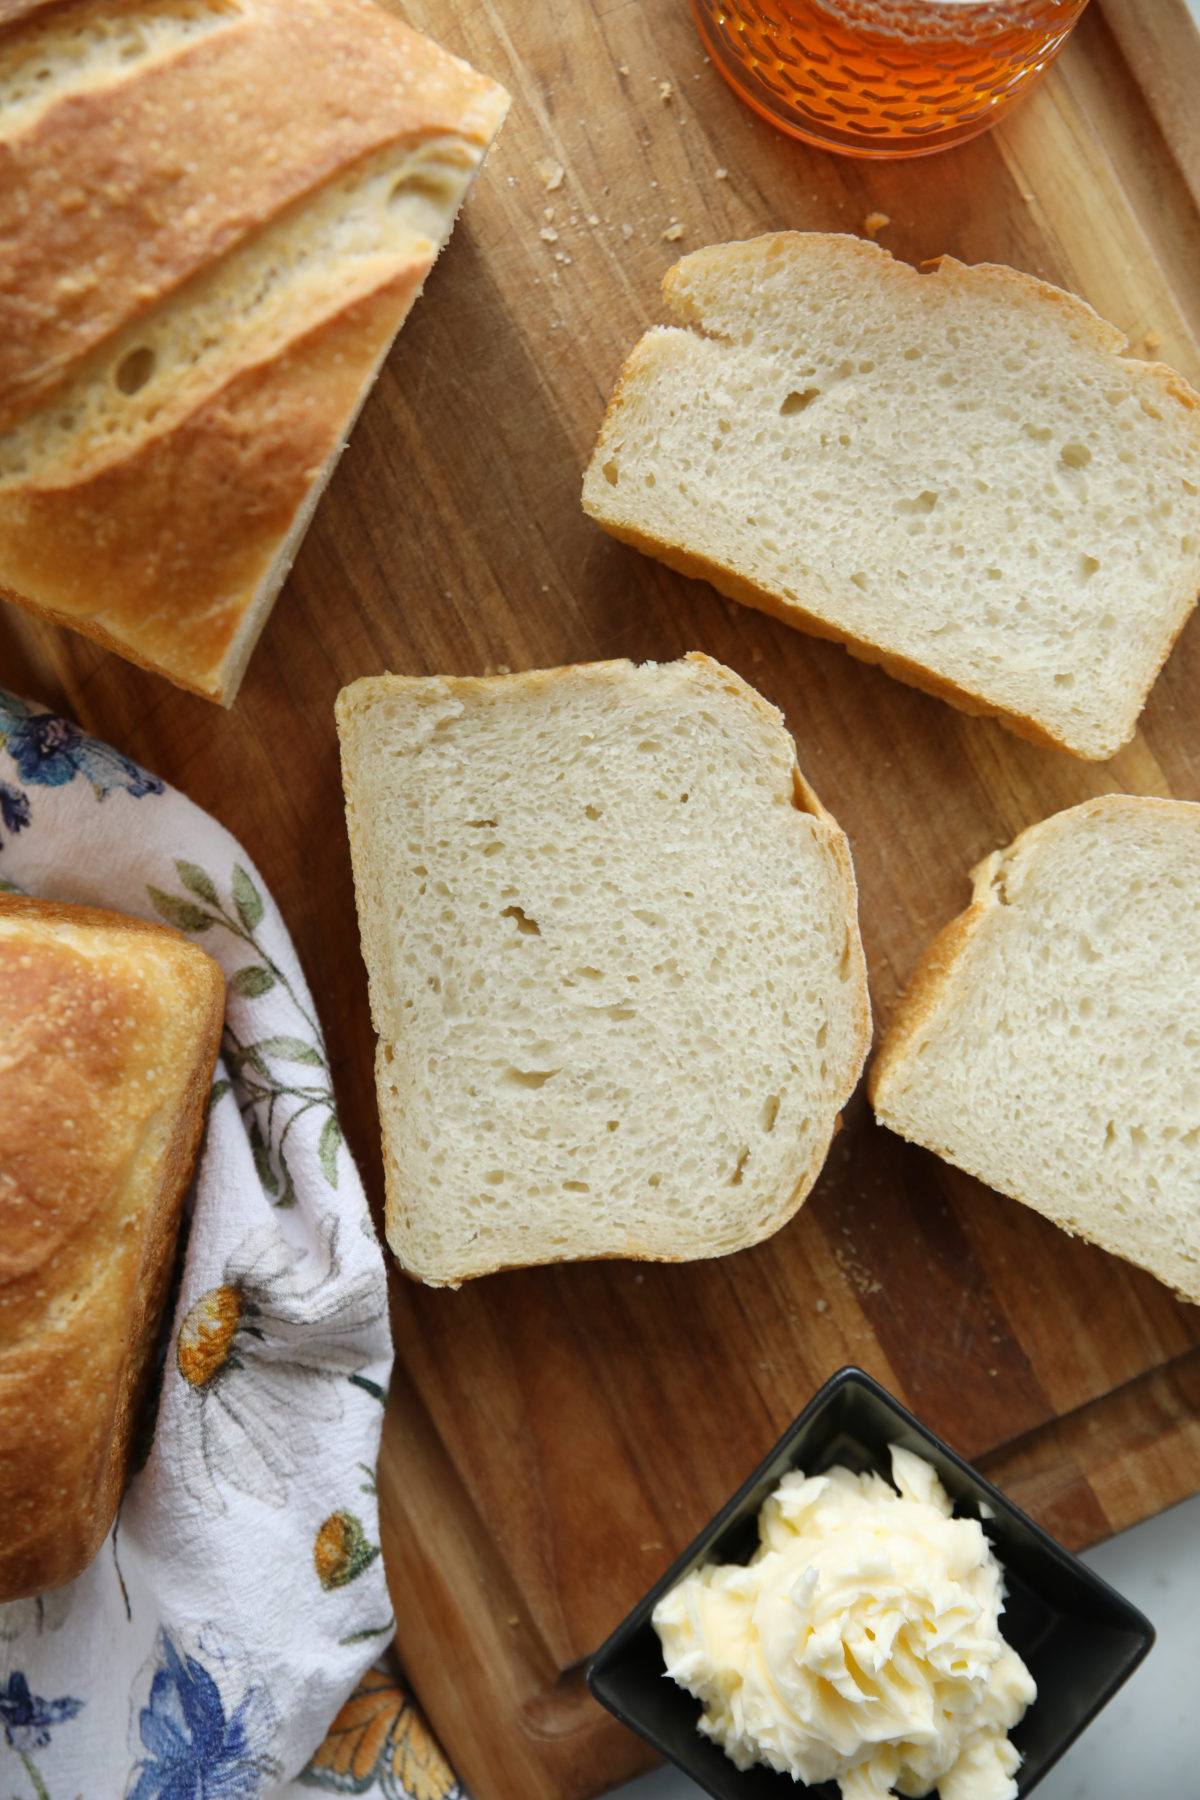
You get a tender, sliceable loaf that works beautifully for sandwiches (no tearing, no giant holes), and the method is intentionally simple. There’s no Dutch oven, no complicated shaping, and no big list of equipment to buy.
It’s also a great beginner sourdough bread recipe. The step-by-step process walks you through exactly what to do without assuming you already know the rhythm of sourdough baking.
And maybe my favorite part—it makes two loaves. One for now, one for later. Future you will be very pleased.
Before You Start – Baking Timelines
One of my top suggestions for success with sourdough bread is to understand the timeline before you start the recipe! This timeline is one example of how you could structure your baking time for this recipe. Many of these steps just take a few minutes but you need to be home when it is time to do them.
My Example Baking Schedule:
Night before: Feed your starter
Morning Day 1: Mix dough, rest, and stretch & folds (This is sourdough jargon for developing gluten in bread. It is different than kneading and a lot faster and easier.)
Midday: Let dough rise at room temperature
Evening: Refrigerate overnight
Morning Day 2: Rest, shape, and rise
Afternoon: Chill, bake, and cool
You don’t need to follow this exactly, but it gives you a rhythm to work with. Once the rhythm makes sense to you everything else is easy.
P.S. Sourdough jargon getting overwhelming? Get my Sourdough for Beginners Plain English Glossary Here.
Ingredients For Sourdough Sandwich Bread
This recipe is written for measuring ingredients by weight which gives you the most consistent results. It is easier than you might think to measure with a scale! And there is so much less clean up without all the measuring cups! Major win!!!!
- 650g warm water
- 300g fed and active sourdough starter
- 60g honey
- 40g olive oil (or your preferred oil)
- 20g sea salt
- 1000g bread flour (bread flour gives this loaf its soft but structured texture. You can’t substitute a different flour without making other recipe adjustments)
Pro Tip: Your starter should be active and bubbly when you begin making the dough. If it’s sluggish, your bread will be too. Grab my complete guide on Sourdough Starter here to learn the easy way to take care of your starter and prepare it for baking.
Tools You’ll Need to Bake Sourdough Sandwich Bread
Nothing fancy here—just the basics:
- Large mixing bowl 3-4 quart size – glass is nice because you can see the dough fermenting and know things are working
- Kitchen scale – even a cheap one will get your started but the OXO is my fave
- Dough whisk or sturdy spoon
- Two 9×5 loaf pans
- Something to cover the dough (plastic wrap or shower caps work great)
- Sharp paring knife or bread lame
- Digital thermometer (one easy way to check if your bread is done in the middle)
That’s it. No Dutch oven, no specialty gear required.
My complete list of sourdough equipment has recommendations for reusable bags and bread knives and other stuff you might eventually want. You can find it here.
How to Make Sourdough Sandwich Bread Step By Step
There are a lot of small steps to this recipe but most of them take just a few minutes and then you leave the dough to take care of itself.
Dough Prep
Place a large mixing bowl on your scale and zero it.
Add the warm water, starter, honey, oil, and salt—zeroing the scale between each addition. Stir until everything is well combined.
Add the flour and mix until a shaggy dough forms and all the dry bits are incorporated. If the bowl has a lot of dry flour stuck to the sides, it’s worth transferring the dough to a clean bowl to avoid lumps later. You might also be able to scrape the sides really well and make sure everything is mixed in completely.
Rest
Cover the dough and let it rest for 30 minutes. This gives the flour time to fully hydrate and makes the dough easier to work with. In the sourdough baking world you will hear this stage called autolyze.
Stretch and Folds
With slightly wet hands, stretch one side of the dough up and fold it back over itself. Cover and let rest for 30 minutes.
Repeat this process, turning the bowl each time, until you’ve worked all four sides over about 2 hours.
Unlike some recipes, you’re only doing one stretch and fold every 30 minutes—not a full set each time. It’s a simpler rhythm and works beautifully here.
Room Temperature Rise
Cover the dough and place it somewhere warm.
Let it rise until it has increased by about 50–100%. Depending on your kitchen, this can take anywhere from 2 to 6 hours.
You’re looking for visible growth and a slightly puffy, airy feel.
Cold Rise
Once the dough has risen, cover it and place it in the refrigerator overnight (or up to 24 hours).
This slow fermentation builds flavor and makes the dough easier to handle the next day. You also get flexibility in WHEN to go to the next step. I have three kids so flexibility is my besty!
Bench Rest and Divide
Remove the dough from the fridge and let it sit at room temperature for about 2 hours.
Gently turn it out and divide into two equal portions (about 1000g each). Try not to press out all the air and gasses. Handle it lightly.
Cover and let the portions rest for 30–45 minutes until they relax and become easier to shape.
Shape and Final Rise
Oil or butter your loaf pans.
Shape each portion into a loaf by gently pulling the sides in and creating surface tension, then place seam-side down in the pan. Don’t stress – anything that creates some sort of loaf shape without abusing the dough will work pretty well! This recipe is kind to beginners!
Cover and let rise in a warm spot for 2–4 hours, or until the dough has risen to about ⅔ of the way up the pan. If you have time, leaning toward the longer rise gives a softer result.
Once risen, cover and refrigerate the loaves for 2 hours before baking. This helps with oven spring.
Bake
Place a pan of water on the lower rack of your oven and preheat to 400°F.
Remove the loaves from the fridge and score the tops with a sharp knife or bread lame (special razor tool for bread). A simple slash down the center works perfectly.
Bake for 15 minutes, then reduce the temperature to 375°F and bake for another 30–35 minutes.
The bread is done when the internal temperature reaches 205°F.
Remove from the pans and let cool completely on a rack before slicing.
Frequently Asked Questions
Is this a Long Ferment Sourdough Recipe?
Long Ferment Sourdough means the dough was left in the refrigerator more than 12 hours. Many people consider long ferment to mean that the dough was left 24-36 hours. A long ferment can improve flavor, give you more tang in the bread (more sour flavor), and some people find it improves their ability to digest it. I have a full post on what Sourdough Bread Is here if you want to learn more.
Can I use all-purpose flour instead of bread flour?
No – sorry. Bread flour gives the best sandwich-style result. It isn’t expensive and you don’t have to buy a fancy brand but you do need bread flour. It is actually a different flour than all-purpose. If you were to make a substitution you would have to adjust the liquids too and your results would still be off.
Why didn’t my bread rise much?
The most common cause is an inactive starter. Make sure it’s bubbly and active before you begin. If your starter isn’t behaving check out my post on taking care of your starter so we can whip it back into shape.
Do I really need to refrigerate the dough?
Yes, the cold rise improves both flavor and texture, and makes the dough easier to handle. If you choose not to do this step you will lose significant texture quality.
Storage & Freezing
Store bread at room temperature in a sealed bag for several days or up to a week. Trying to figure out a good bag for your bread? I have a complete gear post with information about reusable bread bags here.
To freeze, let the loaves cool completely, then wrap well and freeze for up to one month. You can freeze whole loaves or slice first for easy grab-and-toast options.
Mirlandra’s Tips For Success
If your kitchen runs cool, your rise times will be longer. A slightly warm oven (turned off!) is a great trick to create a cozy environment for your dough. This bread dough is very happy at temperatures between 80-95ish.
Try not to rush the final rise. This is where a lot of the softness develops, and giving the dough enough time really pays off.
Let the bread cool before slicing unless you plan to eat the entire loaf right away. This bread is fully cooked when you remove it from the oven (unlike a sourdough artisan loaf) but slicing it too soon can make for a gummy loaf. If you do want to serve a hot loaf with soup you can and just know that the uneaten part of the loaf will be a little bit more dense.
More Delicious Sourdough Bread Recipes
Easy Sourdough Bread Recipe – This simple recipe is the perfect way to bake your first Artisan Sourdough Loaf! Everything is explained and nothing is overly complicated. New sourdough bakers are getting amazing success with their very first loaf!
Easy Sourdough Focaccia Recipe – No stretch and folds, no kneading and no shaping! When I say I say easy I mean it!

Soft and Sliceable Sourdough Sandwich Bread Recipe
Ingredients
- 650 grams warm water about 3 cups
- 300 grams starter – freshly fed and active about 1 ¾ cups
- 60 grams honey
- 40 grams olive oil can sub favorite oil
- 20 grams sea salt approx. 3 teaspoon
- 1000 grams white bread flour
Instructions
Example Sourdough Bread Schedule
- Night Before: Feed your starter so it is ready to bake with in the morning. (Learn how to feed and maintain your starter here.)
- Morning Day #1: Dough Prep Stage (Mix, Rest, & Stretch and Folds – about 3 hours)
- Lunch Day #1: Warm Rise on Counter (2-4 hours)
- Evening Day #1: Long Cold Rise in Fridge (12 – 24 hours)
- Morning Day #2: Bench Rest Dough (3 hours ish active at 0, 2hrs, 45 min)
- – Shape and Final Warm Rise (4-6 hours, active at 2–4-hour mark)
- – Chill for Oven Spring (2 hours)
- – Preheating and Baking (1 hour)
- – Cooling the bread
Dough Prep Stage: Starter should be very active. I feed it at bedtime and try to start bread around 9 to 10am next morning (this stage takes 15 min)
- This recipe has you measure ingredients right into the bowl using a scale. Zeroing a scale (also called taring) means resetting it back to 0 after placing your bowl or ingredients on it, so you only measure what you add next. It lets you weigh each ingredient accurately without doing any math or using extra dishes.
- Put a large mixing bowl on the scale.
- Zero the scale and add 650g warm water.
- Zero and add 300g starter.
- Zero and add 60g honey.
- Zero and add 40g oil.
- Zero and add 20g sea salt.
- Stir with a dough whisk or fork until well mixed.
- Zero and add 1000g bread flour.
- Use a dough whisk or sturdy spoon to mix until you have a shaggy ball of dough. All the flour needs to be incorporated. If the bowl has a bunch of dry bits on the side, I move the dough into another clean bowl so you don’t end up with weird crusty chunks in the dough.
Rest Stage: (plan on 30 minutes)
- Cover the bowl of dough and let it rest for 30 minutes on the counter.
Stretch & Folds – Creating Structure In The Dough: (See video tutorial here to learn more about stretch and folds.) (2 hours total, mostly inactive)
- With wet hands, stretch one side of the dough as far as you can and fold back over into the bowl. Cover the dough and let it rest for 30 minutes.
- When you come back turn the bowl ¼ turn and repeat the process until you have done all four sides over the course of about 2 hours.
- Note: Many sourdough recipes require a full “set” of four stretch and folds every 30 minutes. This recipe is just one stretch and fold every 30 minutes.
Room Temp Rise: (Plan for 2-6 hours inactive time)
- After the stretch and folds cover the dough and put it in a warm place 80-90F is great if you can. (See note on proofing if you need ideas.) The dough is ready to move on when it has increased 50%-100%. This will be 2-6 hours depending on how warm your environment is.Note: This is also considered proofing the dough or a bulk ferment stage. Proofing is when you let the dough rest and rise so it becomes light and puffy.
Long Cold Rise (12-24 hours)
- Cover the dough and refrigerate overnight or up to 24 hours. Avoid letting the bread stay in this cold rise more than 36 hours. At that point the dough will start to break down.
Bench Rest Dough (About 3 hours, mostly inactive)
- When you have finished the long cold rise, remove dough from fridge and let sit at room temperature for about two hours.
- Divide the dough into two 1000 grams dough piles by weight. (I put each on a plate.) Note: It is helpful to lay the dough out without smashing all the air out. Don’t overhandle the dough.
- Cover the piles with plastic wrap and let them rest 30-45 minutes until dough is elastic.
Shape and Final Rise (4-6 hours, mostly inactive)
- Oil or butter 2 loaf size 9”x5” loaf pans and set aside.
- Shaping the dough is just building some tension into the dough while protecting all the gasses that were created during fermentation. You can shape it a lot of different ways to get great success.
- Pull dough into a loaf shape. I alternate pulling sides in and then pinch them together. When you have formed a basic loaf shape put the seam side down in the bread pan. Cover each loaf with a shower cap or plastic wrap.
- Put loaves in a warm spot again for 2-4 hours until the dough has risen to about 2/3rds of the way up the pan. I like to give this a full four hours when I can.
Pre-Baking Chill (2 hours, inactive)
- Cover and chill in the refrigerator 2 hours before baking.
Baking Instructions (1 hour plus cooling time)
- Adjust the oven racks so one is in the middle and the other is below it. Put a 9×9 pan of water in the oven on the lower shelf. (Any other similar size container that is oven proof is fine.)
- Preheat the oven to 400F.
- When the oven is preheated, remove the loaves from the refrigerator and score them ¼” deep. You can use a sharp paring knife or a bread lame (specialized razor for cutting bread dough.) The important thing is that you make some sort of cut for the bread to rise correctly in the oven. You can make it as fancy or simple as you like.
- I suggest one line down the middle of the length of the bread or 3-5 slashes diagonally across the top.
- Put the pans on the top shelf and bake for 15 minutes. Then reduce temperature to 375F.
- Bake an additional 30-35 minutes. The bread is done when it reaches 205F in the center of the loaf with a digital thermometer.
- Remove from the pans and cool on racks to room temperature before cutting.
Helpful Recipe Notes
Your Rating Matters
When you leave a comment or star rating, it means more than you might think. It helps me understand what you’re enjoying, builds trust for other readers, and supports real, tested cooking content. If you have a moment, I’d truly appreciate you sharing your experience. – Mirlandra
Nutrition Estimate
A Note on Nutrition
Nutritional info is an imperfect estimate. Please take it with a grain of salt.
New to sourdough? Start Here! How To Feed Sourdough Starter Beginners Guide Easy Sourdough Bread Recipe for Beginners (Artisan Loaf)
Leave a Reply