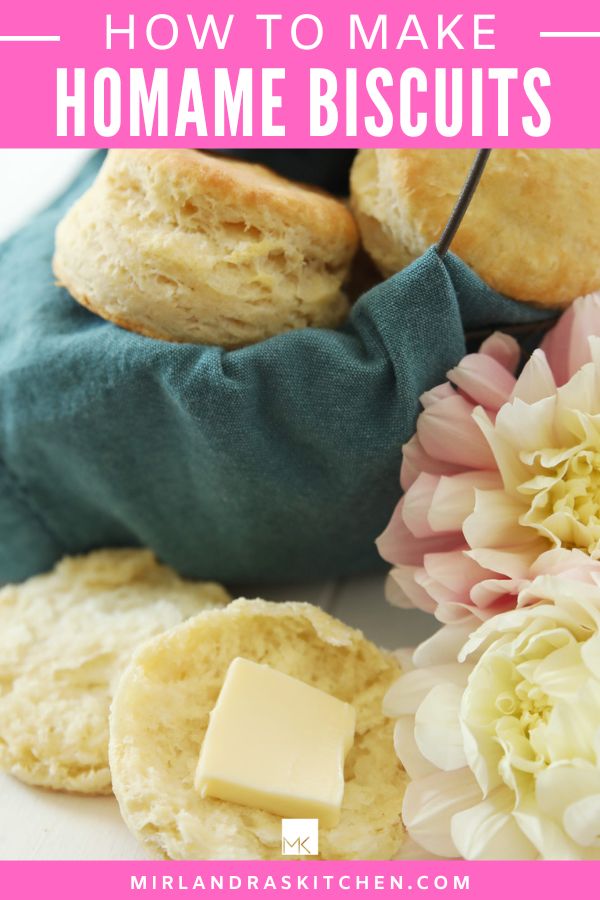
Learn how to make biscuits from scratch with this easy butter biscuit recipe. Soft and fluffy with SO many flaky layers. This biscuit recipe is just 7 ingredients and it is ready in under 30 minutes. Buttery, tender perfection every time and no rolling pin required.

If the thought of making homemade biscuits gives you flashbacks to tough hockey pucks or crumbly disasters, take a deep breath. You are about to learn exactly how to make biscuits from scratch without stress, drama, or a culinary degree. Truly, anyone can do this.
This biscuit recipe uses simple ingredients, zero fancy equipment, and is ready in under 30 minutes. No rolling pin, no complicated steps. Just soft, fluffy, buttery biscuits that rise tall, smell incredible, and make you feel like the kind of person who bakes from scratch on a Tuesday because… why not?
If you’ve been longing to learn how to make homemade biscuits, or just need a reliable butter biscuits recipe, you’re in the right place.
What Makes a Great Homemade Biscuit? (A Quick Biscuit Science Lesson)
Homemade biscuits might be simple, but the “why” behind each step really matters. Here’s the 60-second biscuit science of the baking to lay some groundwork before you start.
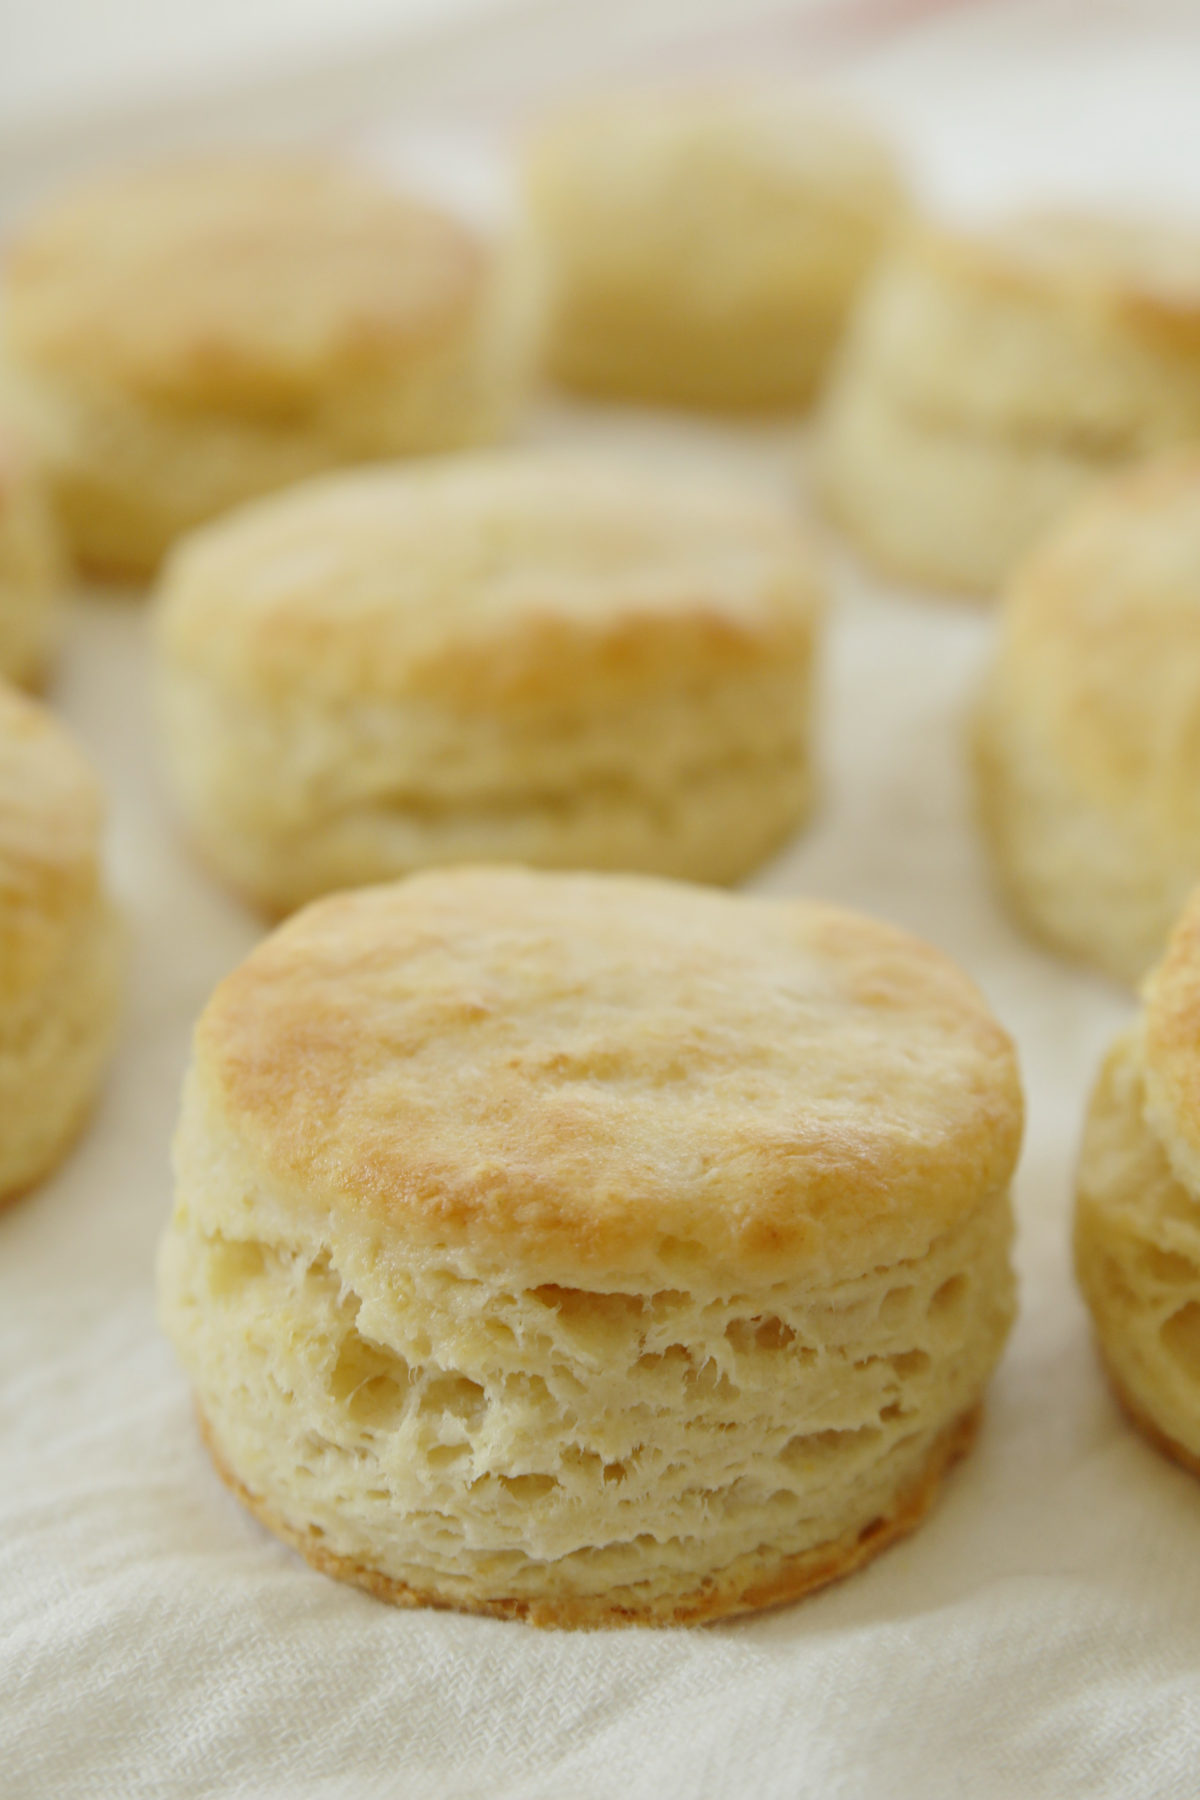
Cold Butter: This is everything. Little cold bits of butter melt in the oven, creating pockets of steam that puff the biscuits up and create that dreamy, flaky texture. Warm butter = flat, sad biscuits every time.
High Heat: Biscuits love a blazing hot oven. Starting at 425°F gives them instant lift and helps create those gorgeous golden tops.
Gentle Folding: You’re not kneading bread dough. With bread dough the point is to manhandle (or womanhandle in my case) the dough with strength and intention to stretch the gluten for a soft, chewy loaf. Biscuits are different. We just want to give this dough a few gentle folds help create soft layers. Going overboard gives you tough, chewy biscuits so no wild kneading, ok?
Size Matters: The thickness of the dough directly affects how tall your biscuits rise. For most traditional butter biscuits, ½” is the sweet spot. This recipe focuses on 1/2″ thickness. I even keep a clean culinary ruler in my kitchen just to measure stuff like this to keep my life simple!
What Makes This My Best Easy Homemade Biscuit Recipe
There are dozens of biscuit recipes floating around, but here’s why this one has become my favorite:
They’re incredibly buttery
If you’re making biscuits, you want them to taste like biscuits, which is to say: buttery, tender, slightly crisp on the outside, and soft in the middle. These check every box.
They rise tall
Thanks to the combo of cold butter, proper folding, and the right dough thickness, these rise beautifully and stay fluffy.
Beginner-friendly
You don’t need buttermilk. You don’t need a stand mixer. You don’t need to know “biscuit technique.” You can make these with a food processor or a simple mixing bowl. It’s real-life friendly. (I have three kids, I run a company and we homeschool. So my life is “real-life” only!)
They’re fast
From “thinking about biscuits” to “eating a biscuit,” you’re looking at under 30 minutes.
If you’ve been wanting a biscuit recipe that works every time and doesn’t demand your whole morning, this is it.
Ingredients for Biscuits From Scratch
You only need pantry staples but a few ingredient notes help make them shine.
-
All-purpose flour: Keep it simple. No cake flour, no bread flour.
-
Baking powder: Fresh baking powder is key to high-rising biscuits. When I bring a new can home I take a sharpie and write the expiration date on the lid and the words “discard on.” Most things you can keep somewhat past the date but baking powder will go bad and I throw it out the day it expires. Better to waste the little bit left than to lose an entire batch of food because it failed to rise!
-
Granulated sugar: Just enough for balance, not enough to make them sweet. Remember, sugar is a flavor enhancer. A little is all you need here.
-
Sea Salt: Salt enhances everything. I’m a big fan of sea salt or another flavorful salt that doesn’t have iodine in it. People with more sensitive palates will pick up the Morton table salt iodine flavor and it isn’t delightful in your baking…
-
Cold salted butter: The star of the show. Slice it straight from the fridge.
-
Whole milk: Adds tenderness and flavor.
-
Melted butter for brushing: Optional, but it makes the tops glisten.
How to Make Biscuits Step-by-Step (From Scratch!)
This is your high-level confidence-boosting guide before we dive into the specific methods.
Step 1: Mix the dry ingredients
Whisk together flour, baking powder, sugar, and salt. Easy.
Step 2: Cut in the cold butter
Either pulse it in the food processor, or use a pastry cutter or two knives in a bowl. You want pea-sized butter bits — not sand, not giant chunks.
Step 3 — Add milk
Stir gently until the dough just comes together. A shaggy, messy dough is good. A perfectly smooth dough means you overmixed.
Step 4 — Fold and shape the dough
Turn the dough onto a floured surface and fold it over itself a few times to help create layers. Press it to ½” thick.
Step 5 — Cut biscuits and bake
Use a round cutter, press straight down (no twisting), and bake at 425°F until golden.
We’ll break this down into the two different methods so you can choose your favorite.
Food Processor Method For Biscuits (Fastest & Easiest)
If you want biscuits fast, this is your method.
-
Pulse dry ingredients.
-
Add cold butter and pulse until the butter looks like coarse crumbs.
-
Transfer to a bowl, add milk, and mix just until combined.
-
Shape, cut, and bake as usual.
The food processor cuts in the butter perfectly every time and in seconds flat! This is my go-to when I’m making biscuits because quick is heaven!
Mixing Bowl Method (Classic & No Equipment Needed)
If you don’t have a food processor, no worries. Biscuit bakers have been making beautiful biscuits with their hands for generations.
-
Stir the dry ingredients.
-
Cut in butter with a pastry cutter or two knives.
-
Add milk and stir gently.
-
Turn out, fold, and shape.
This method gives you a little more “feel” of the dough. If you are kinesthetic and enjoy the physical experience of baking, this might become your preferred method.
How to Shape, Cut, and Bake Perfect Biscuits
A few small technique tips make a huge difference:
Use gentle folds. Don’t knead like bread: Fold the dough over itself 5–6 times. Folding gives you layers; kneading makes things tough.
Press the dough to ½” thick: Thin biscuits don’t rise tall. Thick biscuits stay doughy. Half an inch is the sweet middle ground.
Don’t twist the cutter: Press straight down and lift up. Twisting seals the edges and prevents proper rising.
Place biscuits close together on the tray: Close biscuits help each other rise nice and tall, like cozy little biscuit buddies.
How to Use These Biscuits for Biscuits and Gravy
If you’re craving biscuits and gravy, these biscuits are exactly what you want. They’re sturdy enough to hold up under a generous pour of sausage gravy, but tender enough to melt right into that creamy goodness.
Just bake them as directed, then split them open and ladle on your favorite gravy. This recipe makes an ideal base for a full Southern-style breakfast.

Common Homemade Biscuit Problems (And How to Fix Them)
If you are new to making biscuits or it’s just been a minute these are the most common issues and how to troubleshoot them.
Why are my biscuits tough? If you stir the dough aggressively, the gluten strengthens and your biscuits turn tough. Mix until it just comes together.
Why didn’t my biscuits rise? The butter might not have been cold. Warm butter melts before the biscuits bake, removing the steam pockets that help them rise. It is also possible the dough was too thick or too thin, or your baking powder was expired.
Why did my biscuits spread Instead of Rising? Biscuits need a hot oven. If your oven runs cool, they’ll spread instead of climbing upward. If you suspect your oven is not accurate or if you think you have hot and cold spots get a oven thermometer and check! They are inexpensive and then you will know for sure if you have an issue.
Why are my biscuits crumbly? Too little milk or too much flour. Don’t pack the flour into the cup! Make sure you are measuring by the spoon and level method.
Homemade biscuits don’t need to be intimidating, fussy, or something only your grandmother could pull off. With the right technique — and now you’ve got it — you can make soft, fluffy butter biscuits anytime the craving hits. Whether you’re learning how to make biscuits from scratch for the first time or just want a reliable biscuit recipe you can count on, this one will never let you down.
You’ve got this. Now go bake the best biscuits of your life.
Cooking Equipment for Homemade Biscuits
- Food Processor: I use this to cut the butter in quickly which makes my prep time way quicker. My favorite right now is the Cuisinart for price point and usefulness. I also use this for a lot of veggie prepping and blending tasks.
- Pastry Cutter: If you are not using a food processor you can cut the butter in with two knives but a pastry cutter is easier and quicker. They are inexpensive. This one is high quality.
- A Biscuit Cutting Set: This is super handy for cutting biscuits out without sealing the edges. Other work around options are not ideal. Make sure you get a set like this that has a 2 3/4″ size cutter. (I like the set because sometimes I use other sizes for different things.)
- Plastic Screw Top Lids for Mason Jars – If you store your moonshine in quart or pint jars these lids are great to have and cost effective
Love Breakfast and Brunch? Try Some More of My Popular Breakfast Recipes:
- Crispy Oven Hash Browns
- Blueberry Scones With Vanilla Glaze
- Better Than Cinnamon Cinnamon Rolls With Buttercream Glaze
- Blueberry Honey Butter
Looking for Biscuits and Gravy?
Grab my delicious, savory homemade sausage gravy recipe and tutorial here.

How to Make Biscuits From Scratch
Ingredients
For the Biscuits
- 4 cups all-purpose flour
- 2 Tablespoons baking powder
- 2 Tablespoons granulated white sugar
- 2 teaspoons sea salt
- ¾ cup salted butter very cold
- 1 1/2 cups whole milk can sub 2%
- 4 Tablespoons melted salted butter for brushing hot biscuits optional
For the Cinnamon Honey Butter
- 1/2 cup salted butter very soft but not at all melted
- 1/4 cup honey
- 1 teaspoon cinnamon
Instructions
Before You Begin
- If you have a food processor, by all means use it to make biscuits! It saves time and makes incredible biscuits. If not, no worries – a mixing bowl works just fine too! I’ve included a section of directions for each option just scroll down to your preferred option.
How to Make the Dough in a Food Processor
- Set the oven rack to the middle position. Preheat the oven to 425F. Line a baking sheet with parchment paper or Silpat. (Lining is optional for easy clean up.)
- In the bowl of a food processor, combine flour, baking powder, sugar, and salt. Pulse the mixture until it is completely mixed.
- Take the butter out of the refrigerator and cut it into about 12 chunks. Add to the flour mixture in the food processor. Pulse several times until the butter and flour look like course crumbs. The butter chunks should be the size of small green peas.
- Use a rubber spatula to scrape the mixture into a large mixing bowl. Check for any large lumps the machine might have missed. If you find any, cut them up with two knives or a pastry cutter.
- Pour in milk and use a spatula to stir just until the dough comes together. Do not overmix.
How to Make the Dough in a Mixing Bowl (Traditional Method)
- Set the oven rack to the middle position. Preheat the oven to 425F. If desired line a baking sheet with parchment paper or Silpat. (Lining is optional for easy clean up.)
- In a large mixing bowl combine flour baking powder, sugar, and salt. Whisk or stir until the mixture until it is completely combined.
- Take the butter out of the refrigerator and cut it into about 12 chunks. Add to the flour mixture and cut the butter in with a pastry cutter or two knives. The butter chunks should be the size of small green peas.
- Pour in milk and use a rubber spatula or spoon to stir just until the dough comes together. Do not overmix.
How to Form the Biscuits
- Dust a work surface liberally with flour and transfer the dough to the floured area. If the dough is too sticky to work with you can add a little more flour just until the dough can be managed. (Don't add more than you absolutely have to.)
- Use your hands to fold the dough in half on top of itself and gently press together.
- Continue to fold the dough in half, bringing the long ends together and then pressing down about 5 more times.
- Don’t grab a rolling pin! Instead use your hands to flatten the dough until it is 1/2” thick.
- Dust a 2 ¾” round biscuit cutter with flour. Press the cutter firmly down (without twisting) into the dough and then lift straight up to remove the dough. Place on the baking sheet.
- Continue to cut biscuits as close together as possible placing them about ½” apart on the baking sheet.
- The leftover biscuit dough can be regathered one time and pressed to 1/2” again. After this cutting you can discard the leftovers dough bits or dust with cinnamon sugar and bake on a separate sheet for a sweet treat.
Baking The Biscuits
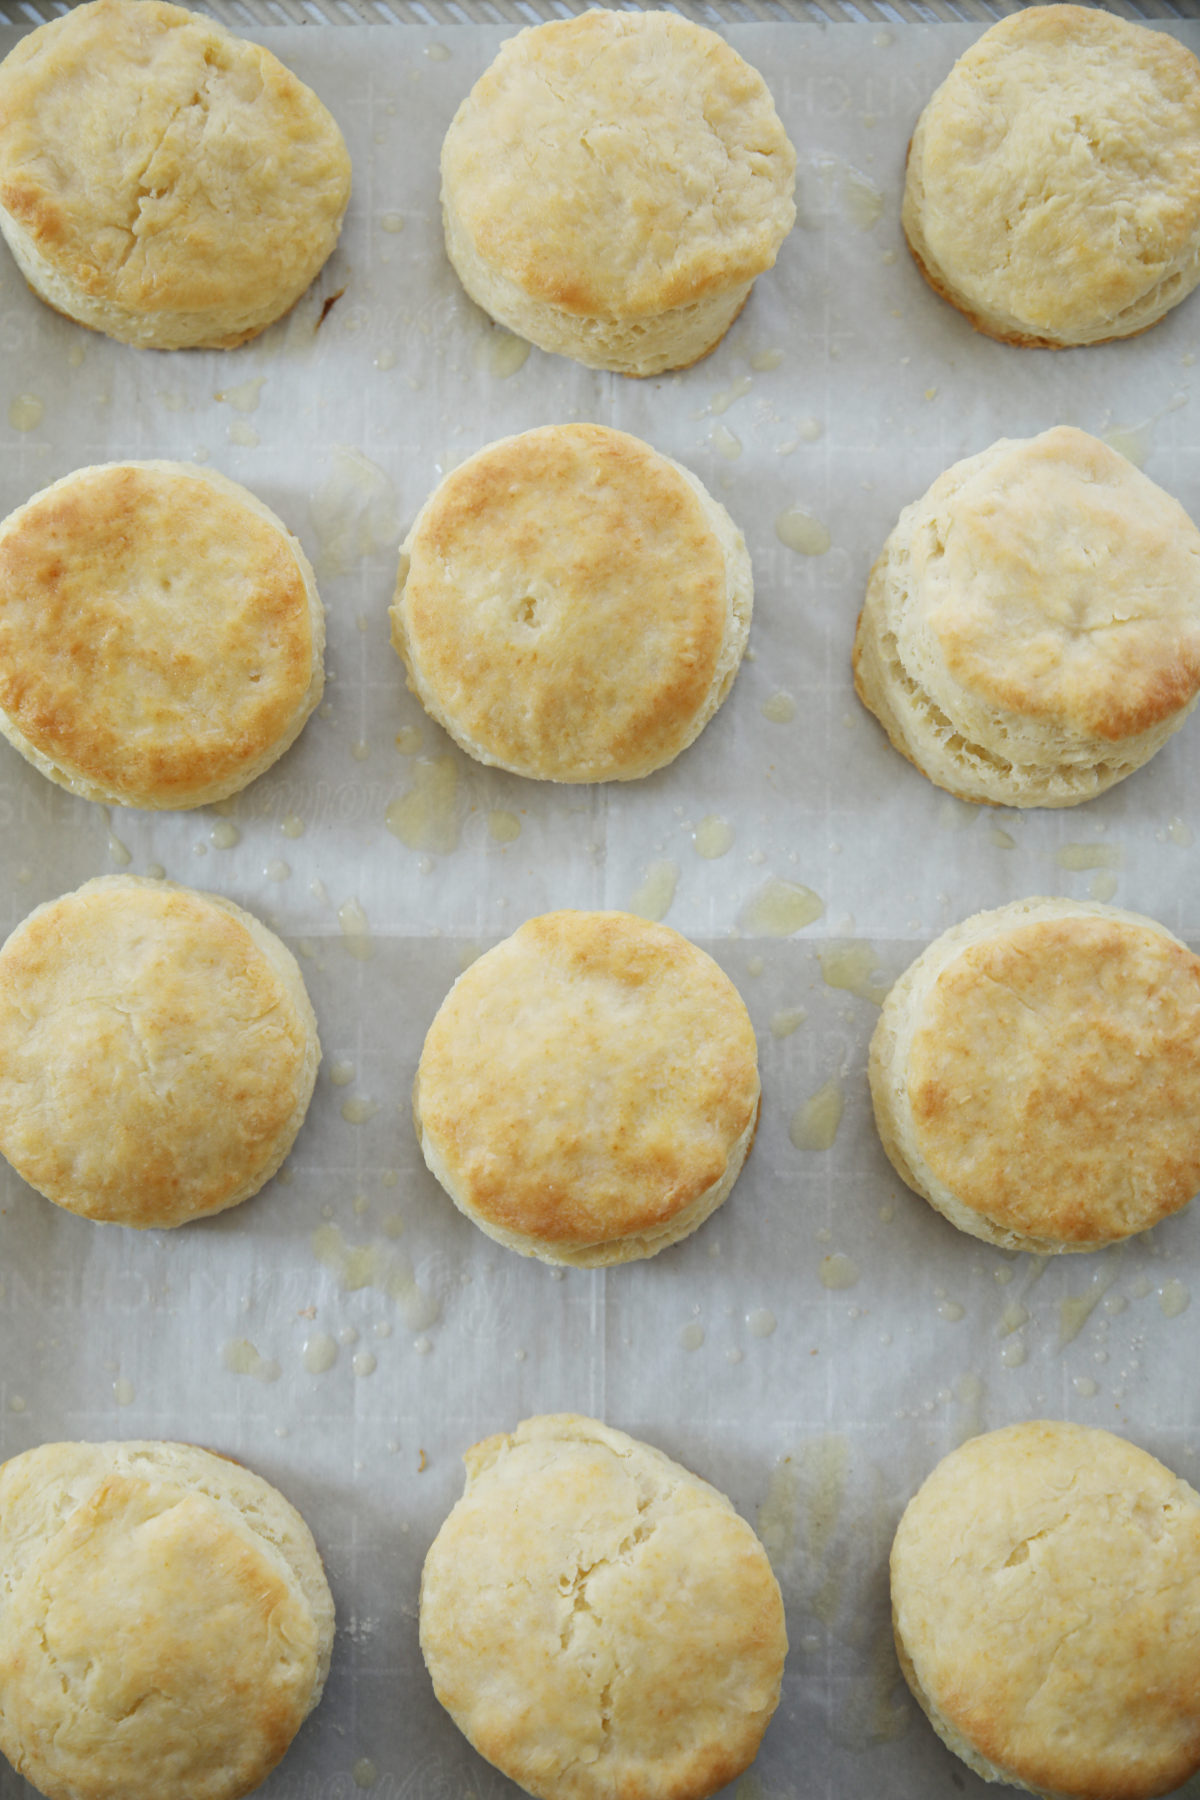
- Bake at 425F for 14-16 minutes or until the tops are start to turn golden brown and there is no uncooked dough in the center of the biscuit. Pro Tip: If the biscuit is still doughy you will generally see raw dough even in the side of the biscuits.
- Pro Tip: To get the biscuits more golden on top you can turn the oven broiler on high for one minute after the biscuits are fully cooked. This will make them a little bit more golden.
- Brush the biscuits with melted butter (if desired) and serve hot. Biscuits will be best the first day and nice the 2nd day. After three days they are no longer fresh. Store in an air tight container at room temperature.
To Make the Honey Butter
- In a small bowl, use a fork to whip together the soft butter with honey and cinnamon. Serve at room temperature with the hot biscuits. Store leftovers in the refrigerator. Try to resist the temptation to eat with a spoon – or not!
Helpful Recipe Notes
Your Rating Matters
When you leave a comment or star rating, it means more than you might think. It helps me understand what you’re enjoying, builds trust for other readers, and supports real, tested cooking content. If you have a moment, I’d truly appreciate you sharing your experience. - Mirlandra
Nutrition Estimate
A Note on Nutrition
Nutritional info is an imperfect estimate. Please take it with a grain of salt.
When you leave a comment or star rating, it means more than you might think. It helps me understand what you’re enjoying, builds trust for other readers, and supports real, tested cooking content. If you have a moment, I’d truly appreciate you sharing your experience.
Leave a Reply