Sourdough can feel unnecessarily complicated to beginners. If you’ve ever felt like recipes are written in a different language, you aren’t alone. When I was starting out, I found myself constantly pausing to look up terms. It took the joy out of the process and made me feel like I was always missing something important. I want sourdough to be easy for you to enjoy, not a source of frustration.
This streamlined guide is designed to help you navigate the learning curve and start understanding your recipes immediately. I’ve removed the confusing technical headers and simplified the language. This is a clear, alphabetized list of the terms that actually matter. From “Autolyse” (yeah that one drove me bonkers) to the “Windowpane Test,” here is everything you need to know to speak Sourdough without having to use Google Translate!
New to sourdough? Start Here! How To Feed Sourdough Starter Beginners Guide Easy Sourdough Bread Recipe for Beginners (Artisan Loaf)
Sourdough for Beginners: My Top 29 Terms Explained
Why 29? Because you don’t need 50 until you hit intermediate or advanced sourdough bread baking. By then you will be all grown up and not need this anymore 😉 It turned out my “important” list was 29 terms long. There you have it!
Autolyse (Pronounced Auto-lies)
Bottom line an autolyze is mixing the initial ingredients and then waiting about an hour for everything to absorb and relax before you start the next step.
It’s important to note that recipes are all over the map on this term. In modern recipes “autolyze” can cover everything from a simple mixture of flour and water to a mix of flour, water, starter, and salt. It gets confusing for beginners.
As long as you understand that Autolyse generally refers to the early mixing and resting of the dough so it becomes smooth and ready for stretch and folds, you should be golden. Each recipe will tell you exactly what to mix together for their specific version of an “Autolyse.”
All that being said, the true science based baking definition of “autolyze” is the process where you mix only your flour and water and let it rest for 30–60 minutes before adding anything else.
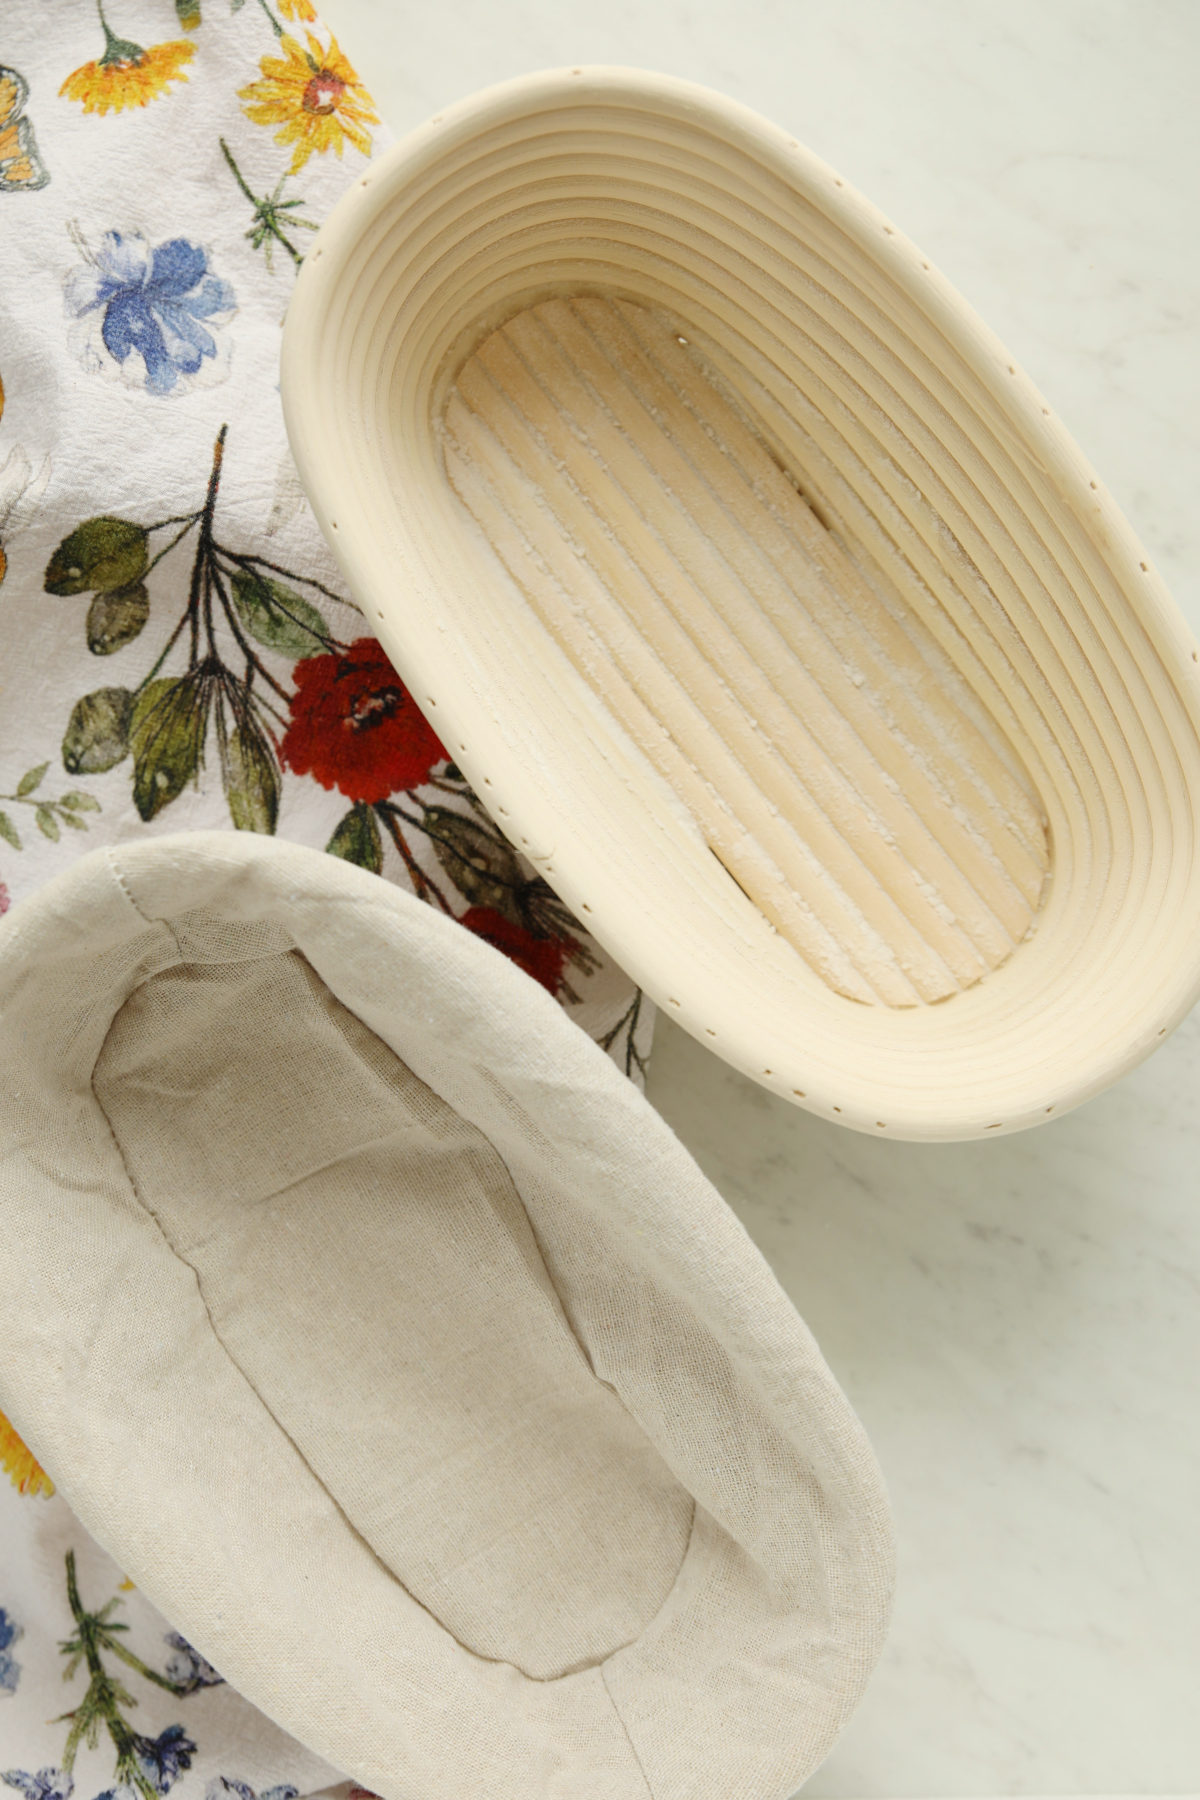
These are two batard shaped banneton proofing baskets I use. I showed one with the cloth liner they usually come with. I don’t use those.
Banneton
A specialized proofing basket, usually made of cane or cotton rope, that supports the dough’s shape during its final rise. It helps manage surface moisture for a better crust. If you don’t have one, a bowl lined with a well-floured tea towel works while you are starting out.
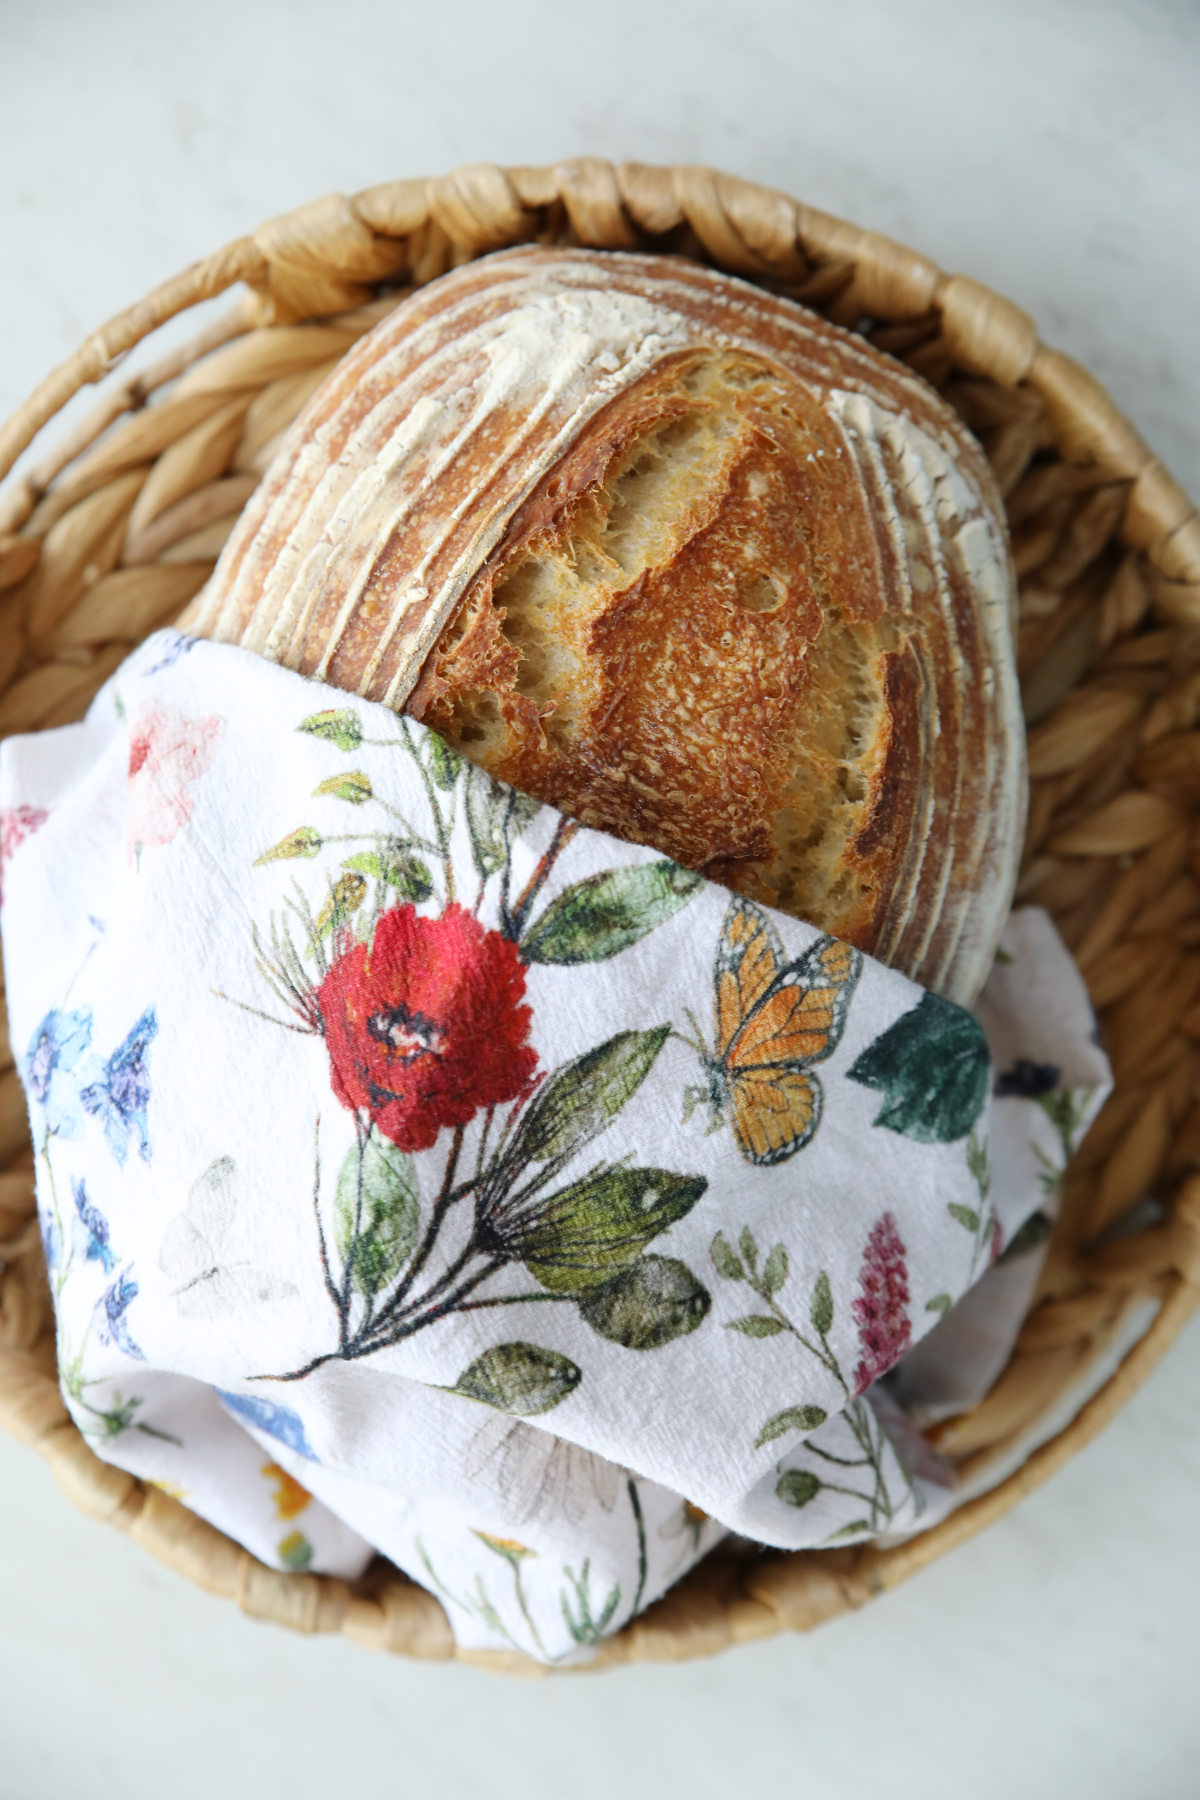
Batard
This refers to an oval, football-shaped loaf. Many home bakers prefer this shape because it’s often easier to slice for uniform sandwiches than a round loaf. Plus, I just think they’re pretty!
Boule
The classic, round “ball-shaped” loaf. It is shaped by tucking the edges of the dough under itself to create a tight, tensioned skin. This is the perfect starting point for beginners learning the basics of dough tension.
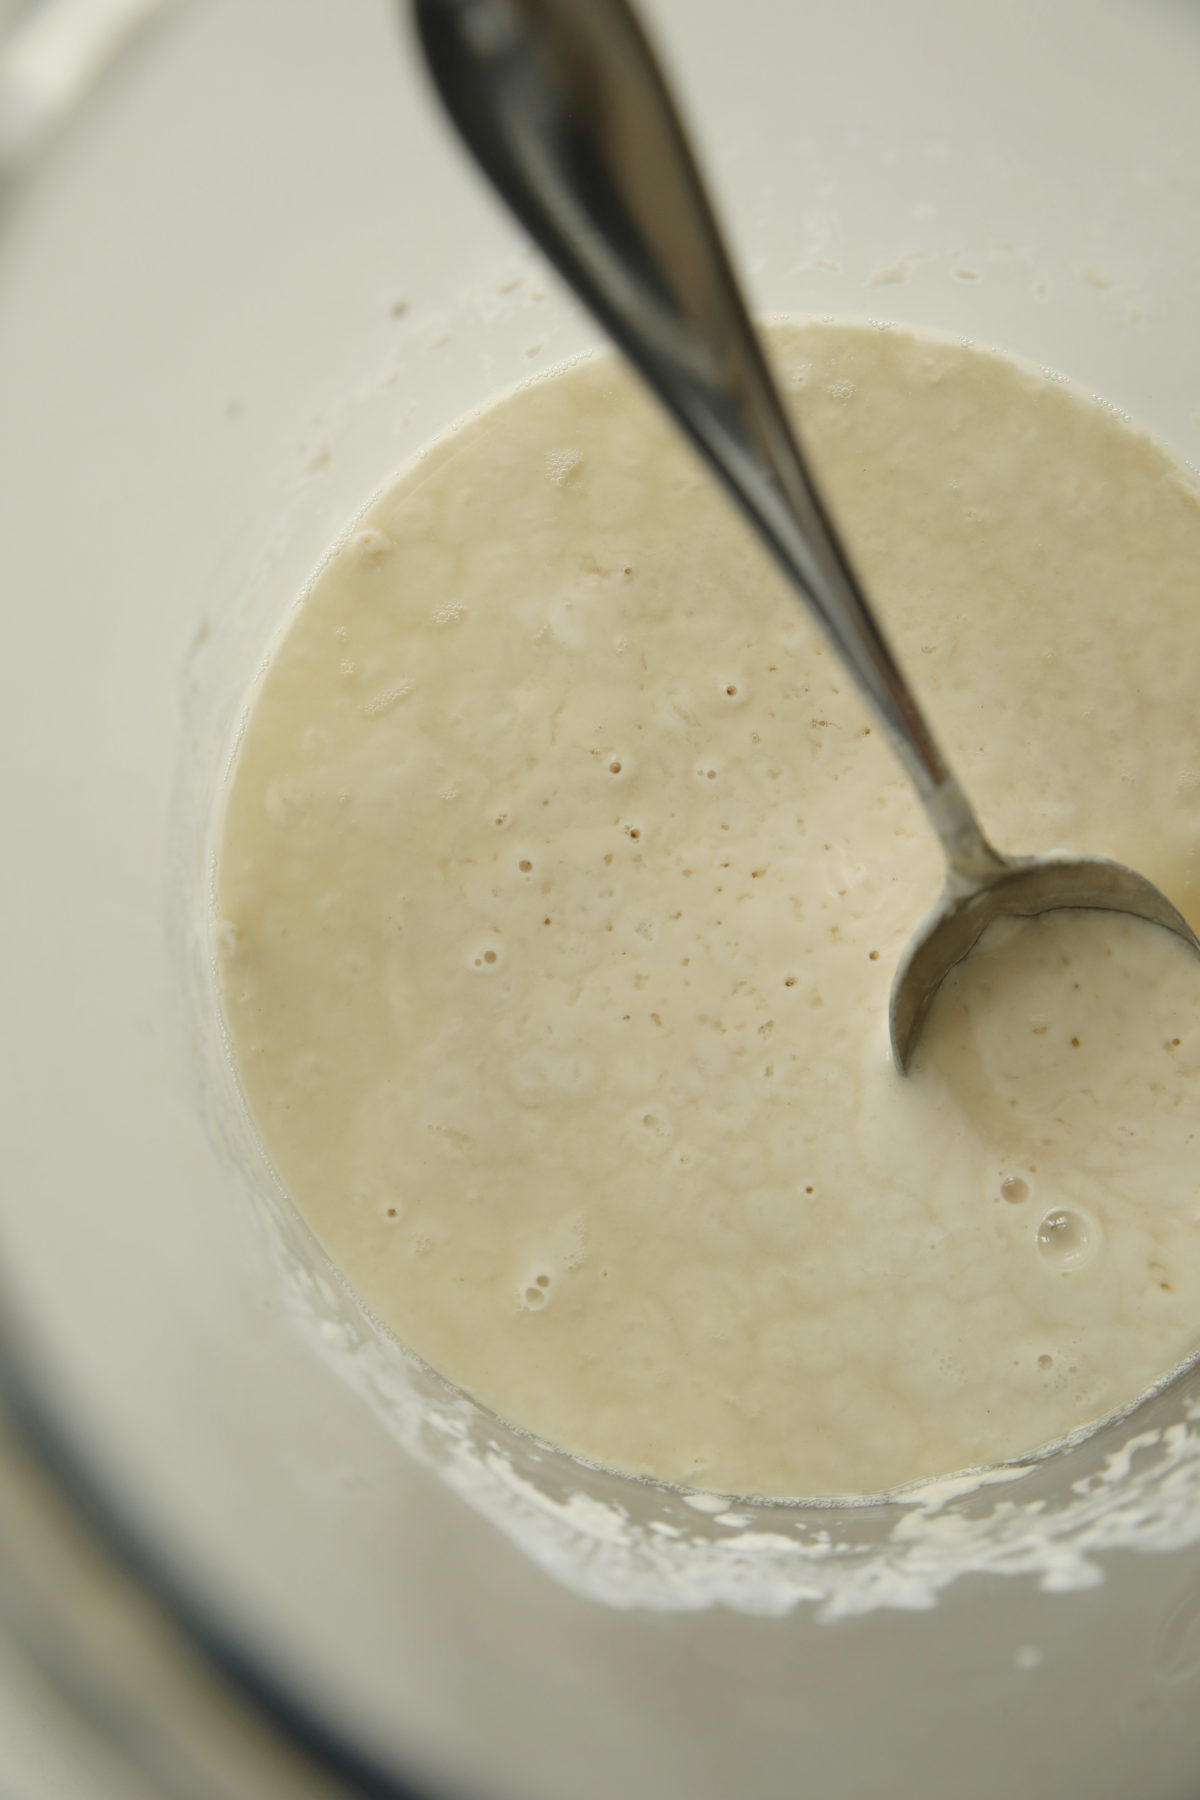
Bulk Fermentation
Known as the “First Rise,” this is the most critical stage where flavor and bubbles are born. It is done at room temperature. You know it’s finished when the dough looks bubbly and “pillowy,” and jiggles like a Midwest jell-o salad rather than just when a timer goes off. Trust your eyes, not just the clock!
Coil Folds
A gentle way to build strength in high-hydration doughs. You lift the dough from the middle with both hands, let the ends tuck under themselves, and rotate the bowl. It’s less aggressive than a stretch and fold, which helps preserve those delicate air bubbles. This is a bit more of an intermediate sourdough skill but you will hear it a lot in sourdough instructions.
Cold Retard
Putting your shaped dough in the fridge overnight. The cold “pauses” the yeast but lets the bacteria create that signature sour tang. It also makes the dough stiff and cold, which makes it much easier to score beautiful patterns.
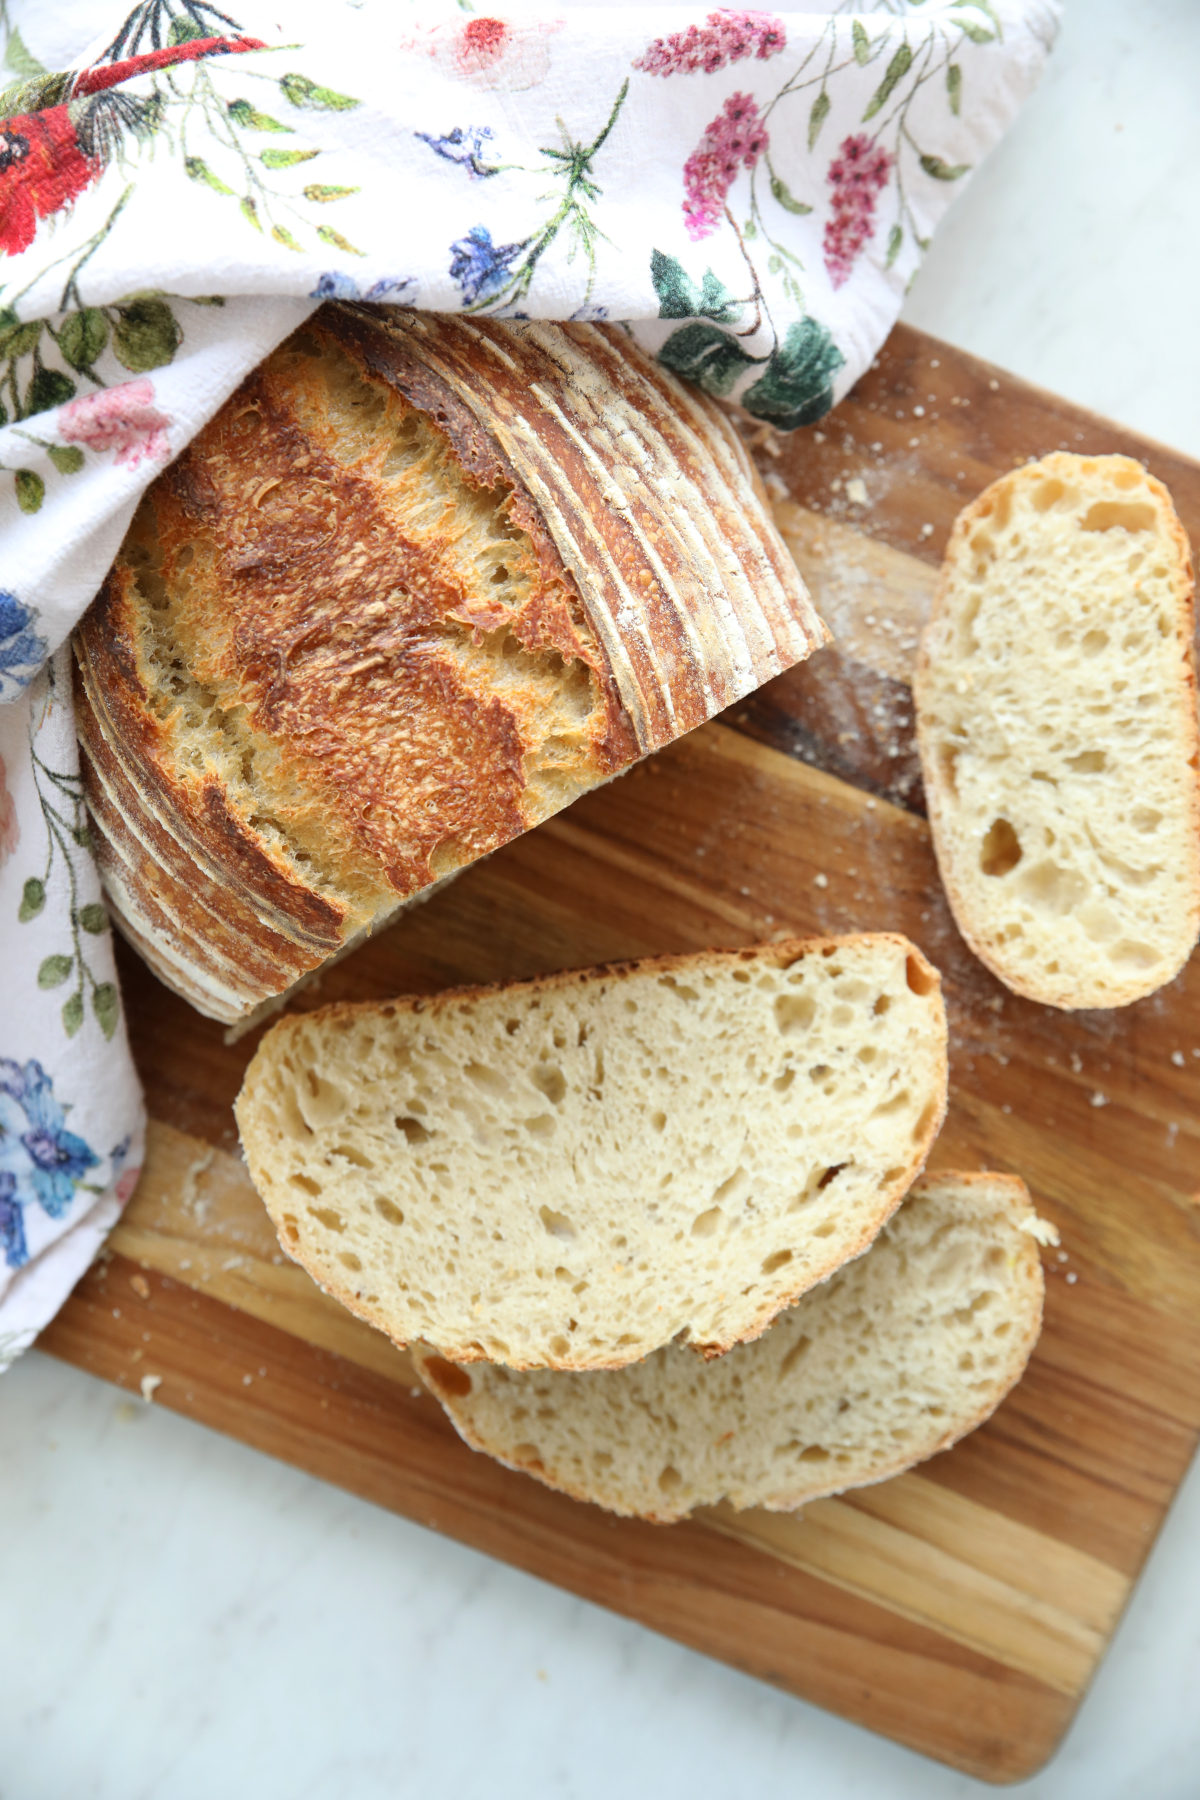
My daughter holds a batard shaped loaf of sourdough with a closed crumb perfect for breakfast toast.
Crumb
The texture and hole structure inside your bread. While social media prizes giant holes, the “perfect” crumb is simply the one you enjoy eating!
Open Crumb: Large, airy holes sought after for the “artisan” look. Beautiful, but a bit of a challenge for holding butter!
Closed Crumb: Tight and uniform—the “holy grail” for sandwiches and toast.
Fool’s Crumb: An uneven crumb with a few giant holes surrounded by dense dough. This is usually a sign that your dough needed a few more hours of fermentation.
Degas
To accidentally or intentionally knock the air out of the dough. In rustic sourdough loaves we usually try to avoid degassing but some recipes for sandwich loaves will intentionally have you degas the dough. (Note: My recipe for sourdough sandwich bread stays light and uniform without an extra degassing step—you’re welcome!)
Discard
The portion of starter you remove before feeding the rest of the jar. It keeps your culture healthy and prevents it from getting too acidic.
Pro Tip: Never throw this in the trash; save it in the fridge for pancakes, muffins, or crackers!
Ear
That crunchy, jagged flap of crust that peels back where you scored the loaf. It’s a “trophy” of a well-baked bread, but don’t let it become a trap for perfectionism! Your bread will still taste amazing even without a prominent ear. My favorite scores are ones that don’t create such a big ear – they are easier to slice and enjoy!
Enriched Dough
Sourdough that has “extras” like butter, eggs, milk, or sugar. These ingredients make the finished product very soft and “pillowy.” Think of this as the category for sourdough brioche, dinner rolls and of course my family favorite – sourdough cinnamon rolls!!!
Feeding
Adding fresh flour and water to your starter. Think of it like providing a fresh meal for your “pet” yeast colony. Consistent feeding is what keeps the culture active and ready to bake. I cover feeding your sourdough starter in detail here. You will learn how to create a low maintenance routine that fits in your life!
Feeding Ratio
The proportion of starter to new flour and water (like 1:1:1). Changing this ratio acts like a “timer”; more food means the starter will take longer to reach its peak. This helps you fit sourdough into your schedule, not the other way around. When you are learning a 1:1:1 is ideal.
Hydration
In sourdough baking hydration is the ratio of water to flour, expressed as a percentage. A loaf around 70% hydration loaf is usually the easiest beginners because it’s less sticky. Higher hydration doughs are more challenging but result in a more open crumb.
When your really dedicated sourdough friend asks you what hydration you use in your recipes you can totally bluff by responding, “The one that tastes good!”
Hooch on top of unfed sourdough starter. This jar is just starting to form hooch. It can be a lot darker and a lot more of it after awhile.
Hooch
A thin layer of dark liquid that forms on top of a hungry starter. It is NOT mold! It’s just a sign your starter needs a meal; you can stir it back in or pour it off. (Read more about hooch here.)
Lame (Pronounced Lahm)
A fancy word for a sharp blade! It’s a specialized baking tool with a razor blade held in a handle, used to score the dough precisely. While it’s great for clean cuts, a very sharp kitchen knife works just fine when you’re starting out. A lame is not expensive so grab one as soon as you are ready to invest in your journey. (I cover all the sourdough tools you might want and the ones you should not buy here.)
Lamination
Stretching your dough into a thin rectangle on the counter and folding it back up. This builds massive gluten strength and is the perfect time to “fold in” extras like jalapeños or cheese or (ahem) chocolate….
Levain (Pronounced Luh-van)
A specialized “offshoot” of your main starter. You take a small amount of your “Mother” starter, feed it in a separate jar, and use that entire amount in your dough. This keeps your main starter clean and is a great intermediate technique. If you are starting out you might want to choose recipes that use classic sourdough starter.
Oven Spring
The dramatic burst of growth that happens in the first 10 minutes of baking. The heat causes gases to expand rapidly before the crust sets, determining the final height of your loaf.
Poke Test
A manual way to check if your dough is ready to bake after its “long cold wait” in the fridge. (Don’t be like me when I was learning and try to use the poke test to see if bulk ferment on the counter was done! LOL)
Under-proofed: The indent springs back quickly and fills in. Give it more time.
Over-proofed: The indent stays deep and doesn’t move. The dough is “tired” and may stay flat in the oven.
Perfectly Proofed: The indent springs back slowly but remains slightly visible. This is your “sweet spot!”
Proofing
The “Second Rise” that happens after you’ve shaped the dough. Proper proofing ensures the bread has enough gas to expand beautifully in the oven without collapsing.
Resting
Any period where the dough is left alone. Sourdough needs “quiet time” for the gluten to relax after handling. These rests are essential for a light, airy texture. It’s like a toddler. A little alone time is good for it AND you!
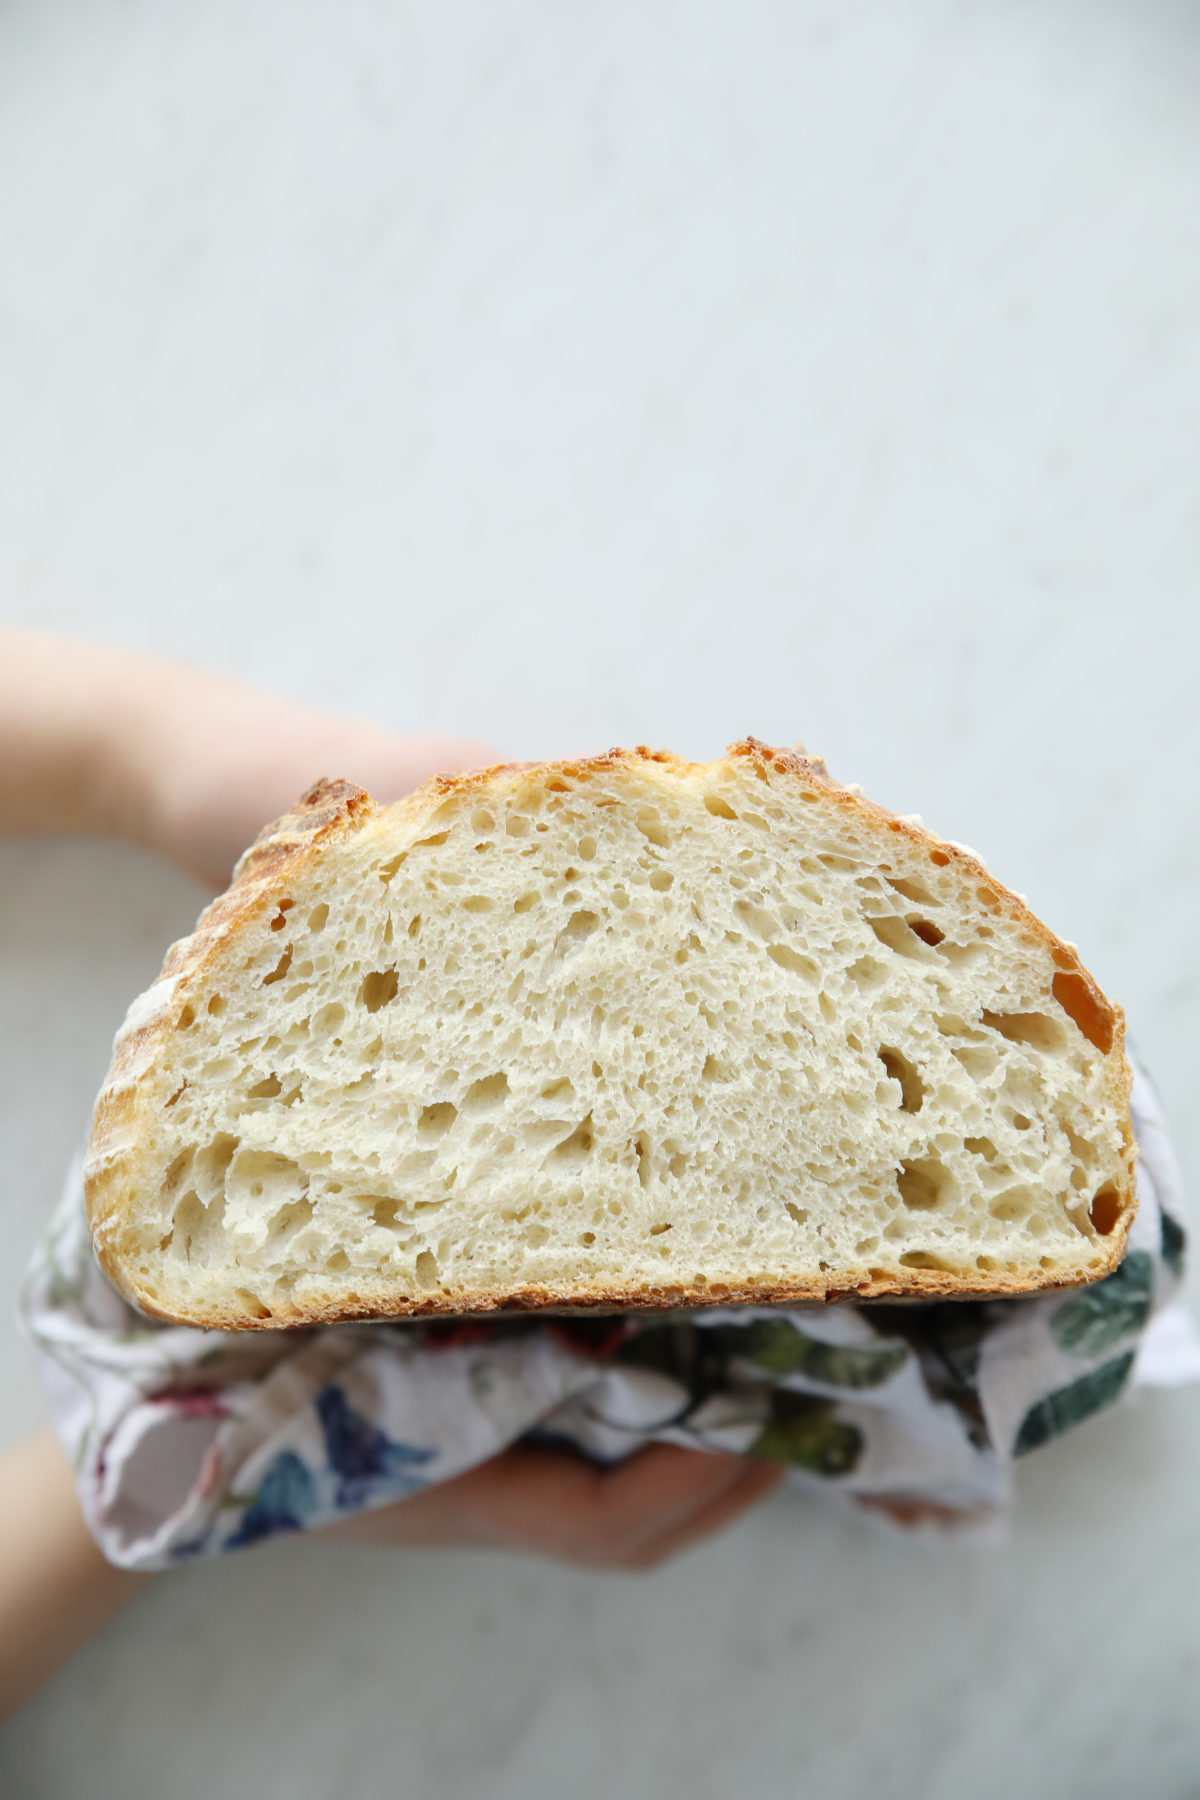
This is a pretty example of Rustic Sourdough. This is also one of my very early sourdough loaves! I hope that encourages you!
Rustic Sourdough
A style of bread that celebrates the “homemade” look. It’s usually characterized by a thick crust, a heavy dusting of flour, and slightly irregular shapes. No perfectionism required here! If you like amazing tasting food that isn’t overly fussy this is going to be your happy place!!! (I have a complete explanation of what sourdough bread is here.)
Scoring
Making shallow cuts in the dough right before baking. An “expansion score” is a deep cut that lets the bread grow, while “artistic scores” are decorative patterns. It’s both functional and your personal signature. (Check out my guide to 10 Simple Sourdough Scoring Designs Here.)
Shaping
The process of folding the dough into a tight ball or oval to create “surface tension.” This ensures the loaf holds its shape and rises up rather than spreading out.
Starter
Your “wild yeast” culture and the engine of your bread. It’s a living mixture of flour and water that you feed to keep active. (Check out my full guide on Henrietta the Starter for more!)
Stretch and Fold
A technique used to build strength instead of heavy kneading. You pull one side of the dough up and fold it over itself. It’s much easier on the hands and very effective for sourdough. Full stretch and fold video guide here.
Windowpane Test
A way to check if your gluten is strong enough. You stretch a small piece of dough between your fingers until it’s thin enough to see light through. If it doesn’t tear, your gluten is ready! This isn’t my favorite “easy” check for beginners but you should know what it is if you see the suggestion in a recipe.
Welcome to the Club
Now that you’re speaking the language, it’s time to get your hands in some dough! My easy sourdough bread recipe for artisan bread or crazy easy sourdough focaccia are great places to start.
Don’t worry about being a “pro” on your first loaf or memorizing this list by heart. Sourdough is a journey of practice, not perfection. Keep this glossary bookmarked for whenever you hit a word that makes you pause, but otherwise?
Just keep feeding that starter and happy baking! Don’t hesitate to drop your questions into the comments so I can point you to a resource that will help you exactly where you are at.
New to sourdough? Start Here! How To Feed Sourdough Starter Beginners Guide Easy Sourdough Bread Recipe for Beginners (Artisan Loaf)
Leave a Reply