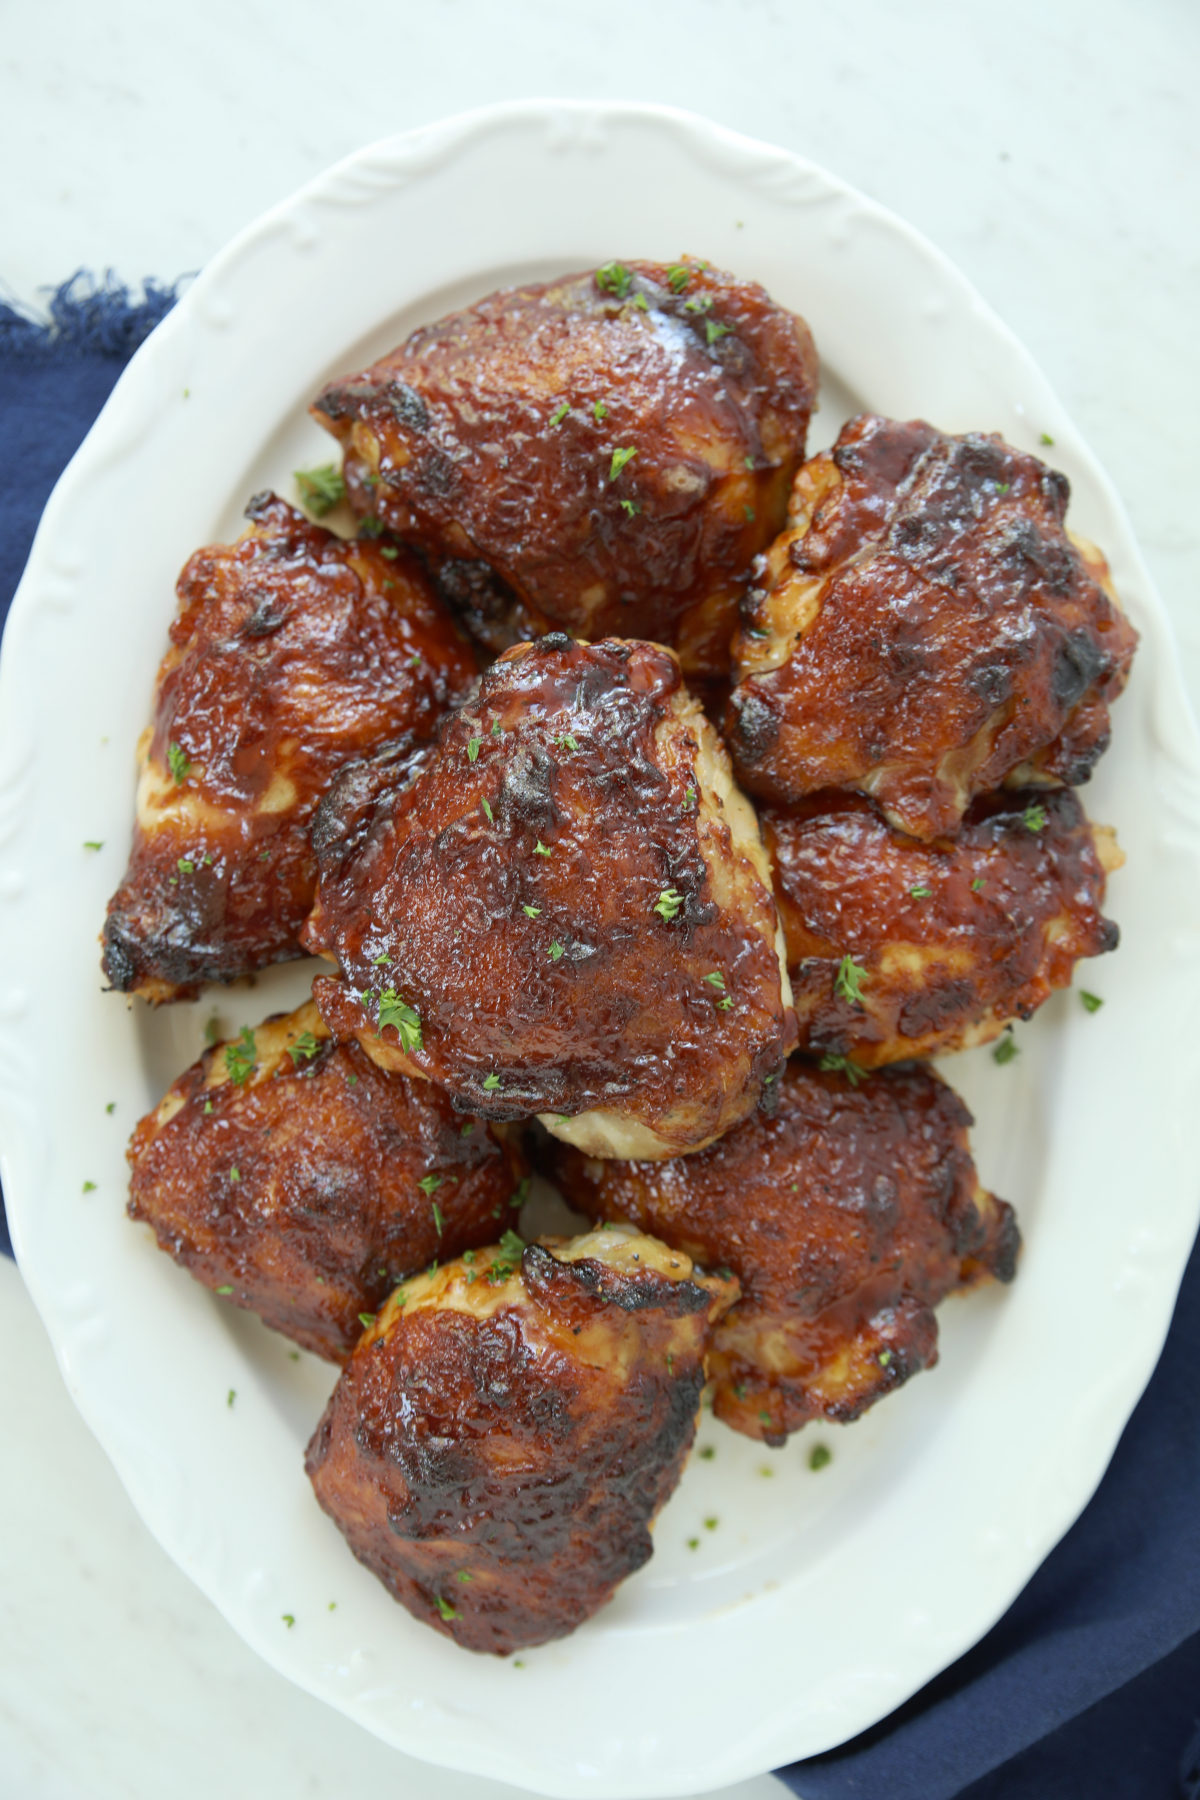
When you want BBQ chicken but the grill isn’t happening, this is the recipe. A quick brine does the heavy lifting on flavor and juiciness, and two rounds of sauce in the oven gives you sticky, caramelized results that taste like you worked a lot harder than you did.
I originally shared this recipe in March 2015, and today I’m updating it with fresh photos, new information and my some extra tips!
I love tender, juicy BBQ chicken but firing up the grill on a Tuesday night in the dead of winter is not always happening. This recipe gives you everything you love about BBQ chicken — sticky, caramelized sauce, juicy meat, real flavor — straight from your oven. The secret is a simple brine and a two-stage saucing method that most recipes skip entirely. Once you try it this way, you’ll understand why it matters.
Why This Recipe For BBQ Chicken In The Oven Nails It
The brine does the heavy lifting. Soaking the chicken in a salt, brown sugar, and pepper brine for anywhere from 90 minutes to 8 hours before cooking does two things. First, it helps the meat hold onto moisture during the high heat cooking process so you end up with juicy thighs instead of dry ones. Second, it adds a subtle savory depth that plain unseasoned chicken just doesn’t have. It sounds fancy but it’s really just dumping stuff in a bag and getting fancy results.
The rack changes everything. Placing the chicken on a rack set over a sheet pan instead of directly in a baking dish lets hot air circulate all the way around the meat. The skin gets better color, the sauce caramelizes properly, and you don’t end up with the bottom of the chicken sitting in a pool of liquid. I use a simple rimmed baking sheet with a wire rack set on top — nothing fancy required. It’s the same equipment I use to bake and cool cookies so it does great double duty! A good heavy sheet pan is worth having in your kitchen. Thin, flimsy pans warp at high heat and cook unevenly. I recommend USA Sheet Pans and a good heavy duty rack.
Two rounds of sauce beats one. Brushing the sauce on in two stages — once at the 10 minute mark and again at 20 minutes — builds layers of flavor and gives you that deep, sticky caramelized exterior. If you put all the sauce on at the beginning it burns before the chicken is done. If you put it all on at the end it tastes raw and bright instead of rich and complex. Two rounds is the move.
What You Need To To BBQ Chicken Thighs In The Oven
This recipe keeps it simple. You need bone-in, skin-on chicken thighs — not boneless, not skinless. The bone keeps the meat juicy and the skin protects it during the high heat bake while also giving you something wonderful to eat at the end. Plan on 2 thighs per adult and 1 per child.
For BBQ sauce, use whatever your family loves. A good quality sauce you already like is going to give you a better result than an unfamiliar one. We are loving the sauces from Kinder’s right now. The Kinder’s Hickory Brown Sugar BBQ Sauce is what’s pictured in this recipe and it was perfect. I’ve also used Sweet Baby Ray’s Sweet and Spicy in this recipe – heads up most people wouldn’t consider it actually spicy but I do think the flavor is nice.
The brine ingredients are pantry staples — salt, brown sugar, and black pepper. That’s it. Gotta love the easy ones!
How to Make BBQ Chicken Thighs in the Oven
Start the brine in the morning for a dinner that night, or start it about 90 minutes before you want to eat. Add the salt, brown sugar, pepper, and cold water to a gallon zip lock bag, seal it, and shake to combine. Add the chicken, seal the bag, and refrigerate until you’re ready to cook.
When it’s time, preheat your oven to 450°F and get your sheet pan and rack set up. Pull the chicken from the brine, drain it well, and pat dry if you want. Place the thighs skin side up on the rack. If there are large floppy pieces of skin hanging off the sides, tuck them under or trim them with kitchen scissors — they’ll just burn otherwise.
Bake for 10 minutes, then brush on half the sauce. Bake another 10 minutes and brush on the rest. Then keep baking until your thermometer reads 160°F — more on that below.
Use a Thermometer. Every Single Time.
This is the part where I’m going to be very direct with you: you cannot safely or accurately judge doneness on this chicken without an instant read thermometer. The BBQ sauce is deep red. You cannot see color changes in the meat. The “juices run clear” method is not considered a reliable safety indicator by food safety experts and I’m not going to pretend it is. It’s also just annoying trying to judge your meet that way! You loose all the juice prodding the chicken over and over.
An instant read thermometer takes two seconds and removes all the guesswork. Pull the chicken when it hits 160°F, let it rest a few minutes, and carryover cooking will bring it safely to 165°F.
My favorite thermometer is the ThermoWorks Thermapen — it’s fast, accurate, and will last you years. If you want a more budget friendly option the ThermoWorks ThermoPop is also excellent. Either one will serve you well in this kitchen and every other cooking situation you run into. I switched over to their stuff over a decade ago and it works every time and lasts for YEARS.
Can I Make BBQ Chicken Legs In The Oven?
Good news — this recipe works beautifully for bone-in chicken legs too. Use the exact same brine and the same method. Depending on the size of the leg you might need to pull it earlier. I also love using chicken hindquarters for this recipe. As always, your thermometer is the final word on doneness, not the clock.
FAQ
Can I make these ahead of time? Yes. You can brine the chicken up to 8 hours ahead and keep it in the fridge until you’re ready to cook.
What is the best BBQ sauce for chicken thighs in the oven? Use whatever your family loves. We rotate between Sweet Baby Ray’s Sweet N Spicy and Kinder’s Hickory Brown Sugar — both work beautifully here. A sauce you already know and like will always give you better results than an unfamiliar one.
Do I have to brine the chicken? You don’t have to, but you’ll notice the difference. The brine is what makes these thighs genuinely juicy instead of just okay. It takes about two minutes of actual effort so it’s worth it.
Do I have to use bone-in skin-on thighs? Yes — and I mean it. Bone-in skin-on thighs stay juicy at high heat and the skin caramelizes with the sauce in a way that makes this recipe what it is. Boneless skinless thighs dry out and you’ll be disappointed. Grab the right cut and thank yourself later.
How do I store leftovers? Store in an airtight container in the fridge for up to 4 days.
How do I reheat leftover BBQ chicken thighs? Reheat in a 350°F oven until warmed through — about 15 minutes. The microwave works in a pinch but the skin won’t be as good.
What to Serve With BBQ Chicken Thighs
This chicken is a natural with simple sides. A few favorites that don’t compete for oven space!
- Best Coleslaw Ever (According to Me)
- Ultimate Creamed Corn (Slow Cooker Recipe)
- Simple Instant Pot Mac and Cheese
- Blistered Shishito Peppers (Easy Skillet Recipe)
- Cucumber Dill Salad (Easy year round light salad to compliment BBQ)
Oven BBQ Chicken Thighs
Ingredients
- 2 Tablespoons salt (remember in a brine you don't eat all this salt, it is just for soaking the meat)
- ⅓ cup brown sugar can sub granulated sugar
- 1 teaspoon coarsely ground black pepper
- 3 cups cold water
- 8 chicken thighs bone-in and skin-on (about 3 pounds)
- 1 cup BBQ sauce Both Kinder's Hickory Brown Sugar and Sweet Baby Ray's Sweet and Spicy are great options for this.
Instructions
- Place salt, brown sugar, pepper, and cold water into a gallon Ziploc bag. Seal and shake to combine.
- Add the chicken to the brine, seal the bag, and refrigerate for 90 minutes to 8 hours.
- Preheat oven to 450°F. Line a cookie sheet with parchment paper or foil and place a rack on top.
- Remove chicken from the brine and drain well. Pat dry if desired. Place skin side up on the rack. If there are large flaps of skin hanging off the meat, tuck them under the chicken or trim with kitchen scissors.
- Bake for 10 minutes, then brush half the BBQ sauce over the chicken.
- Bake for another 10 minutes, then brush on the remaining sauce.
- Continue baking 10-15 minutes more, until a digital thermometer inserted into the thickest part reads 160°F. Remove from the oven and rest a few minutes — carryover cooking will bring the chicken to 165°F. Because the BBQ sauce is red, the "juices run clear" method is not reliable here. Always use a thermometer.
- Total cook time depends on the size of your thighs.
Your Rating Matters
When you leave a comment or star rating, it means more than you might think. It helps me understand what you’re enjoying, builds trust for other readers, and supports real, tested cooking content. If you have a moment, I’d truly appreciate you sharing your experience. - Mirlandra
Nutrition Estimate
A Note on Nutrition
Nutritional info is an imperfect estimate. Please take it with a grain of salt.
cristina says
Look at that BBQ sauce goodness on that piece of chicken…makes my mouth water. Yes, with roasted vegetables, please! Delicious…
Mirlandra says
Thanks! There is never a bad time for BBQ.
Brandon @ Kitchen Konfidence says
I too love tender, juicy, succulent chicken, so I definitely need to give this a try!
Paulette says
Should it be 3/4 cup salt? Teaspoon maybe? Seems like an awful lot of salt.
Mirlandra says
That is the correct amount of salt. You are just using the salt to soak the chicken in a saltwater solution. I know it sounds kind of crazy but it makes very tender, moist and flavorful chicken. The meat will be savory but not salty. When the chicken is done soaking you discard the saltwater and do not include it in the recipe. The chicken will have absorbed a reasonable amount of salt but no more. I hope that makes more sense!
Shekini says
My husband has been saying for YEARS that he doesn’t like BBQ chicken. So, I’ve never bothered to make any for us. But, today I wanted to make something fast and easy, so I decided to try this recipe on him anyway. He LOVED it, and so did I. That’s saying a lot, because he’s a really picky eater. This chicken is so tender and flavorful! I think this will be part of our regular rotation now.
Mirlandra says
Oh wow! Thank you so much! I’m so glad it was a great recipe for you guys!!!