Most raspberry jam is just sugar with a hint of berry. This freezer jam flips that — less sugar so the raspberries actually shine, no canning equipment, and fresh picked flavor you can pull from the freezer all year long.
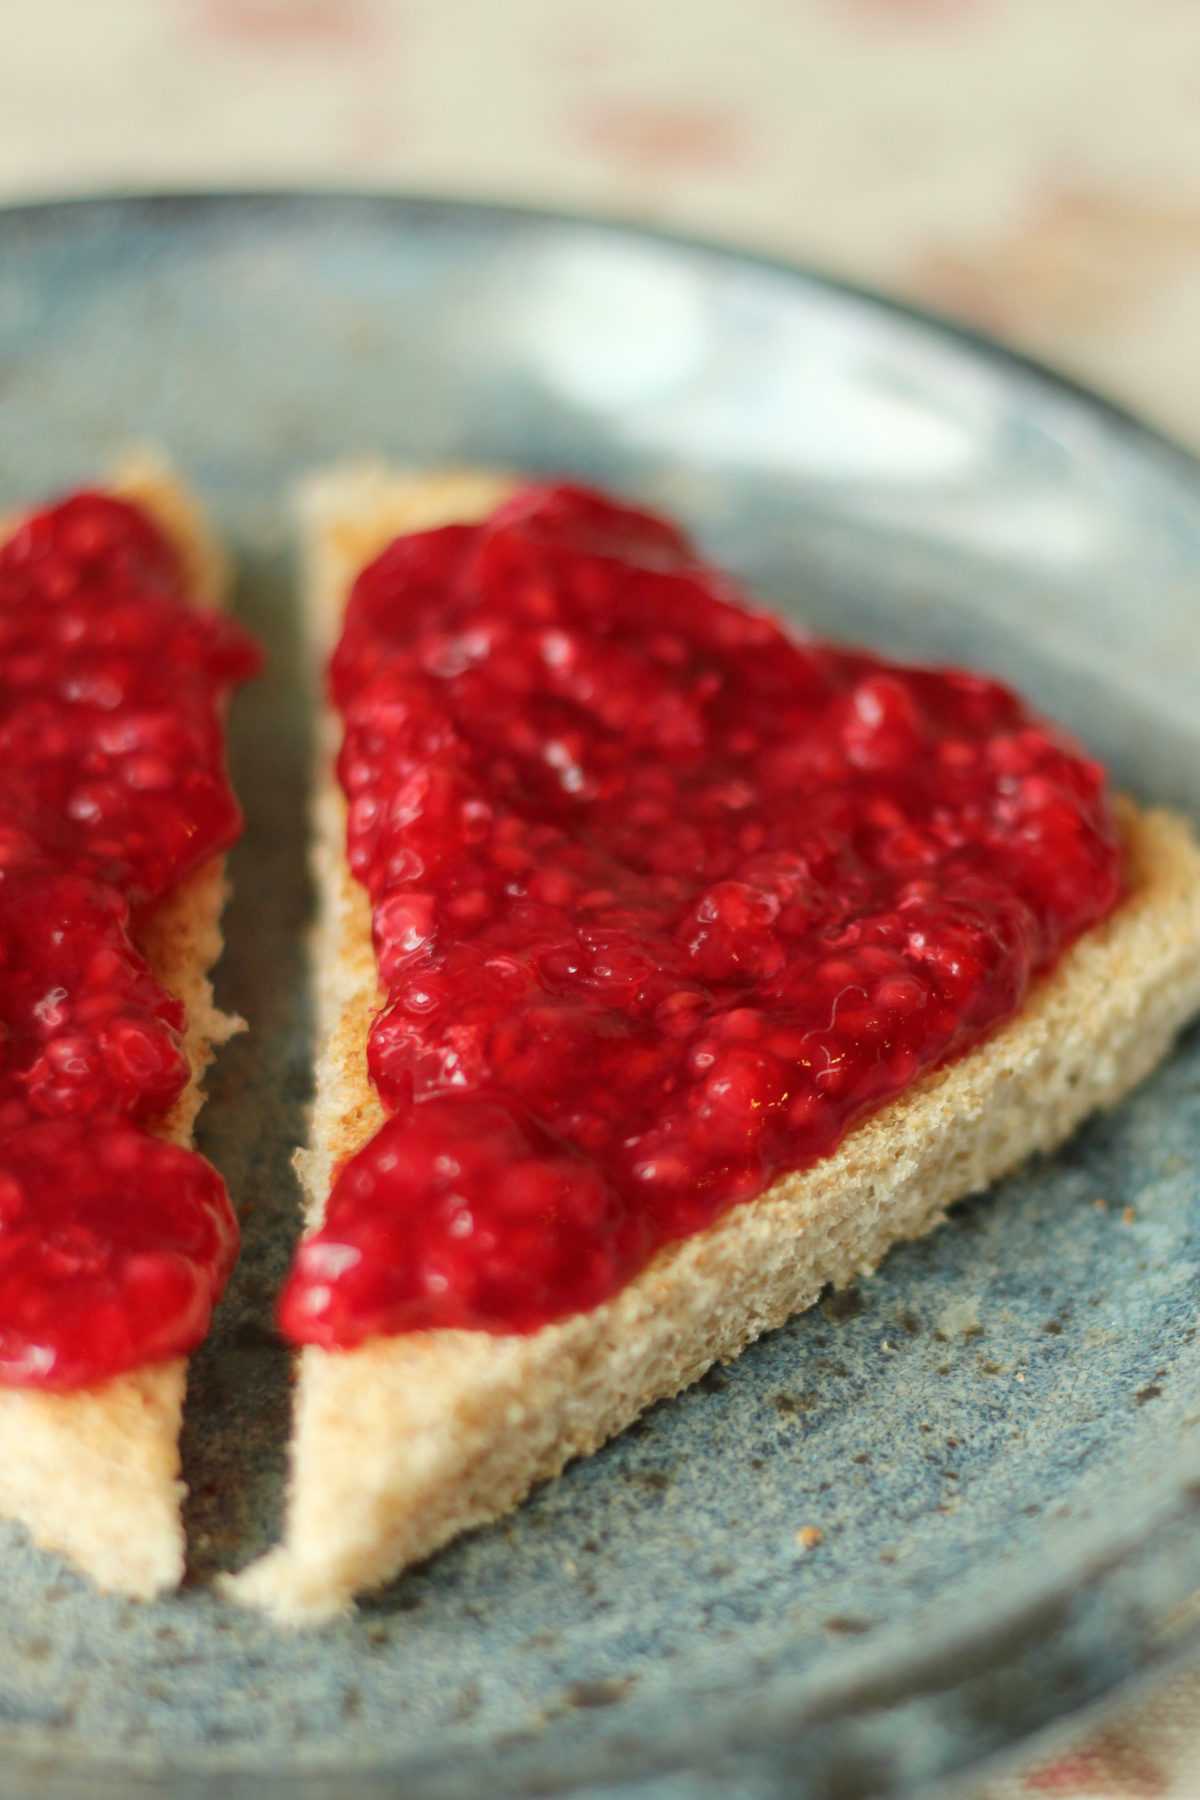
I originally shared this recipe back in June 2014, and today I’m updating it with new information and my some extra tips! The Ball stir in pectin I used to use for this recipe is almost impossible to find now so I’m updating this for the method I use now with Sure-Jell.
Raspberries have this way of showing up all at once and daring you to keep up. A friend calls with a surplus from their garden. You spot them at the farmers market looking perfect. You pick more than you meant to because you always pick more than you meant to. And suddenly you have more raspberries than you can possibly eat before they turn.
Here’s what I do: freeze them. Raspberries freeze beautifully, and that means you can make this jam on a quiet Tuesday in October just as easily as you can make it in the middle of berry season. No rush, no pressure, no racing the clock before they go soft. Just bag them up and pop them in the freezer until you’re ready — they’ll keep for up to a year.
When you are ready, this raspberry freezer jam comes together in about 30 minutes with less sugar than most recipes so the berries stay bright, bold, and tart in the best possible way. My husband Jonathan — going on 15 years now isn’t a big fruit eater but he LOVES finding a stash of this raspberry freezer jam to devour. Of course he has to fight three kids for it now but I make plenty!
What Is Raspberry Freezer Jam?
If you’ve only ever had store-bought jam, there’s something important nobody tells you: the cooking process that makes jam shelf-stable also cooks out a lot of that bright, fresh fruit flavor. Traditional canned jam spends time in a water bath at high heat — great for the pantry shelf, not so great for the taste of the actual berries.
Freezer jam skips all of that. The fruit is never cooked, which means it holds onto that just-picked raspberry flavor — tart, vibrant, and nothing like the overly sweet stuff in a jar at the grocery store. Your freezer does the preservation work instead of a canning pot, and the tradeoff in flavor is genuinely remarkable.
It’s also one of the most forgiving forms of home food preservation. No sterilizing equipment, no worrying about seals, no complicated processing times. If you’ve been curious about making jam but the canning process has felt like too much, raspberry freezer jam is an excellent place to start.
Why You’ll Love This Raspberry Freezer Jam
- Less sugar than traditional recipes — bold, tart berry flavor that actually tastes like raspberries
- No canning required — no water bath, no special equipment, no stress
- Make it now OR freeze the berries and make it months later — completely flexible
- That gorgeous fresh raspberry flavor keeps beautifully in the freezer for up to a year
- Makes 6 cups — plenty to keep and plenty to gift
- Simple enough for beginners, satisfying enough for someone who’s been making jam for years
Ingredients for Raspberry Freezer Jam
Just four ingredients, and three of them are probably already in your kitchen.
Fresh or Frozen Raspberries You’ll start with 6 cups of whole raspberries, which crush down to about 4 cups. Fresh, peak-season berries will give you the most vibrant flavor, but frozen raspberries work beautifully too — which is exactly the point of this recipe. If you’re using frozen, thaw them completely at room temperature and don’t drain the juice. That liquid is part of your measurement. Measure after thawing, not before.
Sugar This recipe uses 3½ cups of sugar — a touch more than the strawberry version, and that’s intentional. Raspberries are naturally more tart than strawberries, and that extra half cup brings everything into balance without burying the berry flavor. Jonathan was very firm on this point during testing and I have learned to trust him on raspberry opinions.
Sure-Jell For Less or No Sugar Needed Pectin The pink box, not the yellow one — and this matters. Sure-Jell makes two versions of their pectin, and they are not interchangeable. The standard yellow box requires significantly more sugar and a different method. The pink box “For Less or No Sugar Needed” is what makes this low-sugar recipe set properly. Look for it near the canning supplies at most grocery stores. If you can only find the yellow box, check a larger store or order online — it’s worth tracking down.
Lemon Juice One tablespoon, and it earns its place. A small amount of lemon juice helps the jam set properly and brightens the raspberry flavor in a way that’s subtle but noticeable. Fresh squeezed is lovely, and bottled works just fine too — just make sure it’s not expired. Old bottled lemon juice has a flat, slightly off flavor that shows up in the finished jam more than you’d expect for one tablespoon. When in doubt, grab a fresh bottle.
How to Make Raspberry Freezer Jam
Read through the full method once before you start — there’s a 24-hour rest at the end that’s easy to forget to plan for.
Step 1: Prep your containers Wash your jars or freezer containers and set them aside. No need to sterilize — just clean and completely dry. This recipe makes about 6 cups, so have enough containers ready.
Step 2: Crush the raspberries Crush the raspberries one layer at a time using a potato masher or fork, leaving some small pieces for texture. You want a mix of crushed fruit and juice — not a smooth puree. Measure out exactly 4 cups of crushed raspberries. Exact measurement is important for a good set, so take a moment to do this properly with a liquid measuring cup rather than eyeballing it.
Step #: Boil the pectin While the berry mixture rests, whisk the pectin and sugar together in a medium saucepan. Then whisk in the water. Bring to a full boil over medium-high heat, stirring constantly. Once it reaches a full boil, stir hard for 1 minute, then remove from heat immediately.
Step 5: Combine and stir Pour the hot pectin mixture into the raspberry bowl. Stir vigorously for 1 minute, making sure everything is fully combined. Scrape the sides and bottom of the bowl with a spatula to make sure nothing is hiding.
Step 6: Fill your containers Ladle the jam into your prepared containers, leaving ½ inch of headspace at the top. The jam expands as it freezes — skip the headspace and you’ll find out the hard way. IYKYK (Ask me about accidently freezing and exploding bottles of Mike’s Hard Lemonade in college!)
Step 7: Rest, then freeze Cover and let stand at room temperature for 24 hours. The jam will look loose when you first fill the jars — that’s completely normal. Give it the full 24 hours to set up before moving anything to the freezer. After resting, refrigerate what you’ll use within a few weeks and freeze the rest.
Freezer Jam Containers — What Works Best
You’ve got more options here than you might think.
Glass mason jars are a classic choice and half-pint (8 oz) jars are the ideal size — easy to use up within a few weeks of opening. Leave that ½ inch of headspace and make sure you’re using jars labeled freezer-safe. One word of warning from personal experience: be thoughtful about where you store glass jars in the freezer. I lost more than a few to a garage freezer where they could fall onto concrete. A shelf where they’re tucked safely in is much kinder to your jam — and your floor. (Some messes should never be seen…)
Plastic freezer containers are a great option if you’d rather not risk glass. Look for containers specifically labeled freezer-safe — standard food storage containers can crack at freezer temperatures. Clear plastic jars in 4 oz or 8 oz sizes are particularly nice for gifting.
Repurposed containers like old peanut butter jars work in a pinch. Make sure they’re thoroughly washed — any residual grease can affect the jam — and understand there’s a small risk of cracking since they weren’t designed for freezer use. But if you’ve got them, they’re perfectly serviceable and I have never had one break except when I dropped them on concrete!
Whatever you use: ½ inch of headspace, every time. I also recommend a canning funnel for loading up the jars without mess. It also helps measure the correct headspace perfectly if you get my favorite one!
Tips for Perfect Raspberry Freezer Jam
Measure exactly. The ratio of fruit to sugar to pectin is what makes this set. Too much fruit, not enough sugar, or an imprecise measurement of either can leave you with a loose jam. Use proper measuring cups and level them off.
Don’t drain your frozen raspberries. If you’re using berries you froze yourself, thaw them completely and use all that juice. It’s part of the measurement and part of the flavor.
Don’t skip the 24-hour rest. The jam looks and acts like liquid when it goes into the jars. That’s normal. It needs time at room temperature to fully set — put it straight in the freezer and you’ll interrupt that process.
Use the pink box pectin. This cannot be said enough. The yellow Sure-Jell and the pink Sure-Jell are different products. The pink box is what makes low-sugar freezer jam work.
Check your lemon juice. Bottled is fine, fresh is lovely, but old or expired bottled lemon juice is neither. It’s one tablespoon and it matters — grab a fresh bottle if yours has been sitting in the fridge for a while.
Frequently Asked Questions
How long does raspberry freezer jam last? Up to a year in the freezer. Once opened and moved to the refrigerator, plan to use it within 3 to 4 weeks. In our house it rarely survives that long.
Can I use frozen raspberries? Absolutely — and this is one of the best things about this recipe. Freeze your berries when you have them, make the jam when you’re ready. Thaw completely, don’t drain the juice, and measure after thawing.
Can I use regular Sure-Jell instead of the For Less Sugar version? Not in this recipe. The standard yellow box requires a different method and significantly more sugar. For this low-sugar version you need the pink box specifically.
Why didn’t my jam set? Almost always a measurement issue — too much fruit or not enough sugar. If your jam is too loose after the 24-hour rest, pour it back into a bowl, boil a fresh package of pectin in 1 cup of water, stir it in, re-jar, and let it rest again. It will still taste wonderful. Loose raspberry jam is also a spectacular ice cream topping, so nothing is ever truly lost.
Can I reduce the sugar even more? The recipe is already on the lower end of what works with this pectin. Going much lower risks a poor set. If you want to go sugar-free, the pink box instructions include a no-sugar method — follow those rather than this recipe.
Can I double the batch? Make two single batches back to back rather than doubling. Larger quantities affect how evenly the pectin distributes and how well the jam sets.
Is freezer jam safe without canning? Yes — completely. Freezer jam is preserved by cold rather than by heat processing. Keep it frozen until you’re ready to use it, then refrigerate and use within a few weeks. It’s safe, simple, and one of the most beginner-friendly ways to preserve fruit at home.
Ways to Use Raspberry Freezer Jam
Toast is never wrong. But raspberries are particularly wonderful in a few other places:
- Swirled into plain yogurt or vanilla ice cream (I buy the Fage 5% yogurt for a high protein option and then sweeten it up with homemade jam) and top with my homemade granola!
- Spooned over cheesecake or pound cake
- Stirred into lemonade on a gray January day when you need a reminder that summer exists
- On a buttered biscuit
- As a filling for Chantilly Cake!
- In a PB&J that will make you wonder why you ever bought store-bought jam (make it with my soft and sliceable sourdough sandwich bread…)
- Lathered on my amazing buttermilk waffles or spooned over my famous pancakes!
- Straight off the spoon — I totally don’t stand at the fridge and do this!
More Jam and Preserving Recipes
- Easy Strawberry Freezer Jam
- Quick and Easy Blackberry Freezer Jam
- Beginner Peach Jam – An Easy Intro to Water Bath Canning
- Nectarine Freezer Jam
Easy Low Sugar Raspberry Freezer Jam
Ingredients
- 6 cups raspberries fresh or frozen
- 1 Tablespoon lemon juice fresh or bottled
- 1 box Sure-Jell For Less or No Sugar Needed Fruit Pectin (pink box, 1.75 oz)
- 3 1/2 cups granulated sugar
- 1 cup water
Instructions
- Wash your jars or freezer containers and set aside. This recipe makes about 6 cups. Have enough containers ready.
- Crush raspberries one layer at a time with a potato masher or fork, leaving some texture. Measure out exactly 4 cups of crushed raspberries into a large bowl. Stir the lemon juice into the fruit.
- Whisk the pectin and sugar together in a medium saucepan. Whisk in 1 cup of water until combined. Bring to a full boil over medium-high heat, stirring constantly. Boil hard for 1 minute, then remove from heat.
- Pour the hot pectin mixture into the raspberry bowl. Stir vigorously for 1 minute until fully combined, scraping sides and bottom of the bowl.
- Ladle into prepared containers, leaving ½ inch of headspace at the top of each.
- Cover and let stand at room temperature for 24 hours to set.
- Refrigerate for up to 3–4 weeks, or freeze for up to 1 year. Thaw overnight in the refrigerator before using.
Helpful Recipe Notes
Your Rating Matters
When you leave a comment or star rating, it means more than you might think. It helps me understand what you’re enjoying, builds trust for other readers, and supports real, tested cooking content. If you have a moment, I’d truly appreciate you sharing your experience. - Mirlandra
Nutrition Estimate
A Note on Nutrition
Nutritional info is an imperfect estimate. Please take it with a grain of salt.
Leave a Reply